
HMM Gojulas

I actually built this kit in December 2014, but a cursory Google search would seem to indicate that there isn’t all that much information about it out there. I guess not too many people built this guy, which isn’t surprising – it’s a massive undertaking and even when it was new, the kit was prohibitively expensive. I think just putting it together and doing some detailing ended up taking me about 3 weeks – imagine what it’s like actually painting the whole kit.
I originally took these pictures to post them on the now-defunct Zoidspoison forum, and I lost the accompanying text when that forum disappeared. So I’ll have to reconstruct the build from memory, but this was quite the experience and I remember it well. So let’s take a look-see.
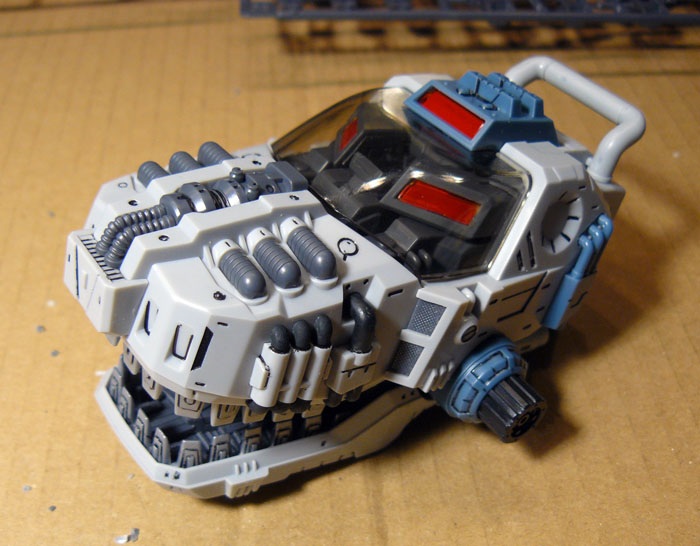
You start with the head. The pipes on the side here are darker than the ones on top because I had to paint them to match the rest of the detail, and somehow I was happy enough with this flat black. Tamiya’s dark grey would’ve probably matched perfectly, but this was two years ago, and back then I tended to just use whatever I happened to have lying around. Also, the eyes and that light on top of the canopy are actually orange, but painting them red on the inside makes them appear red, and I wanted to nudge this one a bit towards Zoidzilla, or the OJR Gojulas if you prefer.


The head is followed by the neck and shoulders. I was getting a bit more comfortable with the detailing at this point and decided to add more black pipes. Also, all of the gold pieces are spray painted. If you’re familiar with Kotobukiya’s HMM kits, you probably know the butt-ugly “gold” plastic they use everywhere, and this one’s no exception. I was finally fed up with that here, partly because the kit was going to take forever to assemble anyway, and decided to fix it. The end result was a great improvement for very little effort, and I’m definitely doing this on all my HMMs from now on. I just wish I’d also taken the time to clearcoat them and done a better job touching up the nub marks after I spray painted them on the sprues. More on this later.
In a classic example of Kotobukiya engineering weirdness, you build this backpack type thing next.


Up next is this section of the torso that houses the Zoid core. Those bars across the grills are molded into the dark grey pieces and needed to be painted. Unlike with the pipes on the head, I decided the paint here had to match the plastic and went through numerous attempts of mixing light grey into white to get the exact same color. Ultimately I got so close that you really can’t see the difference anymore, and I also ended up using that color for the white stripes on the guns you see here and on most of the other guns on the kit. Also, some added gold detail on the back that ended up not being visible, but the gold and that pale blue tone looked really good together, so I wanted to have the color combo in more places.


The hip section completes the torso. There’s another clear orange piece here that needed to be painted red, and I think this is the first example of one of those coil spring pistons where I painted the inside black to make them look more convincing. This turned out to be less difficult to pull off than I thought, so I ended up doing it all over the kit. Like spray painting the gold parts, this turned out to be a big improvement for relatively little effort.


And then we get to the tail. So, so many segments. It’s all worth it in the end, needless to say, but the hours and hours of repetitive work here… it’s not fun. More brushed-on gold and off-white detail here, and a look at the terrible job I did with the gold pistons on the underside of the tail. I meant to go back and touch this up, but I never did get around to it.


I also took some pictures of how the main gun in the tip of the tail tucks away. This is kind of a weird detail to me even though it looks cool – why would the smallest weapon on the entire Zoid be hidden? I wonder if the Japanese text in the instructions explains the fiction behind this. Oh well.
Next are the arms AKA where I realized that painting all the clear orange pieces red was a problem. The red one you see here is actually molded in red, so painting the orange one would’ve ruined the effect of the color separation, and it needed to be left the way it was. Although I still think this looks a bit weird, like Gojulas has brake lights on his arms or something.


I’m not a real big fan of the arms on this kit. The pictures here demonstrate this complicated mechanism that folds out of the inside of the elbow and is, I guess, supposed to help with poseability, but it doesn’t really add much. Typical bad Kotobukiya engineering, I’m afraid, but at least this doesn’t fall off like those stupid shoulder armor plates on the Saber Tiger. The arms are also clearly too long. I actually applaud Kotobukiya for sticking with Godzilla proportions here instead of designing the kit closer to an anatomically correct T-Rex, but why they’d make the arms longer than on the original I’ll never understand.


The final part of the build that I documented is the feet and the legs. For some reason I didn’t take pictures of the backpack assembly. The feet are satisfingly comlex and absolutely massive, and I love how they stuck with the skeletal appearance of the legs despite changing the upper thighs considerably, probably to make them more sturdy because they do have to hold up a kit that makes everything else look puny by comparison. The one annoying aspect here is that those dark sections on the front that look like an inside layer of armor showing through actually needed to be painted. From what I remember, this wasn’t difficult to do, just kind of annoying.
Anyway, on to the pictures of the completed build.
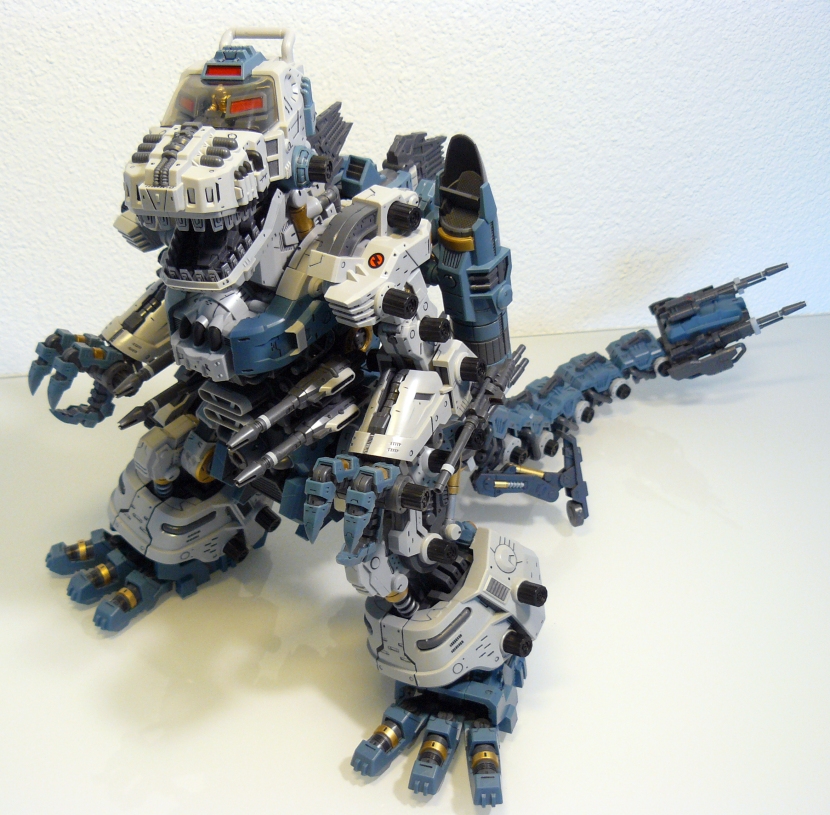
Just getting this whole thing into one picture was a problem because it’s so massive.
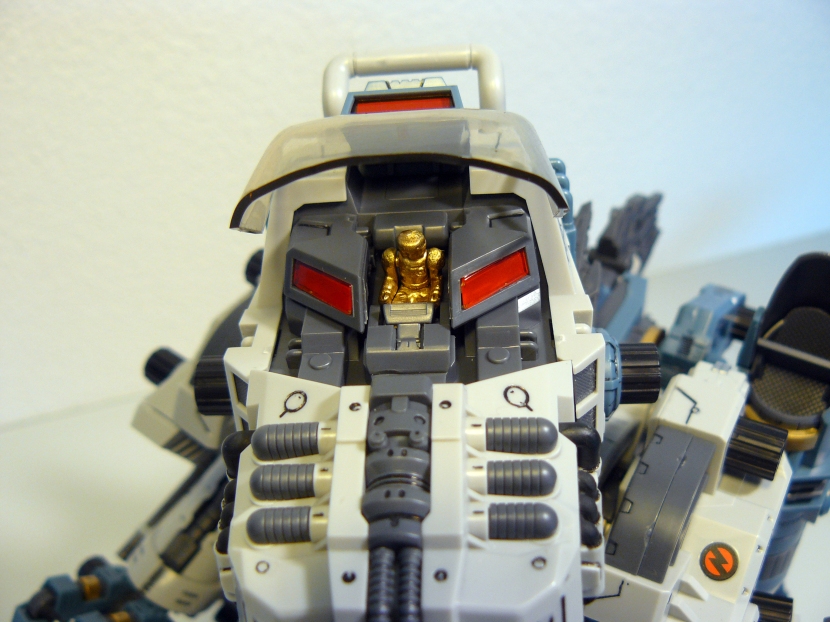
I had to spray paint the pilot gold like an OER pilot – since it’s a very visible aspect of the design, it was kind of a no-brainer to me that this needed to be done. I don’t know why I’m yakkin’ about this, but for all the detailing I did on this kit, this is probably still my favorite idea that I had.
Here’s a shot that captures the massive size really well. Although looking at it now, it also kind of captures the problem of the arms being too damn big.
To give you an idea of just how big this kit is, here are two comparison shots. First with the original, and then the entire Gojulas family, including the HMM and OER versions of Godos, i.e. Trooperzoid. As you can see, the HMM Gojulas is about the size of King G.


And yes, that is of course an OJR King G and not the RCZ reissue, thank you for asking.
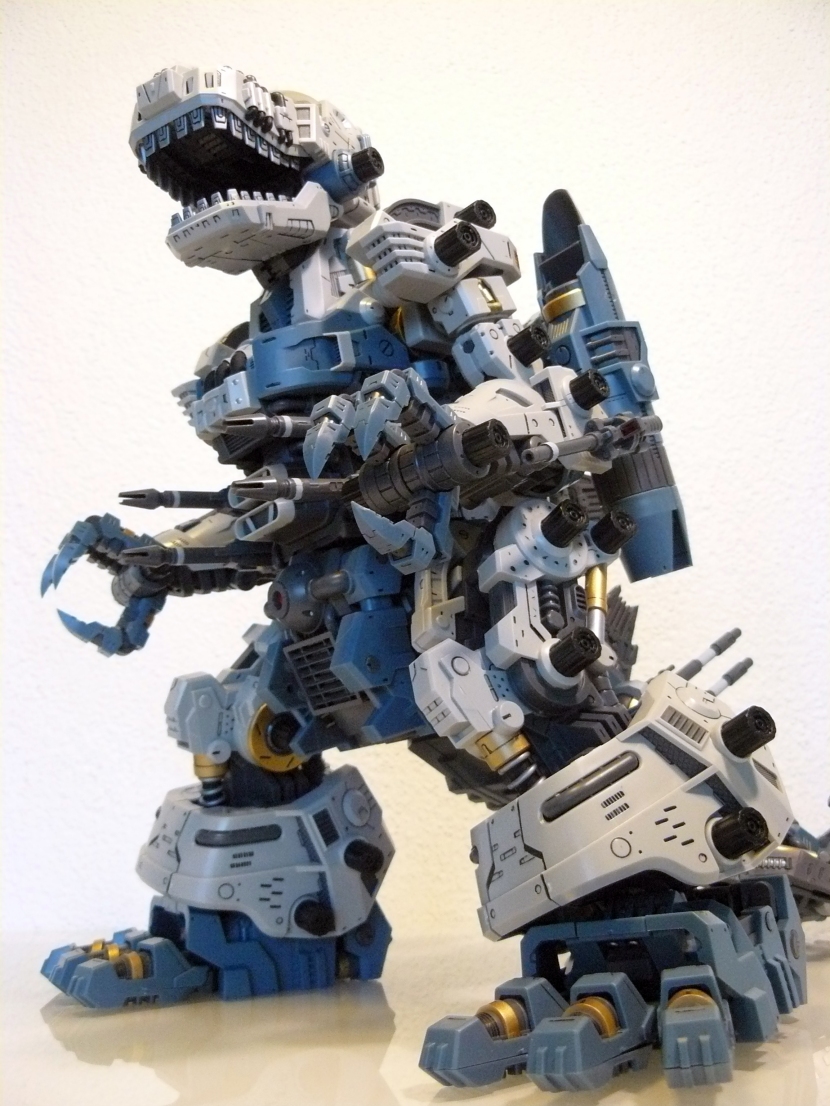
One of my favorite aspects of this kit is that the head moves backwards enough to allow you to do this howling at the moon pose. It just looks so damn cool.


The “transformation” into this T-Rex mode or whatever you want to call it doesn’t work for me, though. It’s nice that they included this and it amuses the nerdier part of me because I’ve always thought it was funny how Gojulas went from supposedly being a “Tyrannosaurus Type” in the 80s when paleontologists still thought the tyrannosaurus rex walked upright to sort of a fantasy creature (besides, he’s obviously really Godzilla and not a dinosaur) when the science on that changed. But it just doesn’t look good.


And finally, here are some closeups because I like doing closeup shots of nice detail.


In closing, if you like Zoids and you like big, complex model kits, I urge you to try and track one of these down. They didn’t make too many of them, but they’re still on Amazon and eBay and there’s also an Ogre version now that looks positively amazing. Be prepared to pay a fortune and clear a lot of shelf space, but you do get a lot of bang for your buck here – as I said at the beginning of this review, I spent about three weeks building this kit with just the relatively minimal detailing shown here, and if you decide to do a more complete paintjob, you can probably have fun with this thing for two months. And it really is some of the most fun I’ve ever had with a model kit. Aside from the weird arm construction, the engineering is rock-solid and there are no fiddly or annoying sections, it’s just fun all the way through and the end result looks fantastic.
I’m still somewhat in awe of the insanity on display here. The Zoids line is relatively obscure, and you’d have to think the R&D resources that went into this kit were at least the same as for your average PG Gundam, with potential sales figures nowhere near what those probably sell. Yet someone at Kotobukiya clearly decided this needed to be done and greenlit it, and I hope to one day meet this great human being and thank them for being such a magnificent bastard. Whatever the Japanese for “magnificent bastard” is.

Just what I was looking for thank you!!
LikeLike
Glad to hear it. One day I’ll build the Ogre and do a full repaint. One day.
LikeLike