
RG Sinanju
A few weeks ago I built the RG Sinanju, my first Real Grade kit. While I like it quite a bit, I can’t see myself really getting into the RG line. I just wanted something quick and simple after the momentous undertaking that was the PG Unicorn, and this kit was kind of an obvious choice. Like everyone else it seems, I’m a big fan of all the suit designs in the Unicorn storyline, and I was already planning to build the MG version of the Sinanju (which as of this writing I’ve actually completed, btw), so a quicker version of that suit that looks good just out of the box made sense.
If you’re like me and you’ve never built an RG kit before, the line is basically Bandai’s attempt to bring an MG level of detail and complexity to 1/144 scale models. Here’s a shot of all of the sprues laid out before I started, to give you an idea of what that means.
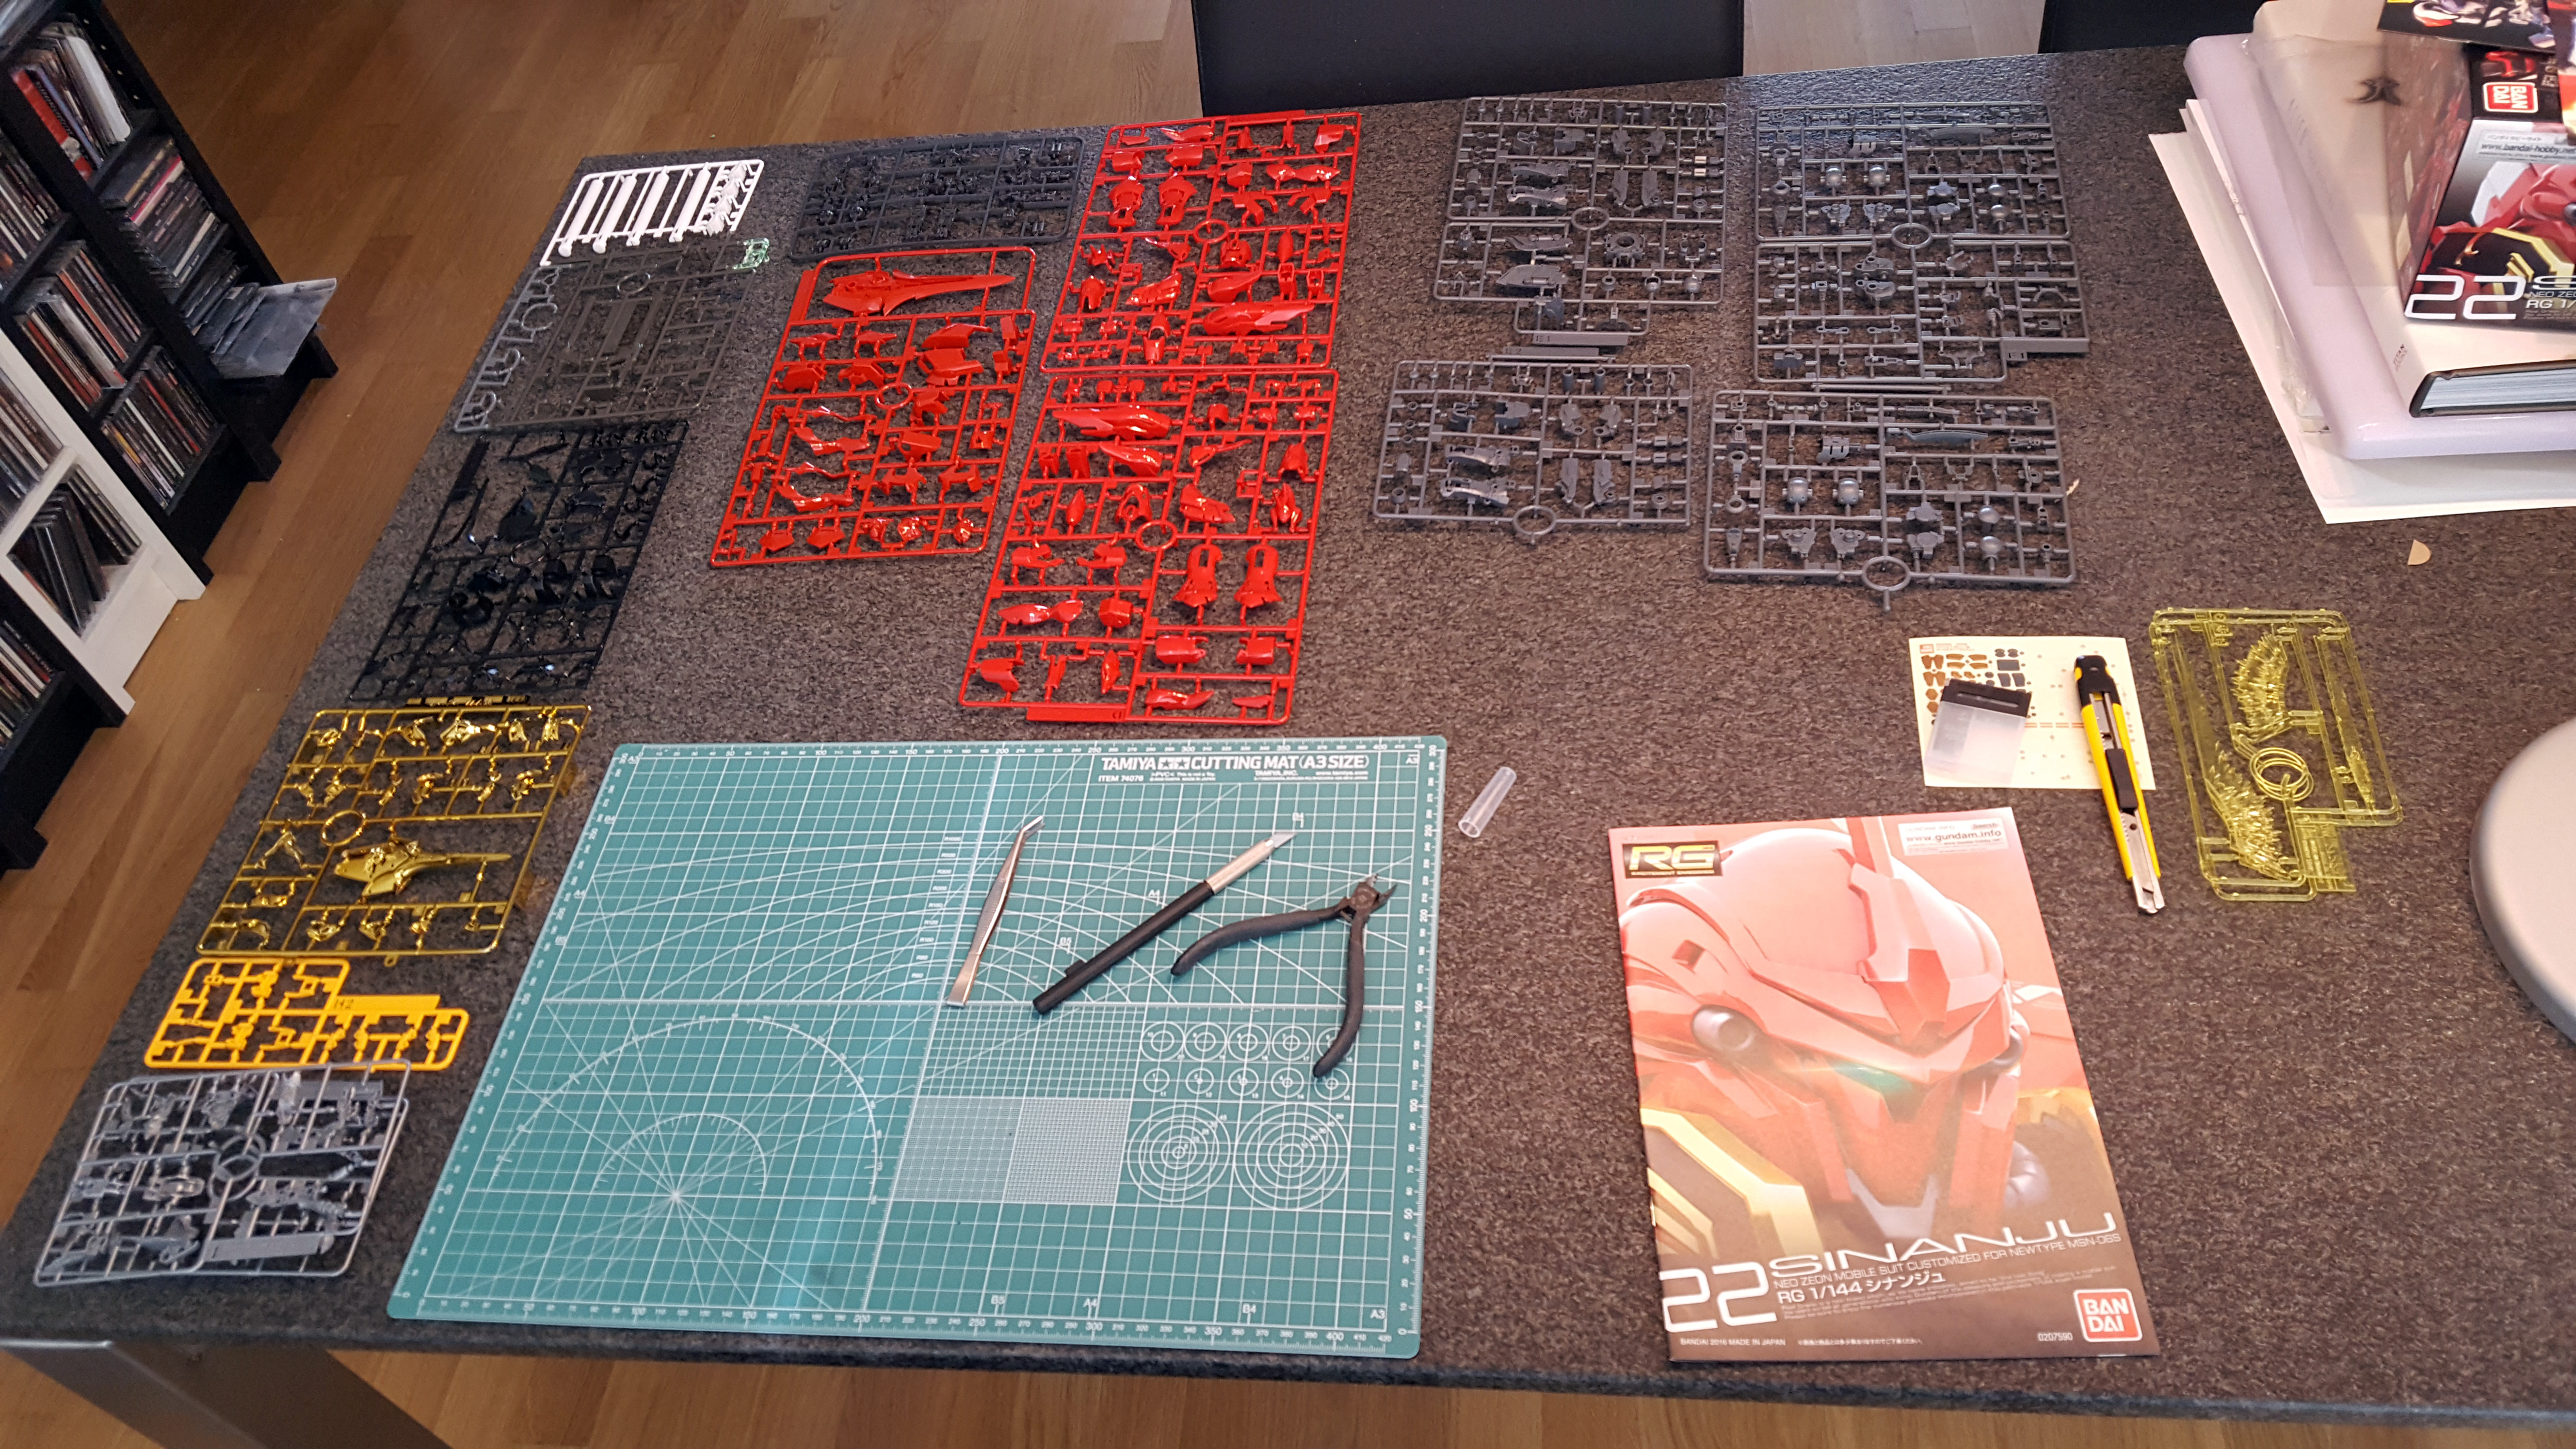
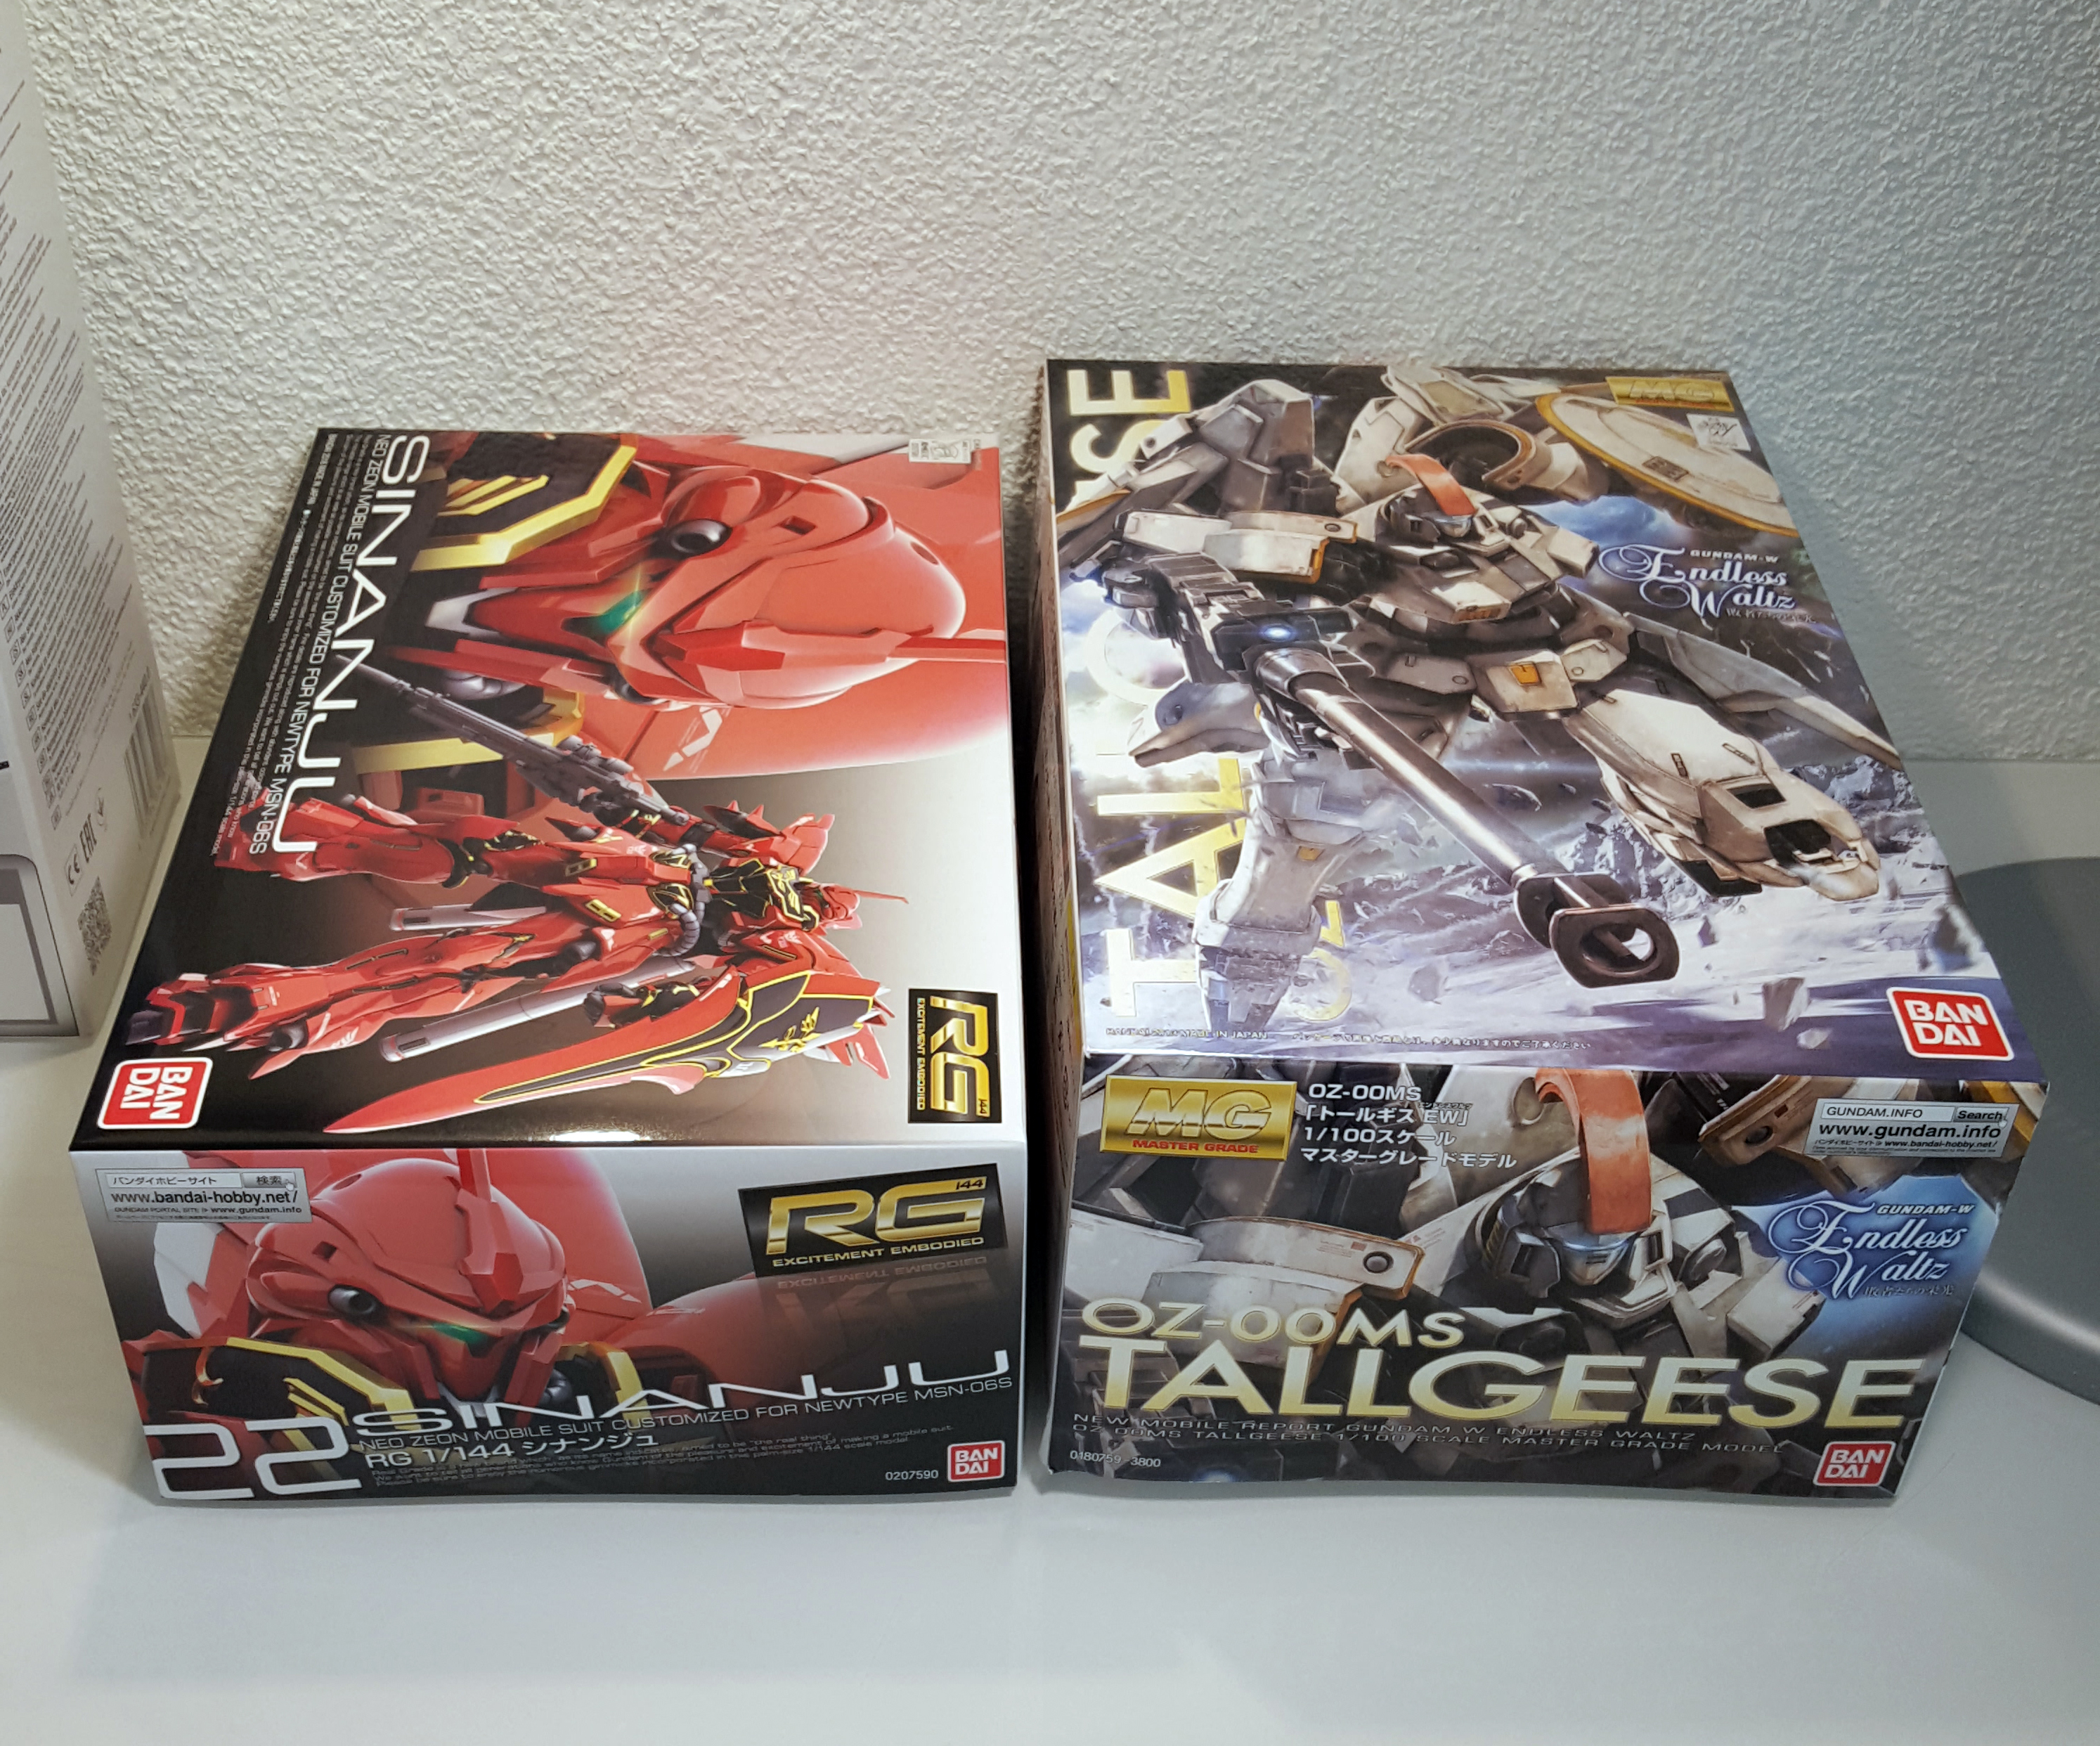
Yeah, you’d pretty much think I was building an MG if it wasn’t for the conspicuously small size of all those sprues. There are over 350 parts on this kit, and I’m not frickin’ kiddin’. The box is almost the same size as the box of the MG Tallgeese. Granted, that’s a small MG box, but again, keep in mind that this is for a 1/144 scale model.
Also for the benefit of my fellow RG noobs, here’s a shot of the B sprue. Instead of polycaps, the RG kits have these parts that combine to form the inner frame of the suit. As you can more or less see, the entire limbs are on these sprues, joints and all. You may have seen what I assume is the same plastic casting technology in action with the more recent PG and MG hands that come pre-molded – here it’s the entire inner frame.
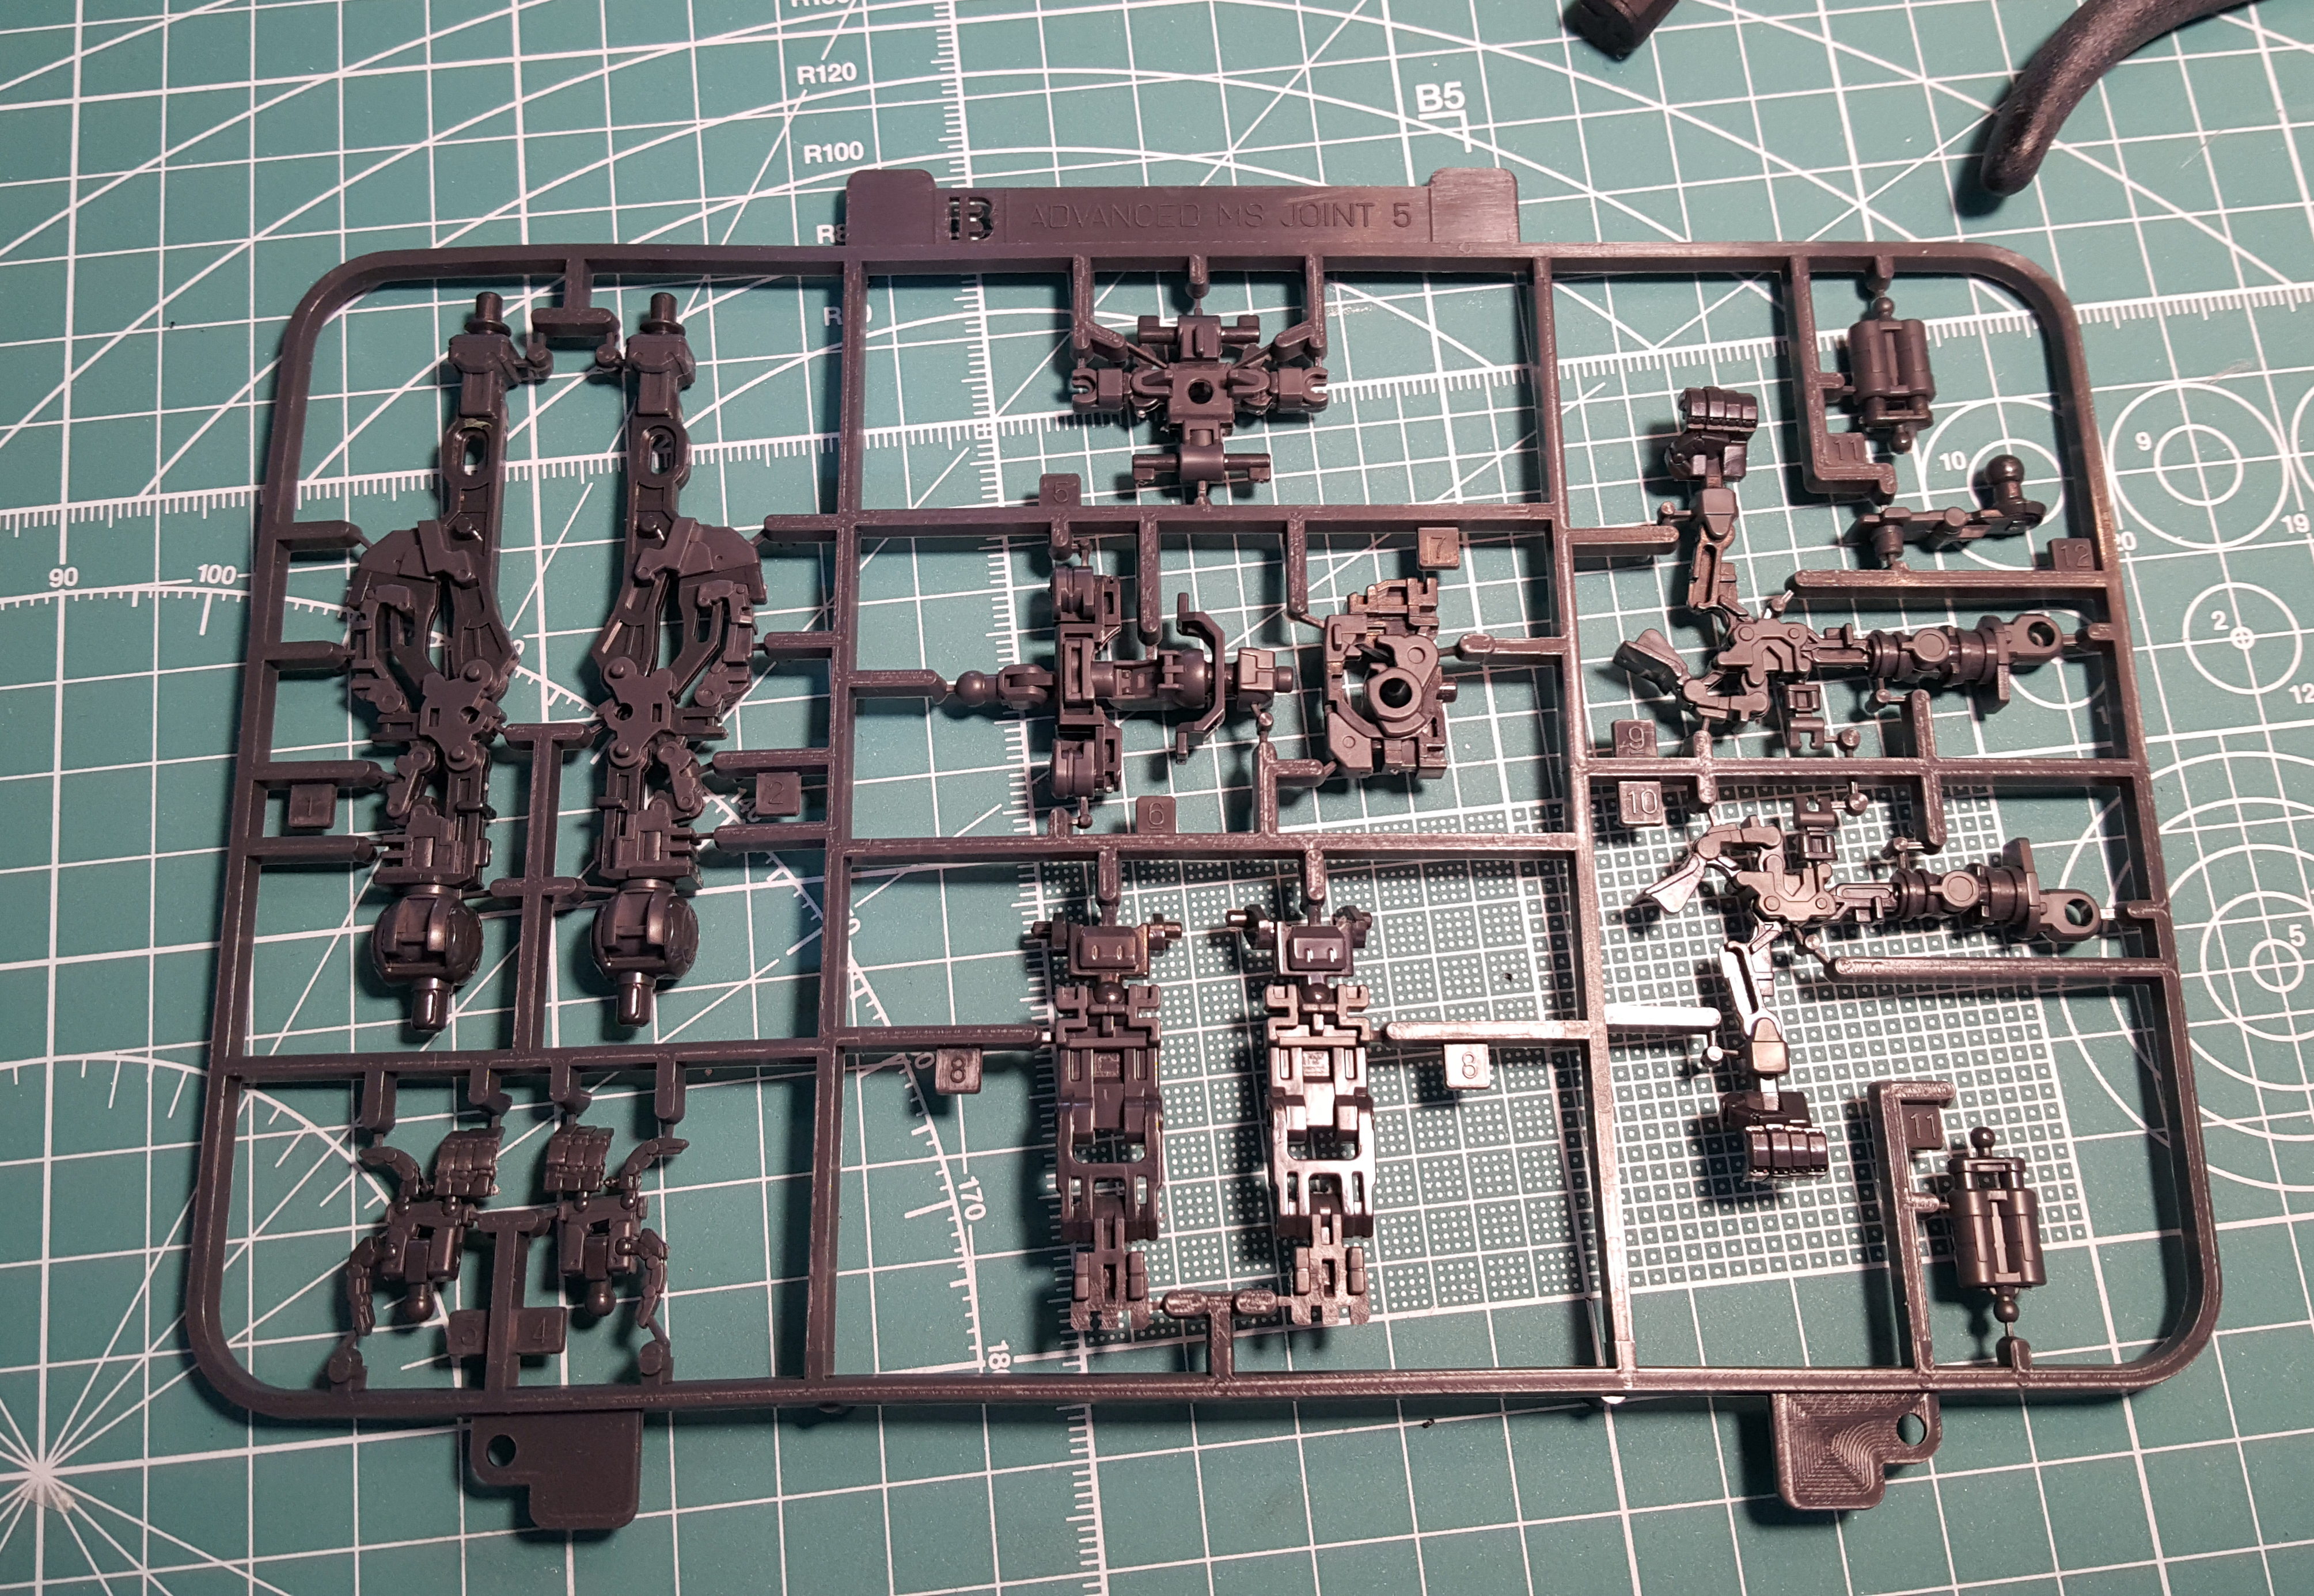
From a technological standpoint, it’s impressive, but I’m not sure how I feel about this. Since the build is still more than satisfyingly complex, it doesn’t exactly seem fair or reasonable to compare this to, say, the Murasame Liger in the Zoids line, but it does bring back unpleasant memories of that kit, and I hope the completely pre-built inner frames stay confined to the HiRM line.
Anyway, on to the build pics. You pretty much build the Sinanju from the bottom up, starting with the feet.
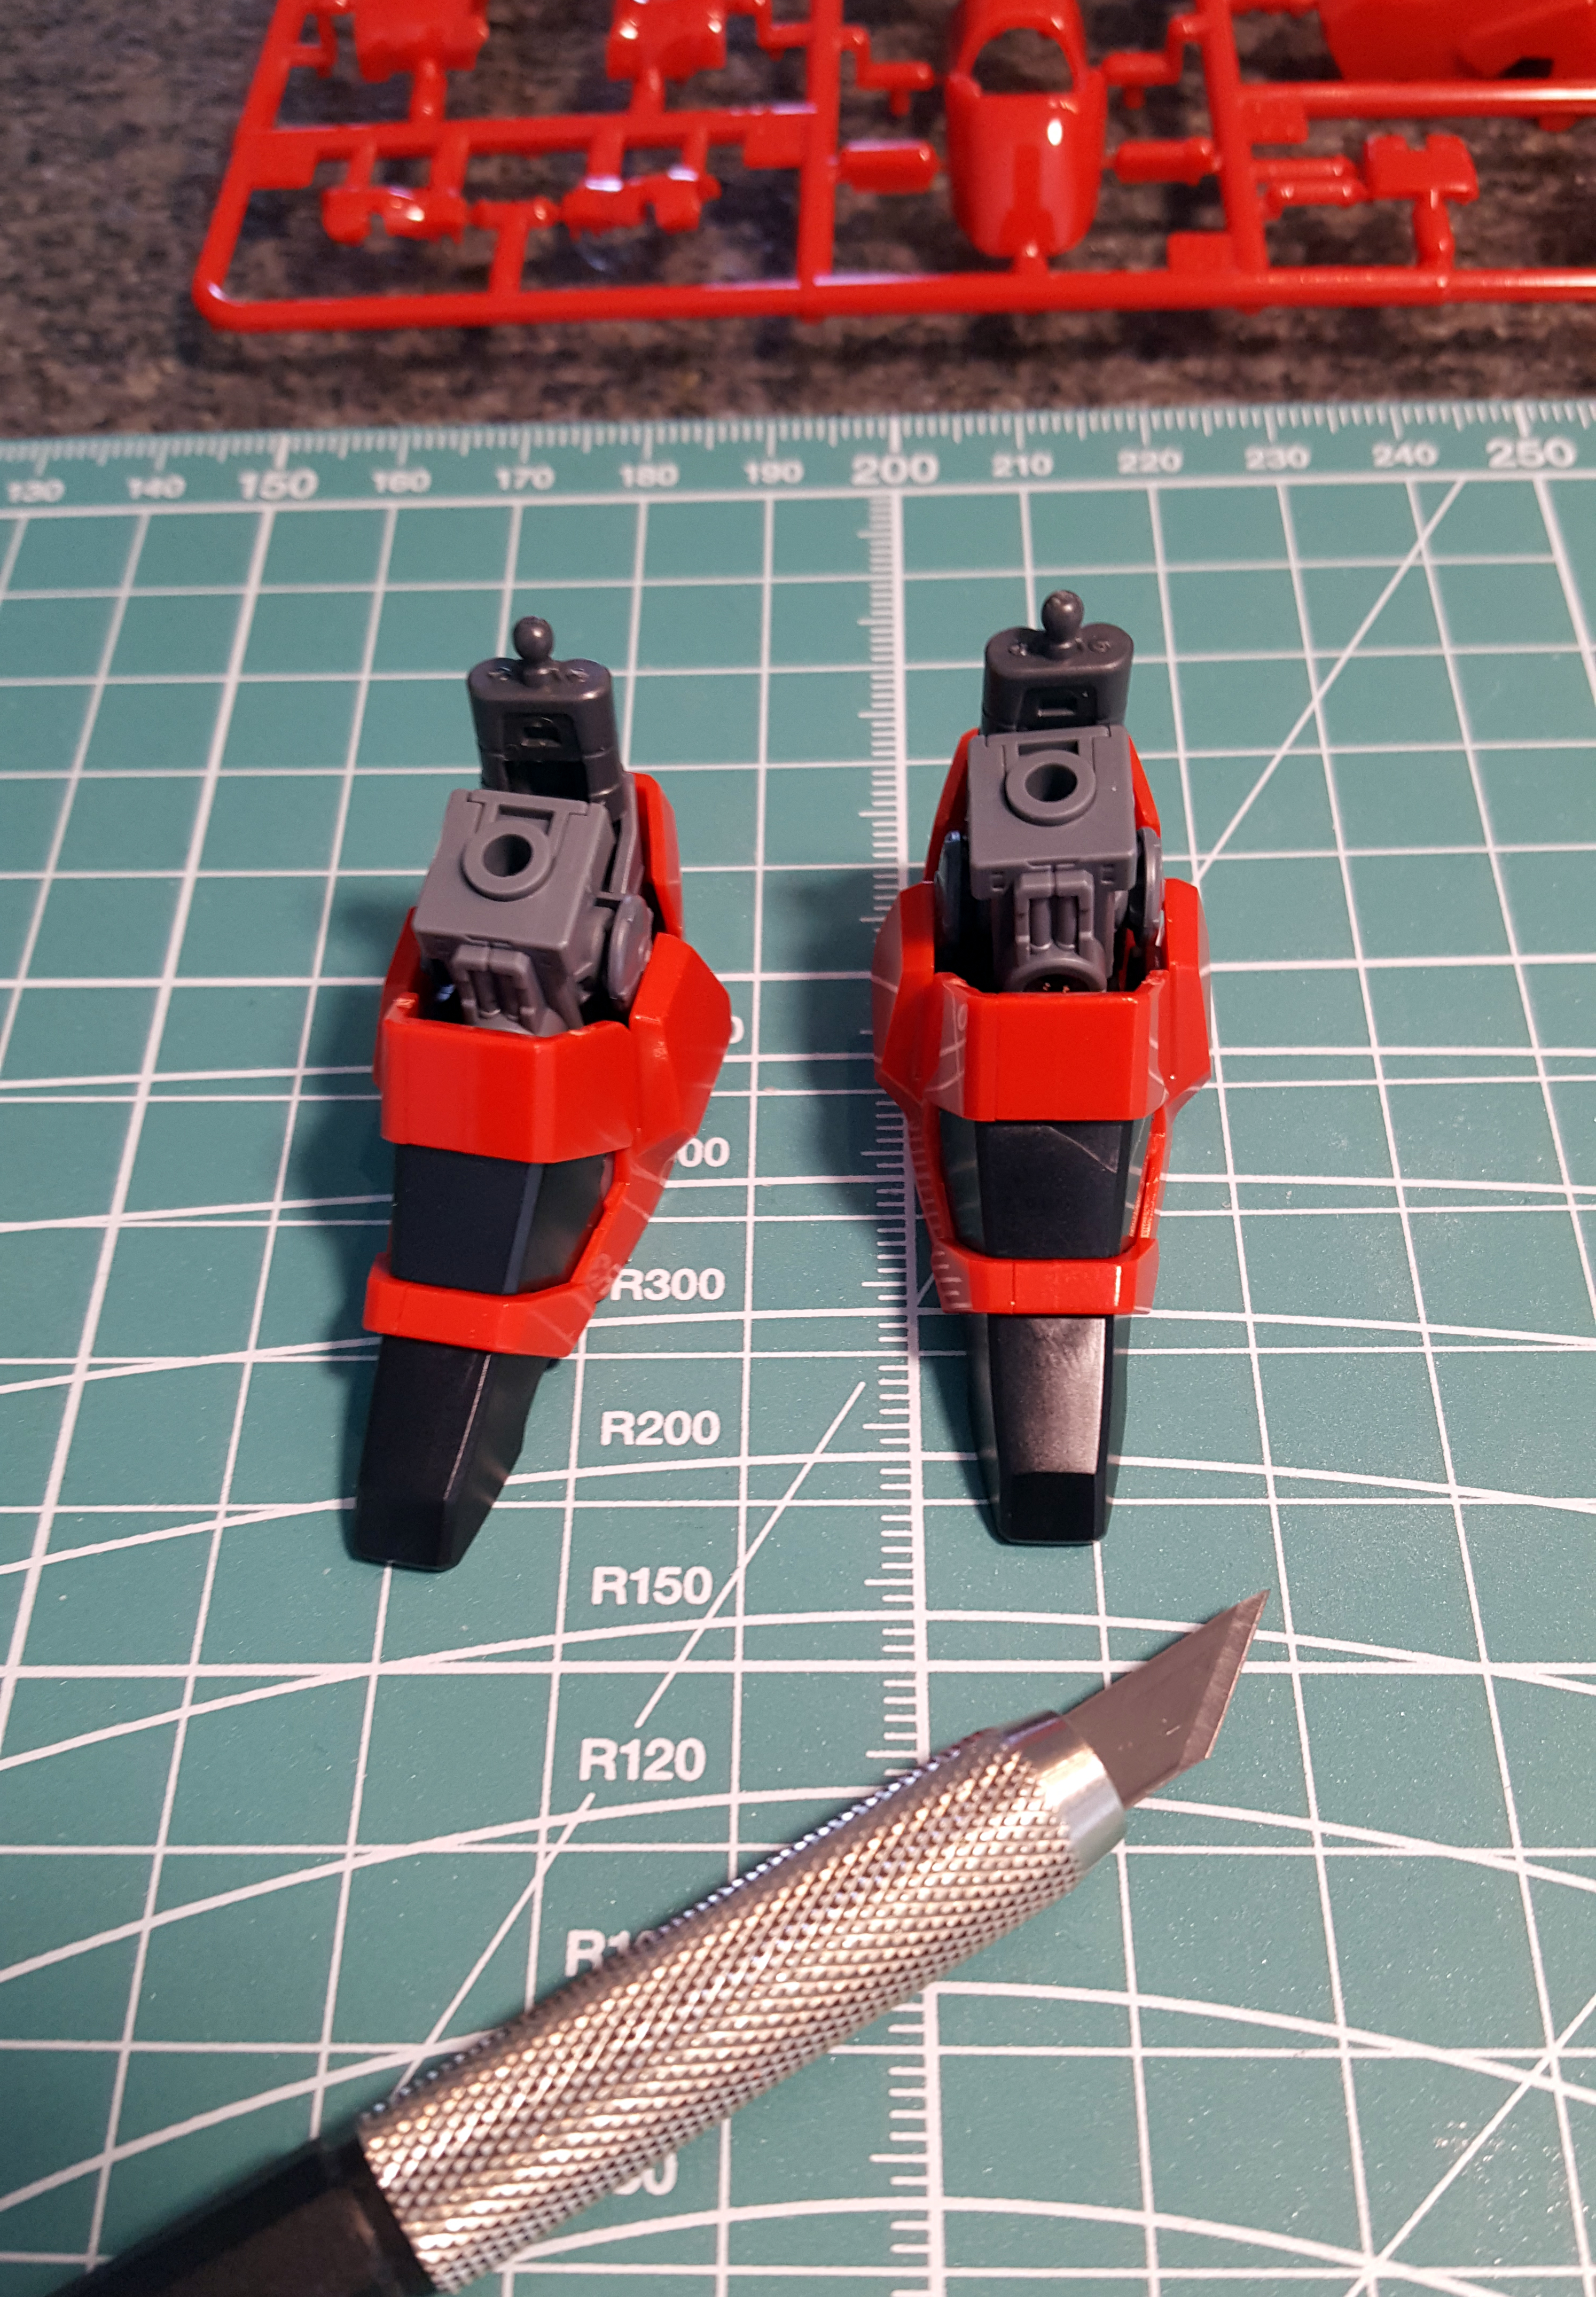 These are about as complex and articulated as on your average MG kit, but tiny. I left the knife in the picture for scale. Up next are the legs, and this is where you run into your first problem with this kit.
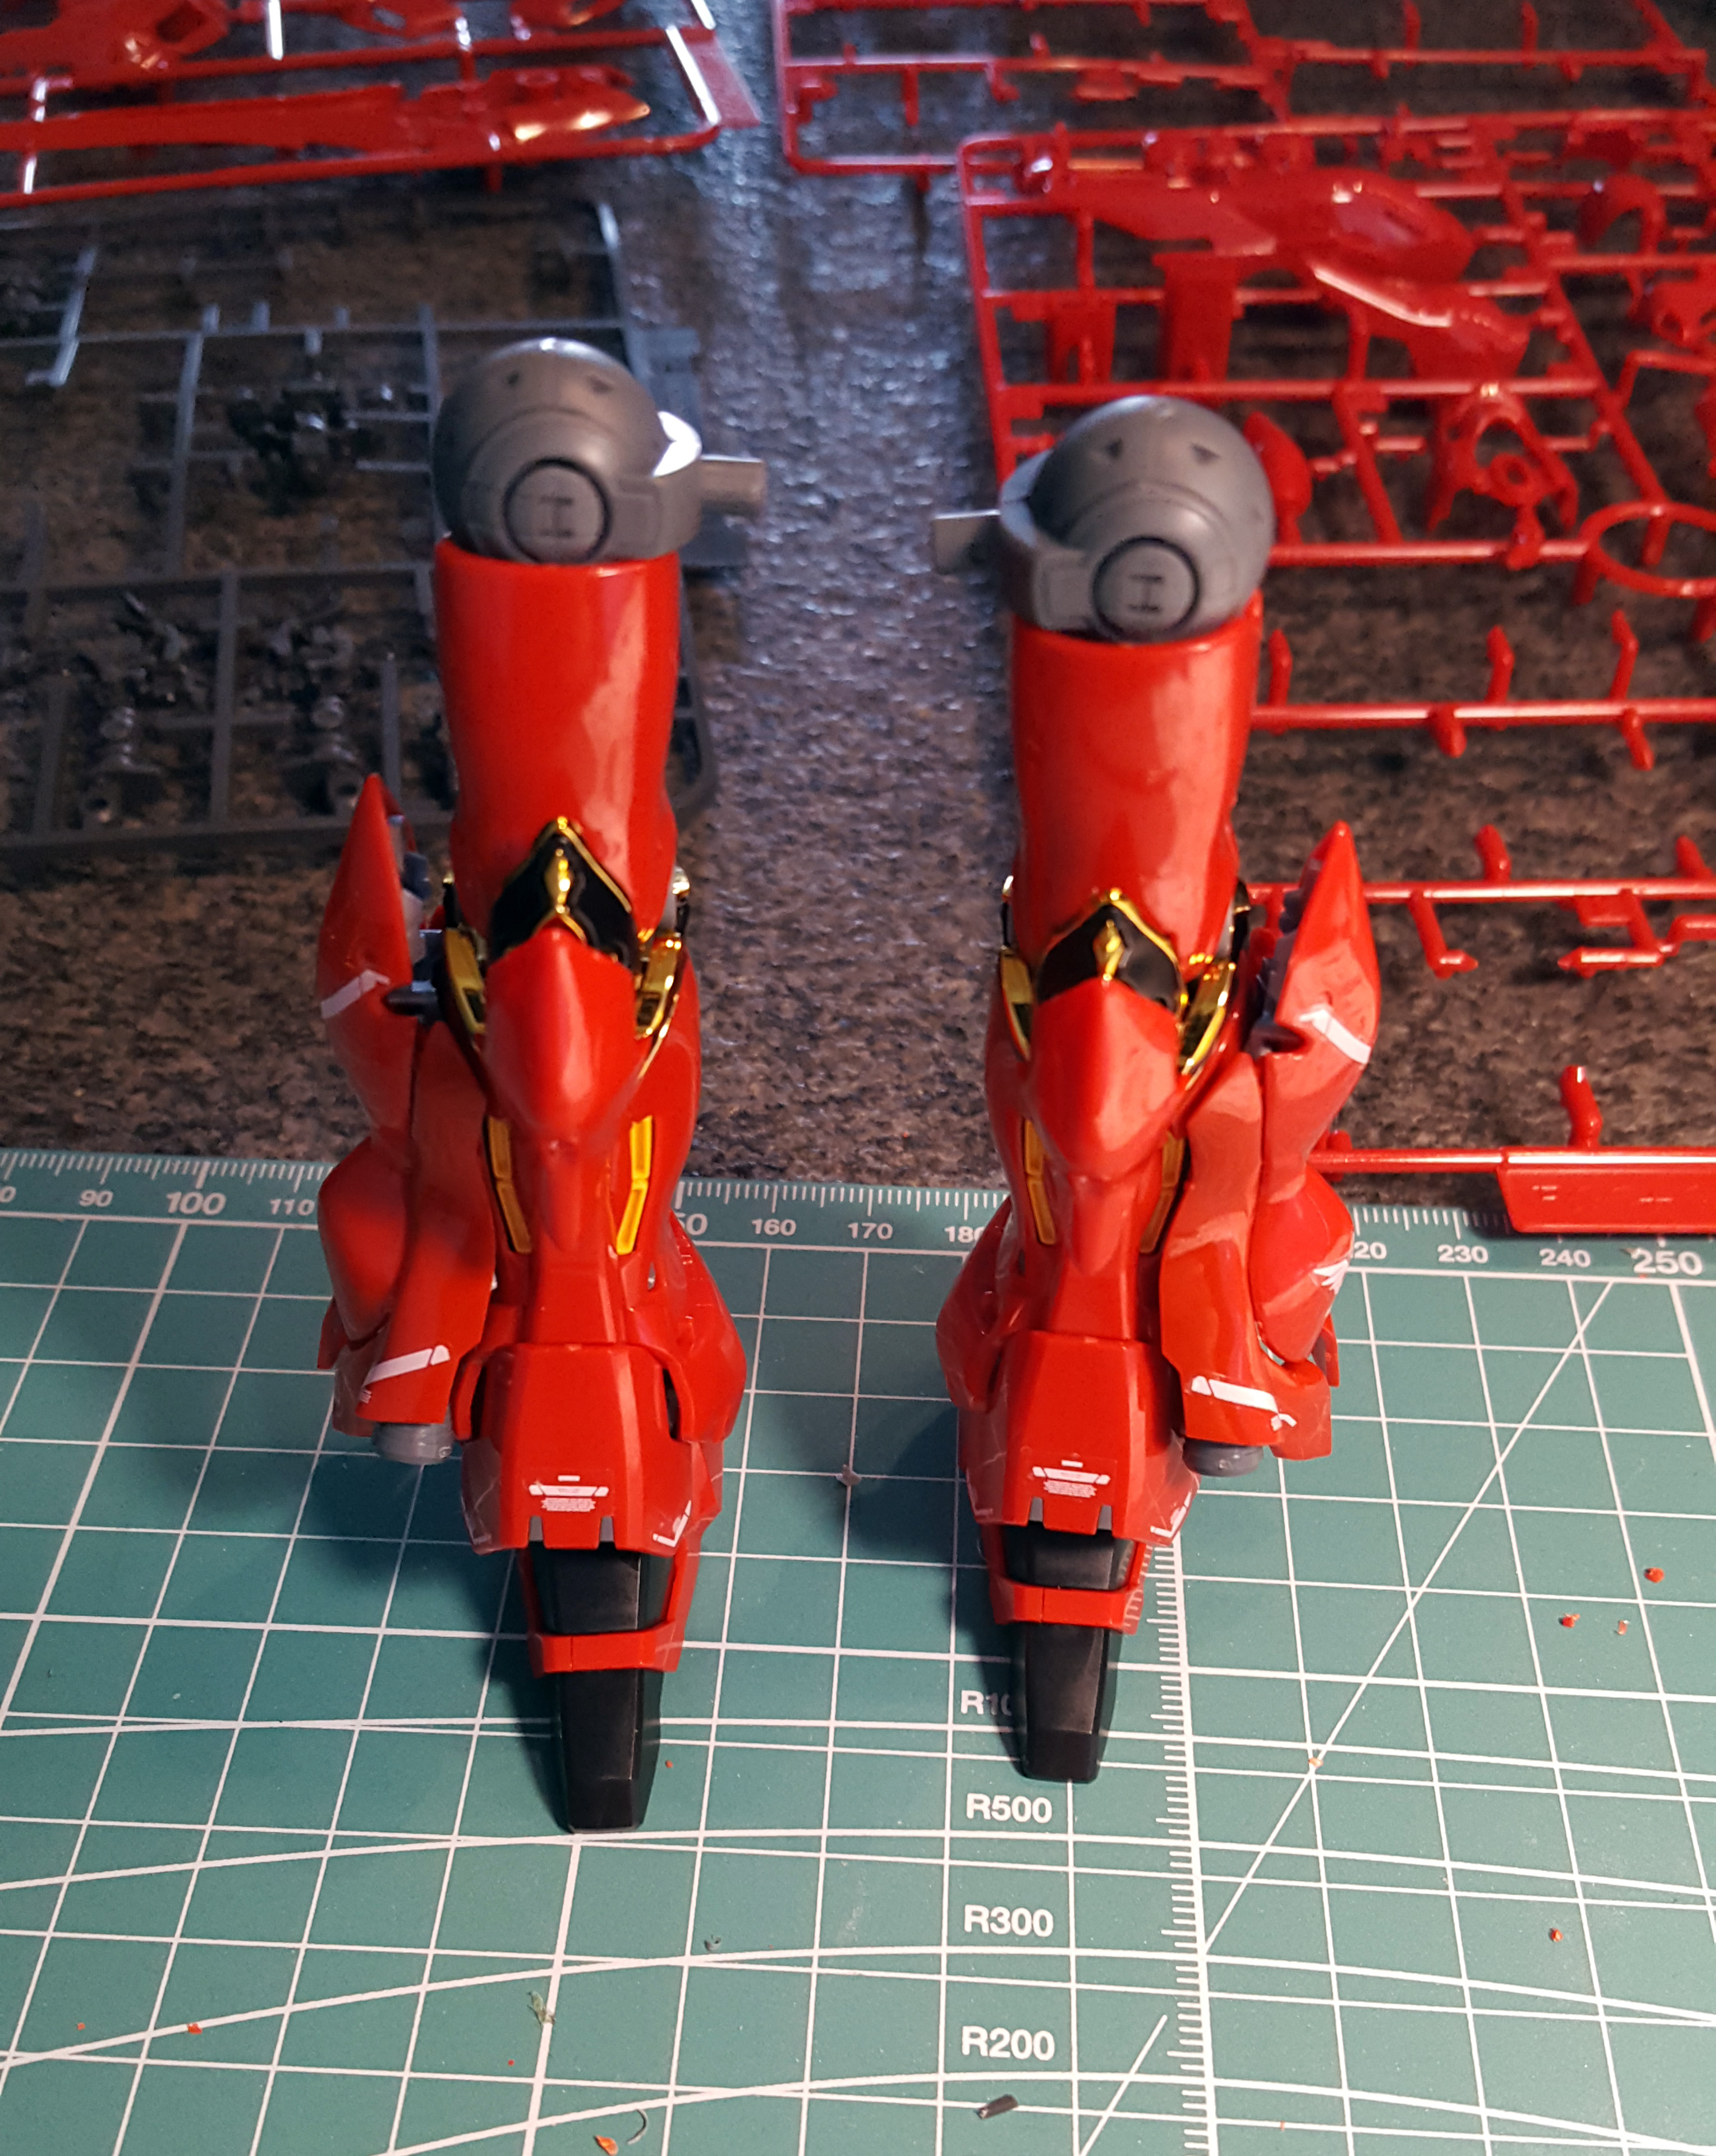
The legs are often the best constructed part of Gunpla kits, at least in my somewhat limited experience, and the RG Sinanju is no exception. The knees bend back very far, the booster pods on the sides open and extend, and, well, they look good, don’t they. But those damned kneepads just will not stay in place, and it’s difficult to tell how dangerous it is to glue them – so far I’ve decided not to because I’m worried I’ll get glue in the joint or that it’ll damage the material of the inner frame. It just seems like there’s not much you can do.
Note also that I decided to decal this kit as I went. I don’t usually do this because I like to see things put together before I decide what decals to put on them, but I’ve kind of come to go the everything route with Gunpla lately, and I really didn’t want to have to take this one apart again at the end.
After the leg comes the hip section with the skirts. No trouble at all here, this part’s rock solid, though those hoses on the front skirts severely limit poseability. They press the skirts down, making it more or less impossible to lift the legs up forward.

You build the arms next because you can’t complete the upper torso without attaching them first.
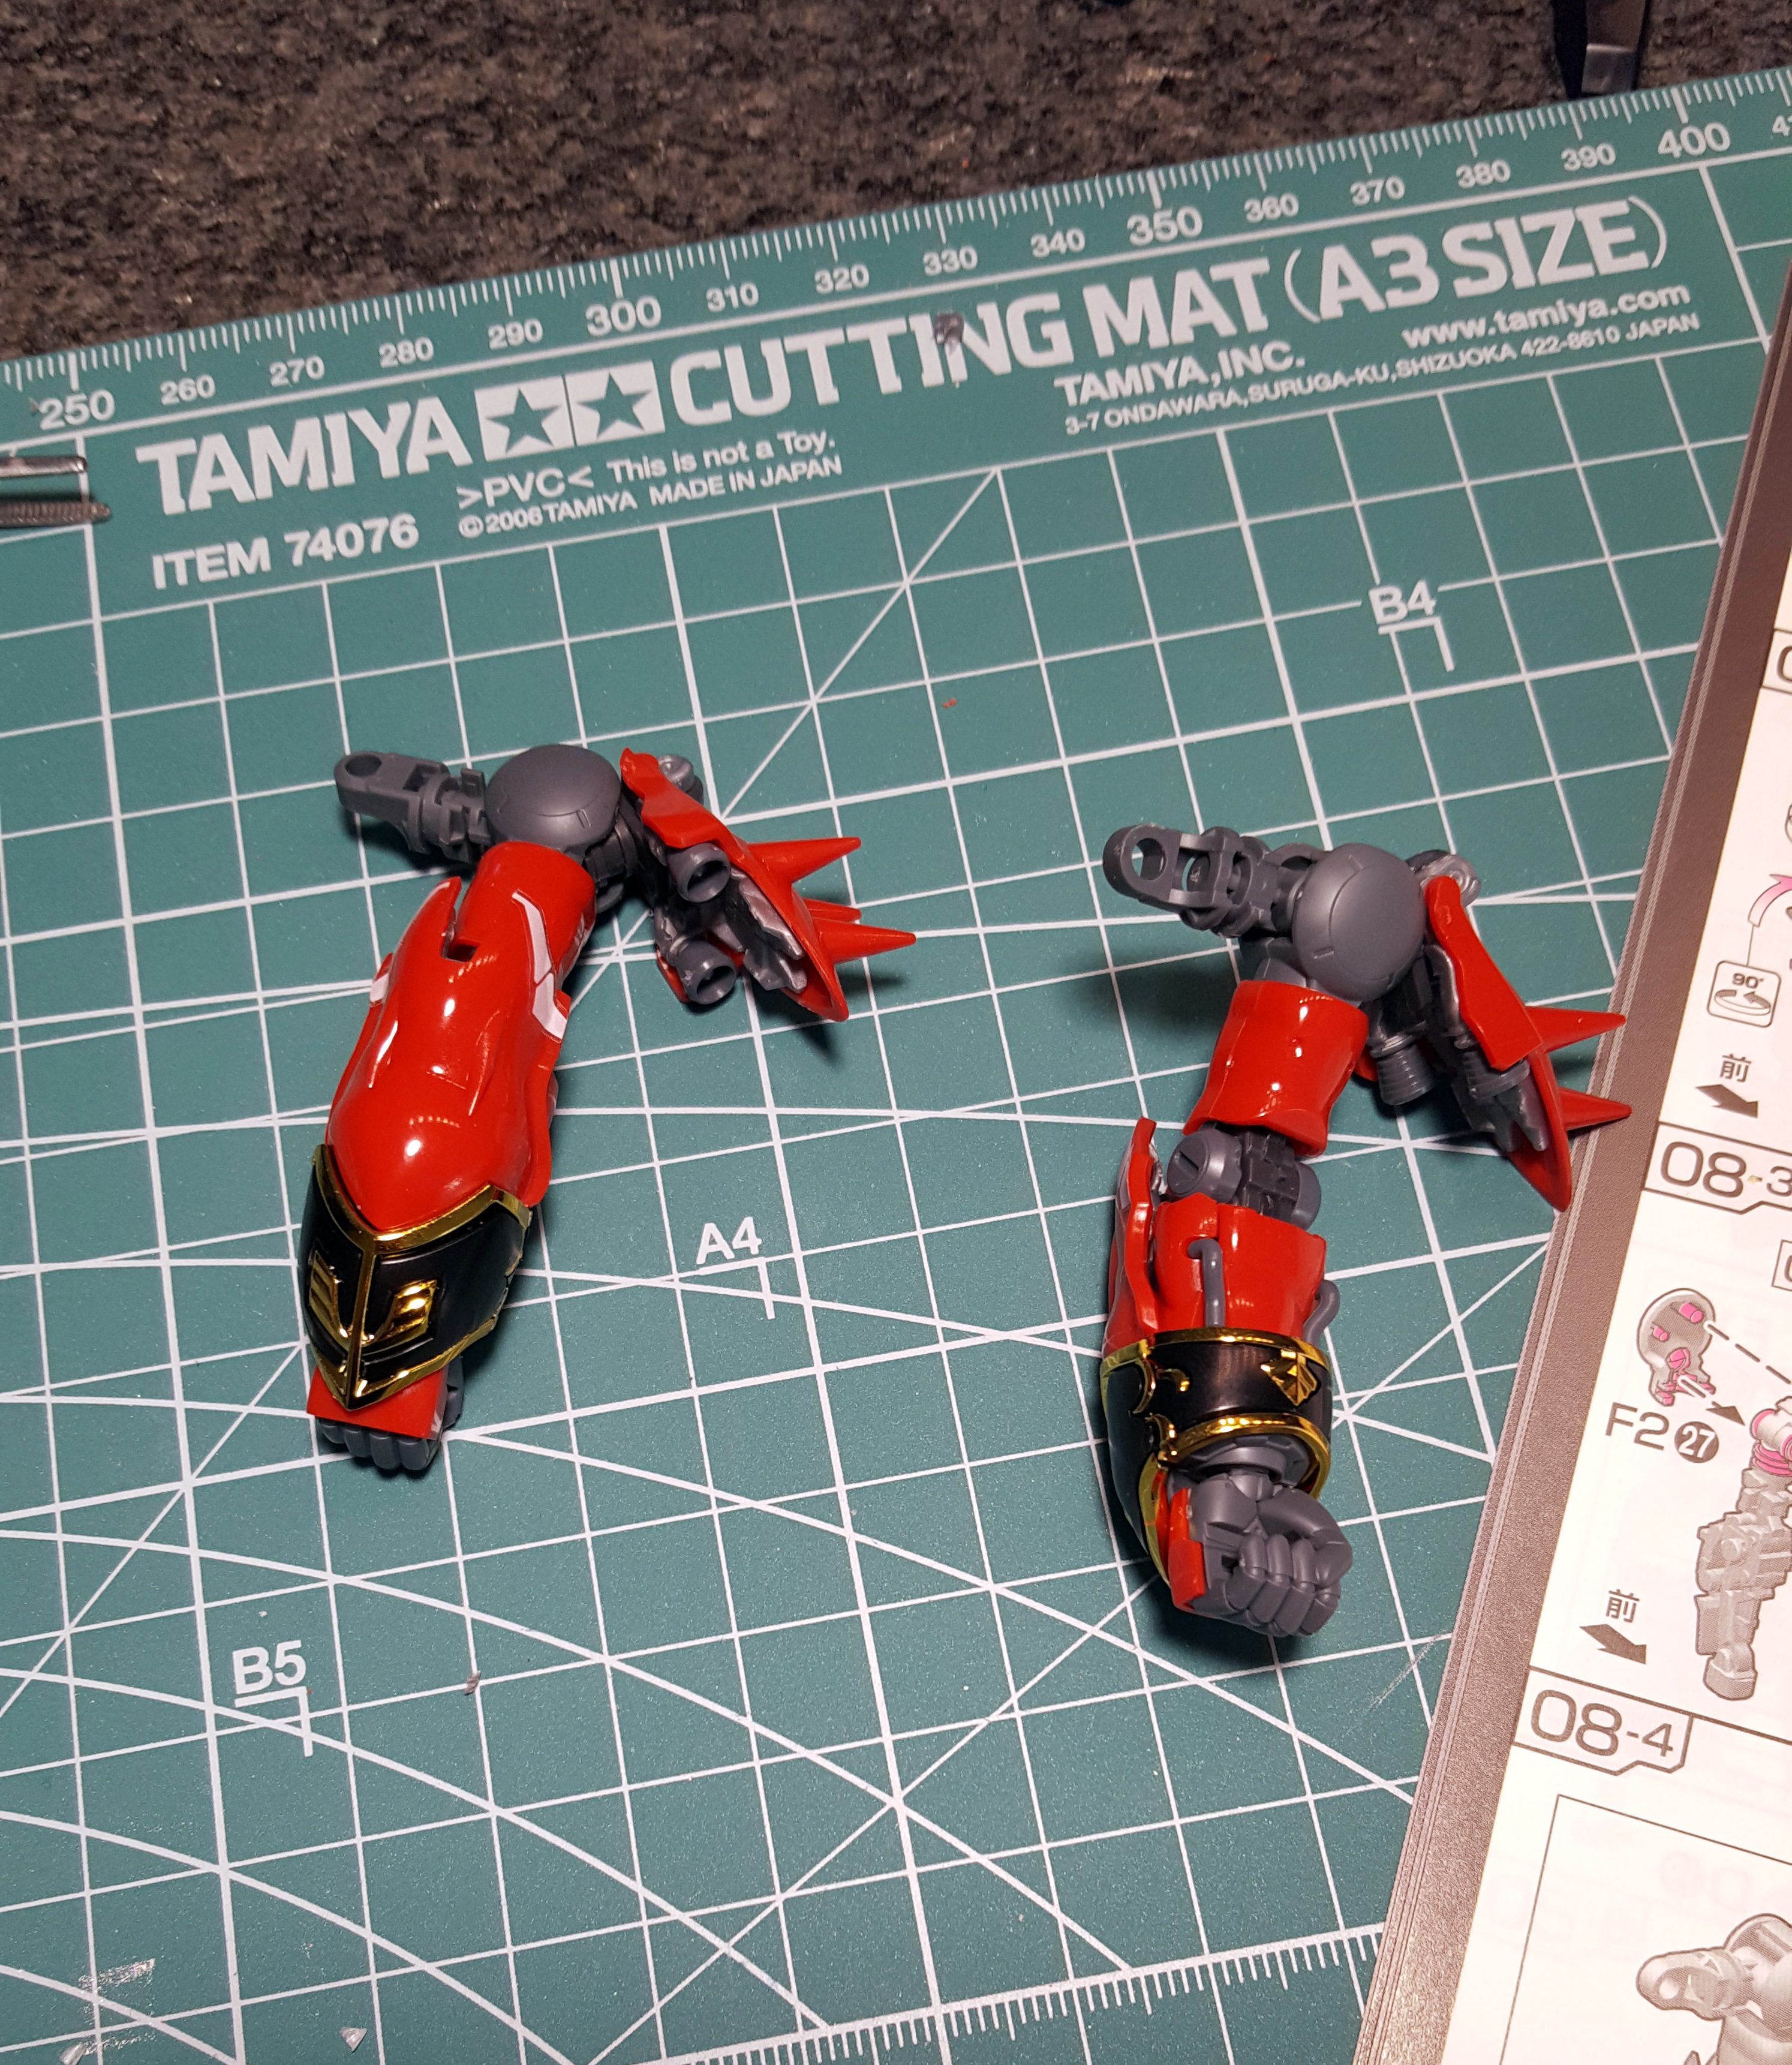 Now the thing about the arms is, they, um, how do I put this… they suck. First of all, the wrists are a goddamn disaster. The black cuff is made up of two halves that always come apart if you so much as look at them, and if it’s not that, then it’s the entire wrist assembly just falling off the arm because of the way it’s attached. You also get basically zero movement out of the wrists except for rotation, and because the expansive cuff armor gets in the way of so many things and you can’t rotate the elbow, this becomes a problem as soon as you want the suit holding any accessories. Oh, and while the elbow does bend almost 180 degrees, if you try to completely straighten it out, the armor halves on the upper arm pop off. This happens all the time. It’s really just infuriating how flimsy the arms are, and it makes posing the kit a nightmare.
Anyway, the arms then go on the torso, followed by the shoulder pads.


I’m a bit iffy about the stickers, to be honest. I decided to put them all on because I really like the white pin-stripes on the MG Sazabi Ver. Ka, so I liked that this kit mimics that, but the Sazabi has waterslides, and those work a lot better on curved surfaces than stickers. Plus a lot of the stickers on this kit are really big, especially basically every one of those Neo Zeon emblems, and it’s somewhere between difficult and impossible to apply them without air bubbles or having them peel off an hour later. The one you see on the Sinanju’s left shoulder here is particularly maddening – if you look closely, you can see that it couldn’t really be applied any more to the right because of the groove in the armor there, but the way it is now, it has to bend almost 90 degrees inward on the left, causing it to peel off. It’s pretty literally stuck between a rock and a hard place. I somewhat alleviated this later by cutting off most of the excess clear material, but it still won’t stay completely attached.
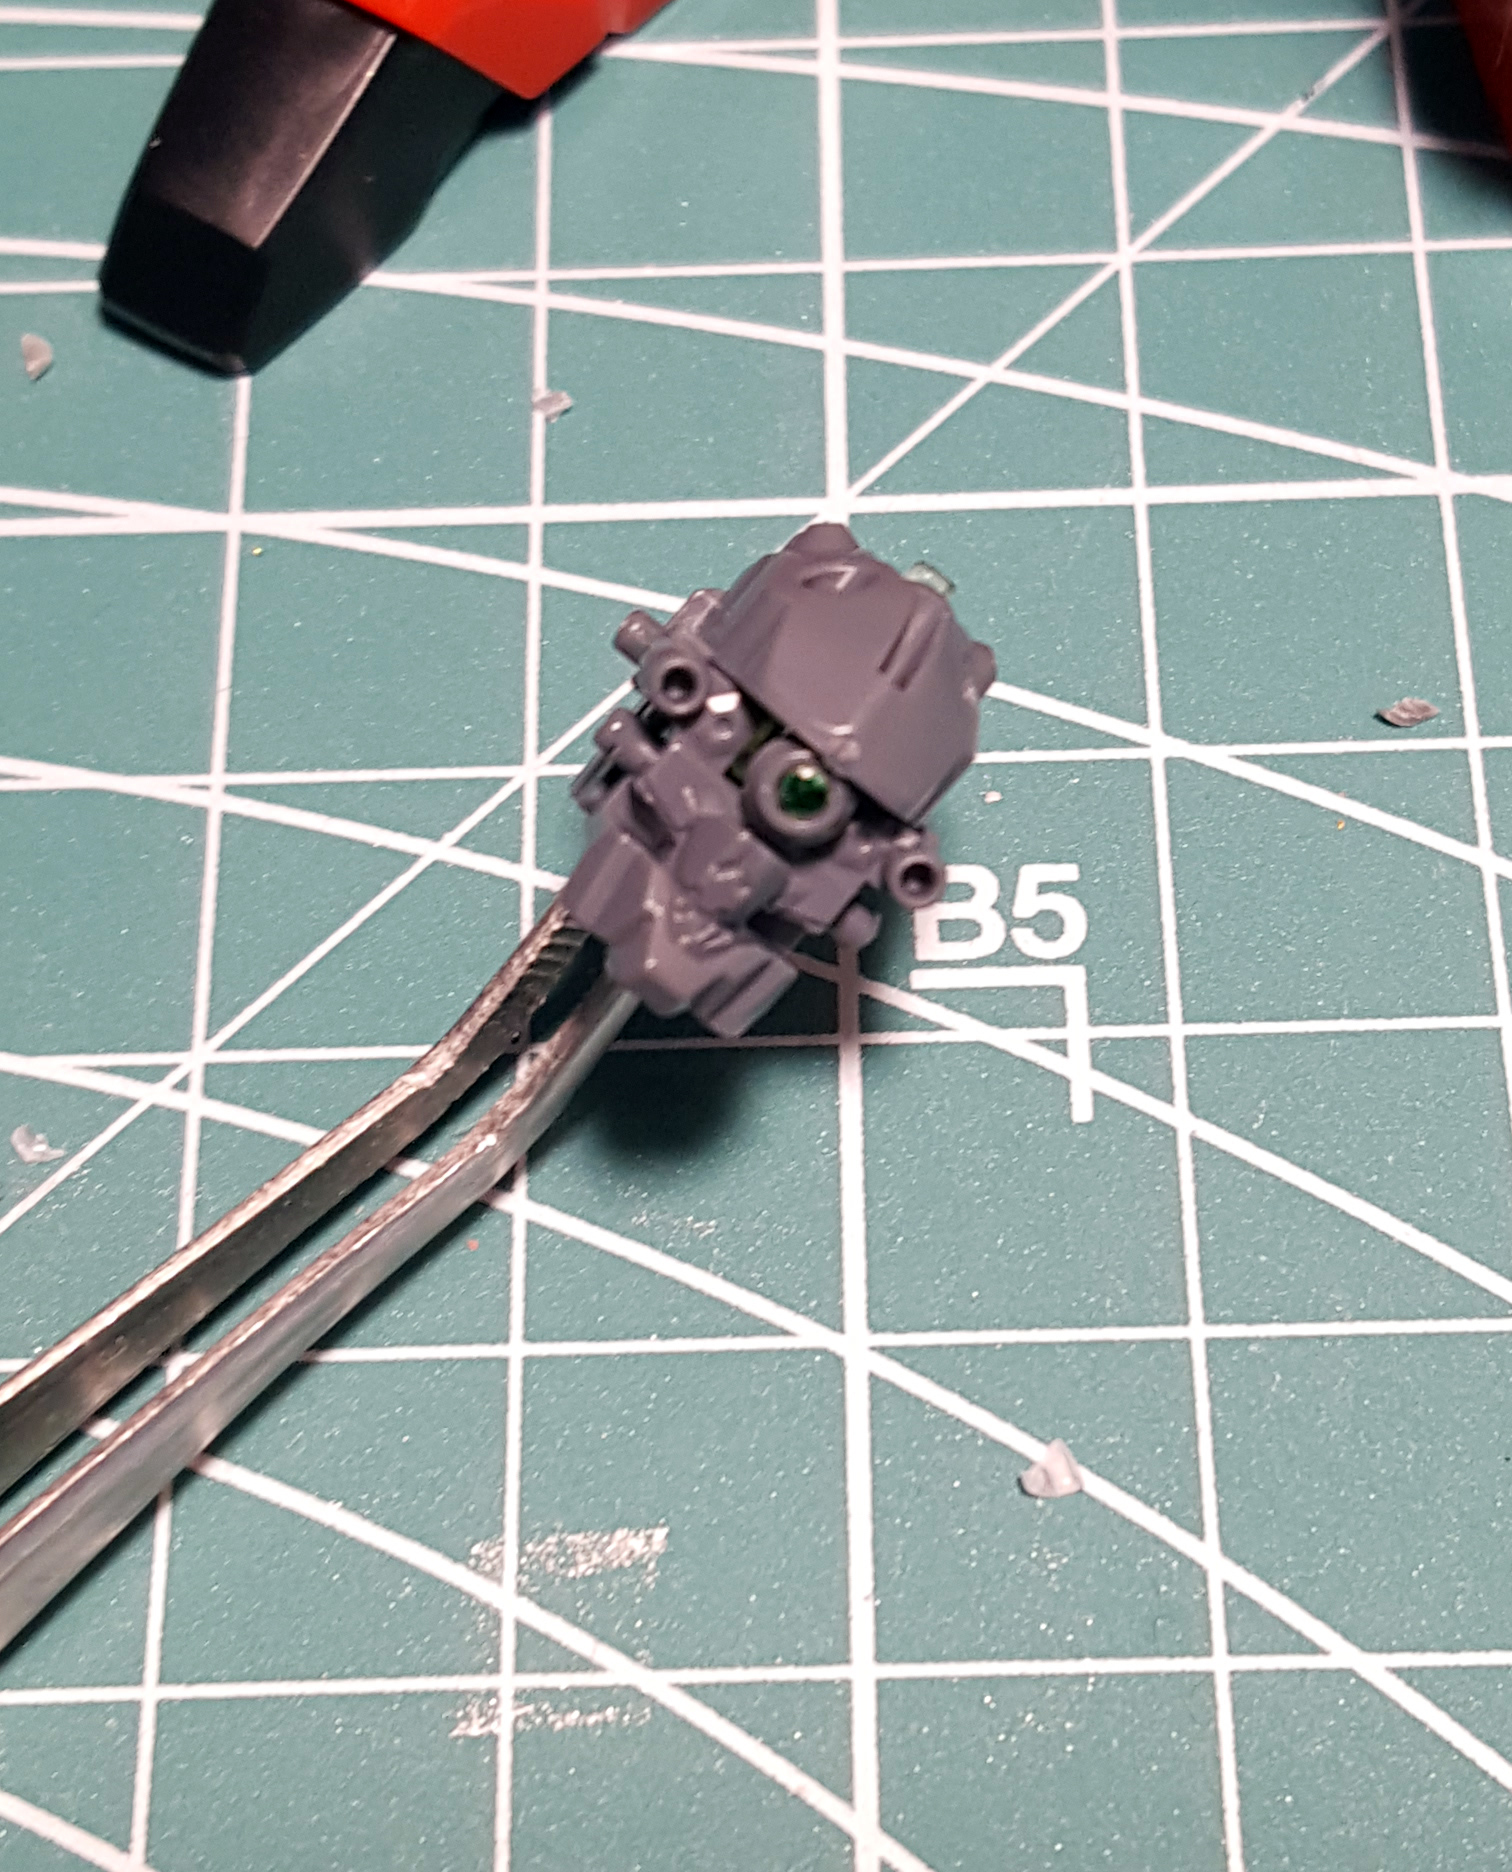
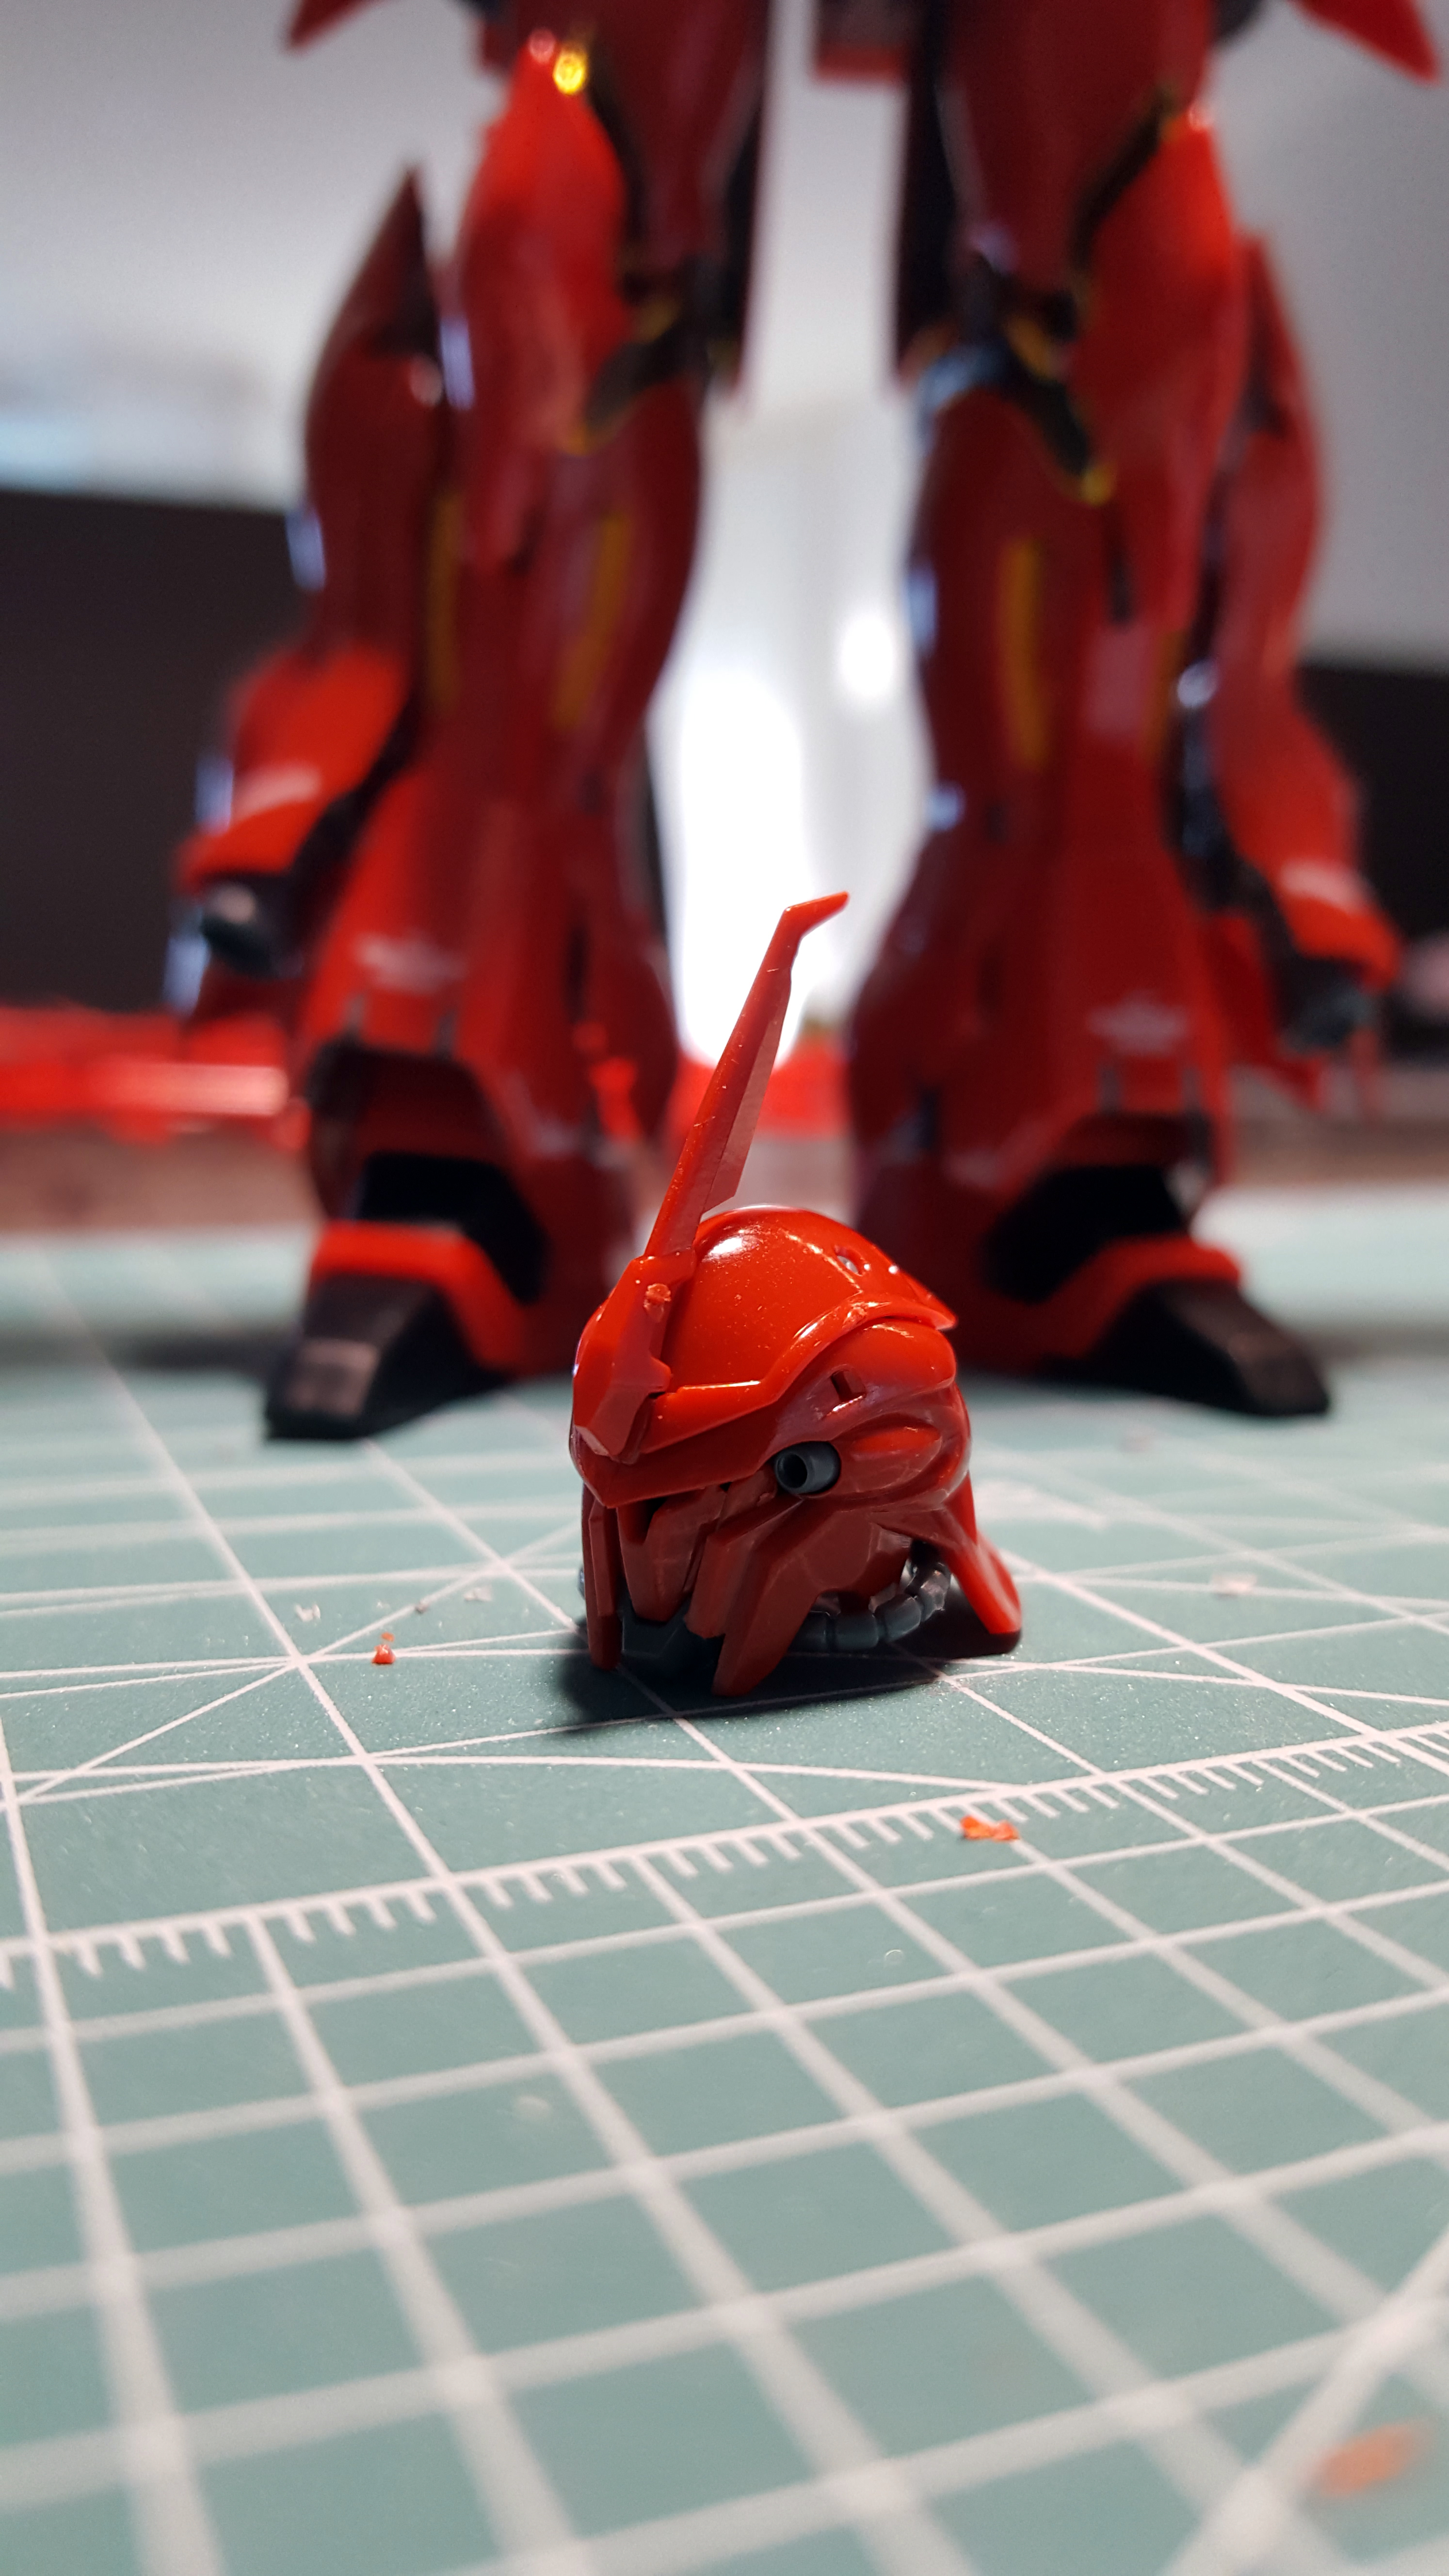
Up next is the head. I thought it looked funny without the armor on, so here’s a picture. This is also the only time you really see the green foil sticker on the mono-eye because it pretty much disappears once the armor’s on. Sadly, there’s no way to paint this piece that would look any better than using the sticker; I really don’t like these foil stickers much, but the reflective surface gives it at least a tiny little bit of pop if you look at the head very closely, and that wouldn’t have been any better painted.
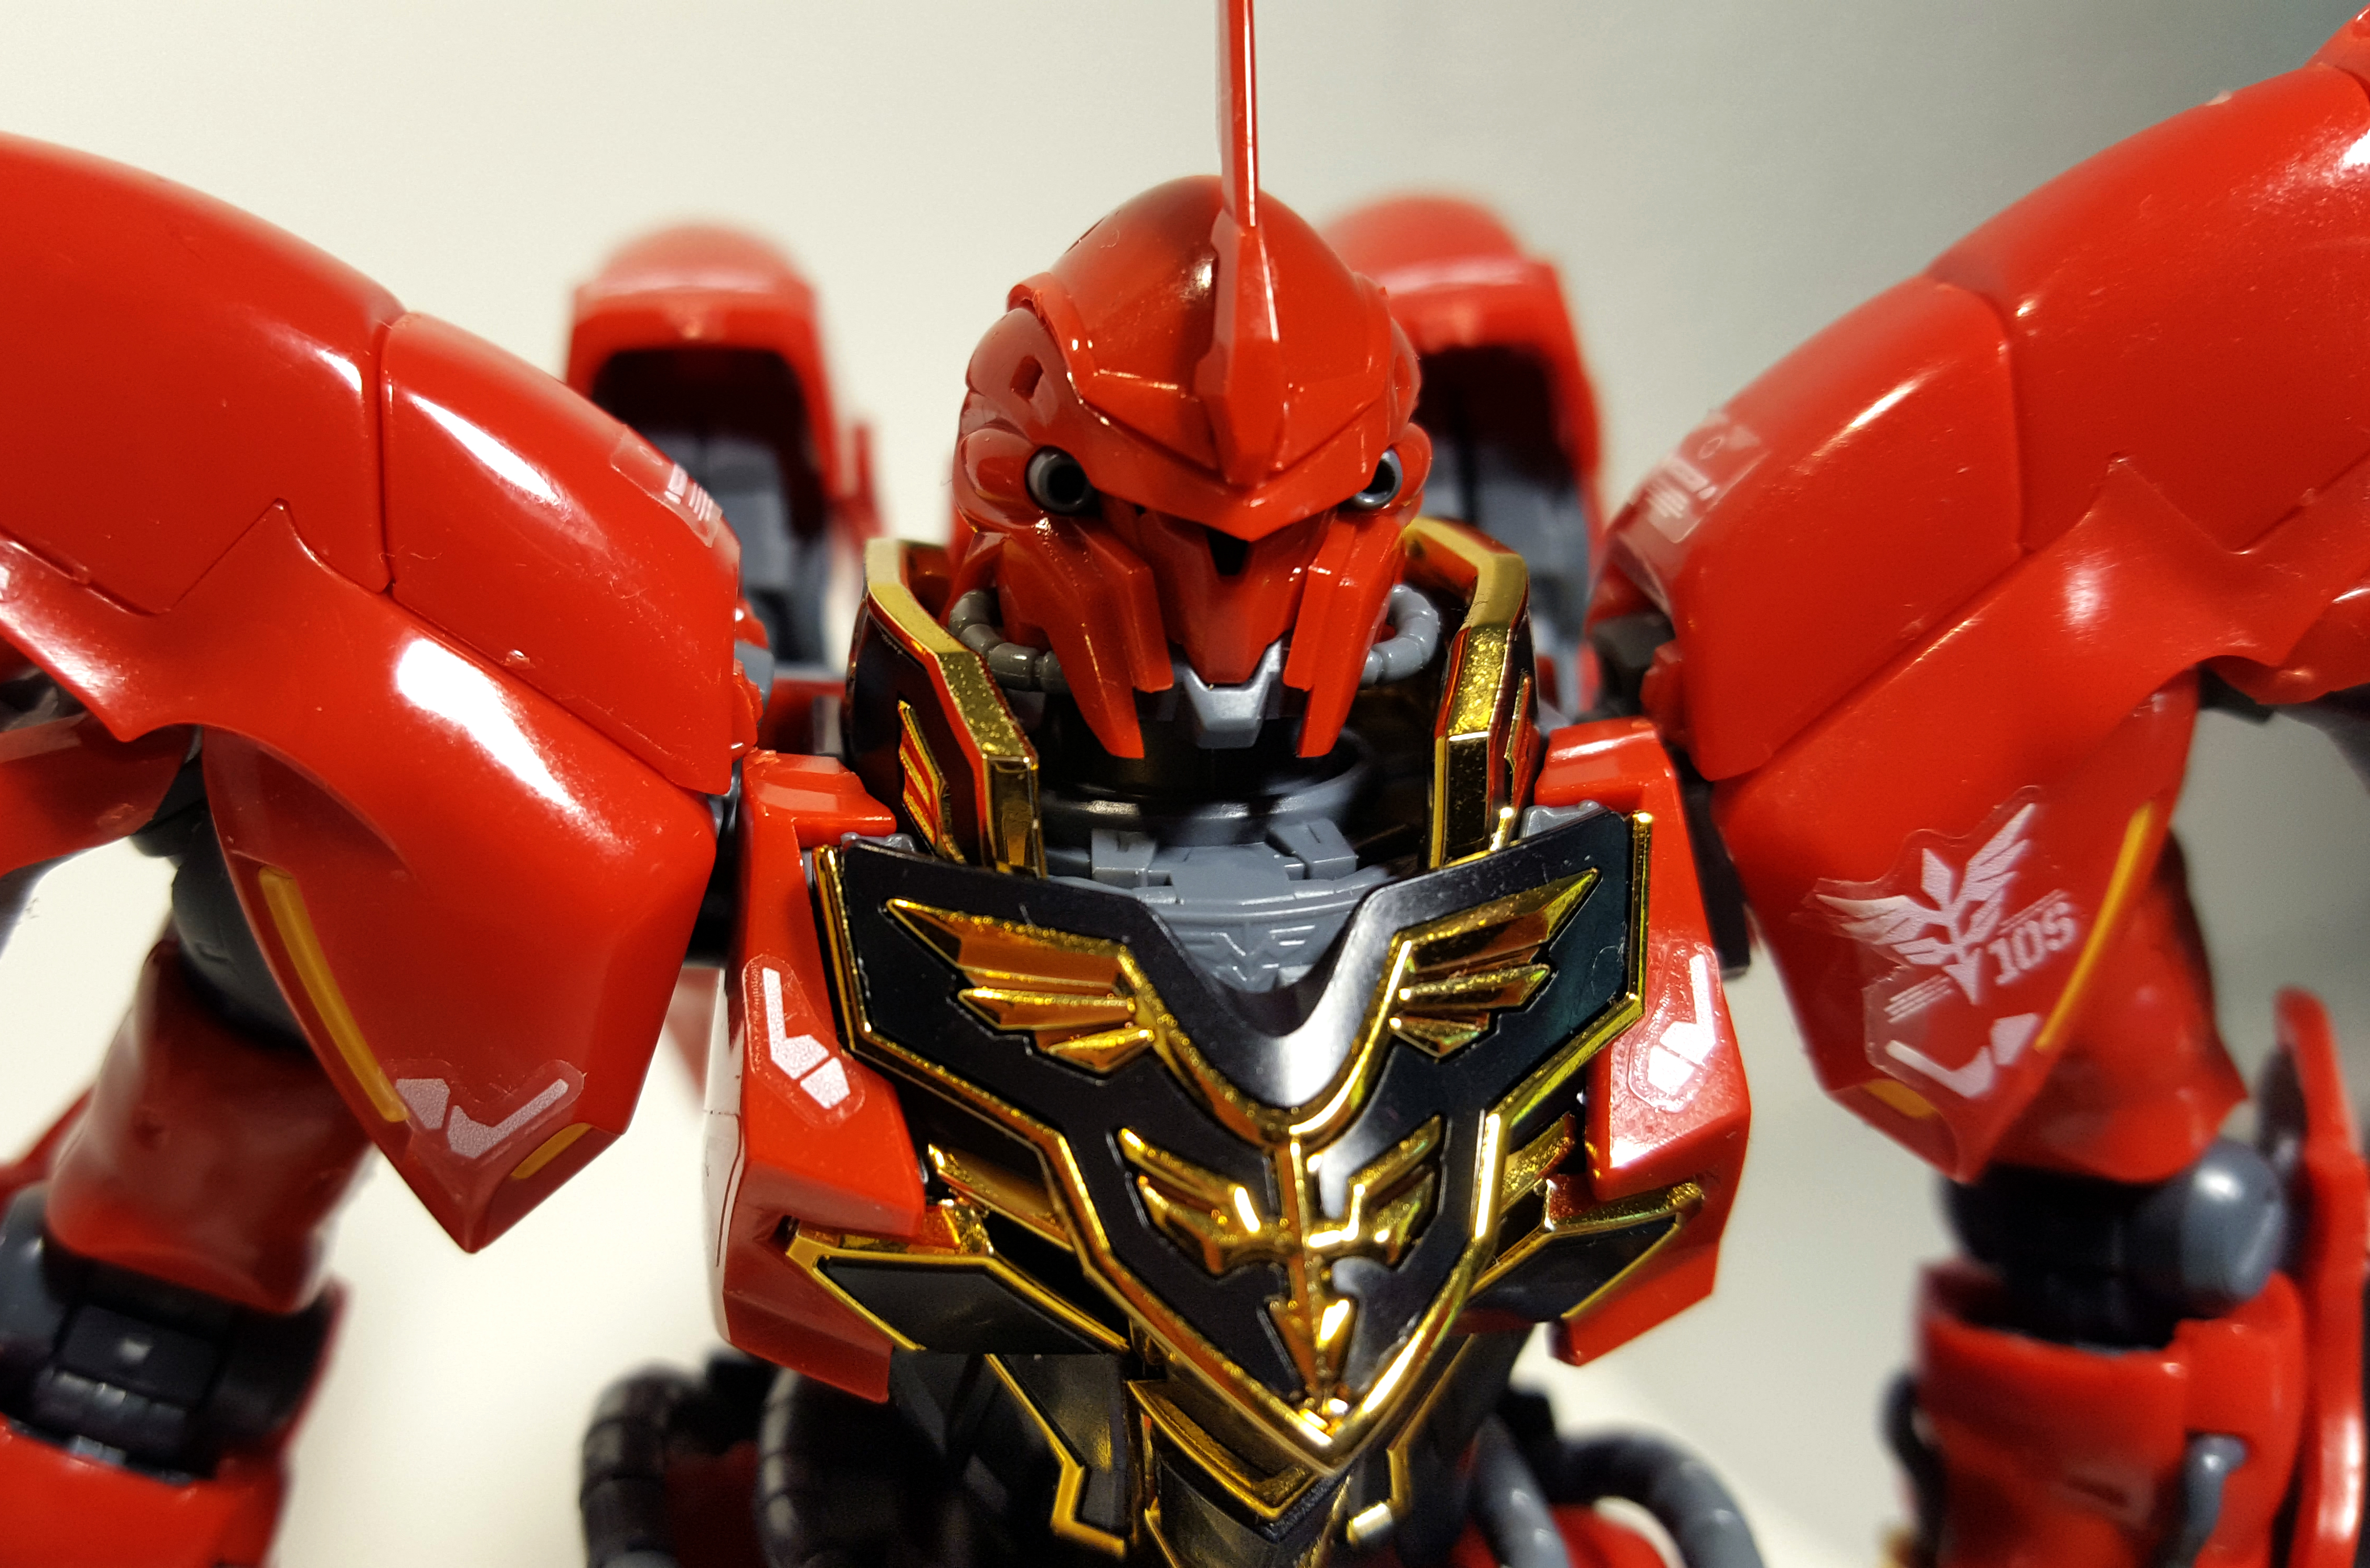
 Here’s the head all finished. It looks… well, it looks dang-blasted awesome. It’s about the size of the tip of my pinky, and the amount of detail on it is staggering. Keep in mind that nothing is painted here – the vulcans, unlike on the MG, are actually molded in grey. Everyone knows about the gold trim, but there are other small details like this in other places that require painting even on the MG and don’t here.
It also has a lever at the top to move the mono-eye that you can access if you take the top of the armor off, but since you can’t see the mono-eye anyway, that’s kind of pointless. Nice idea, though, and I hope they keep it in mind for future kits of other mono-eyed suits. Like the PG Sazabi that has to be coming out any day now because I want one.
The head obviously goes on that little ball joint you saw in the previous picture, but it’s not attached very firmly and likes to come off.
The last thing you build, as usual, is the backpack. And what a beauty it is. I’m sorry, but I love these excessively large fuel tanks, and I wish every mobile suit had them. Note also the grey vents that are separate pieces and not just molded into the tanks like on the MG.
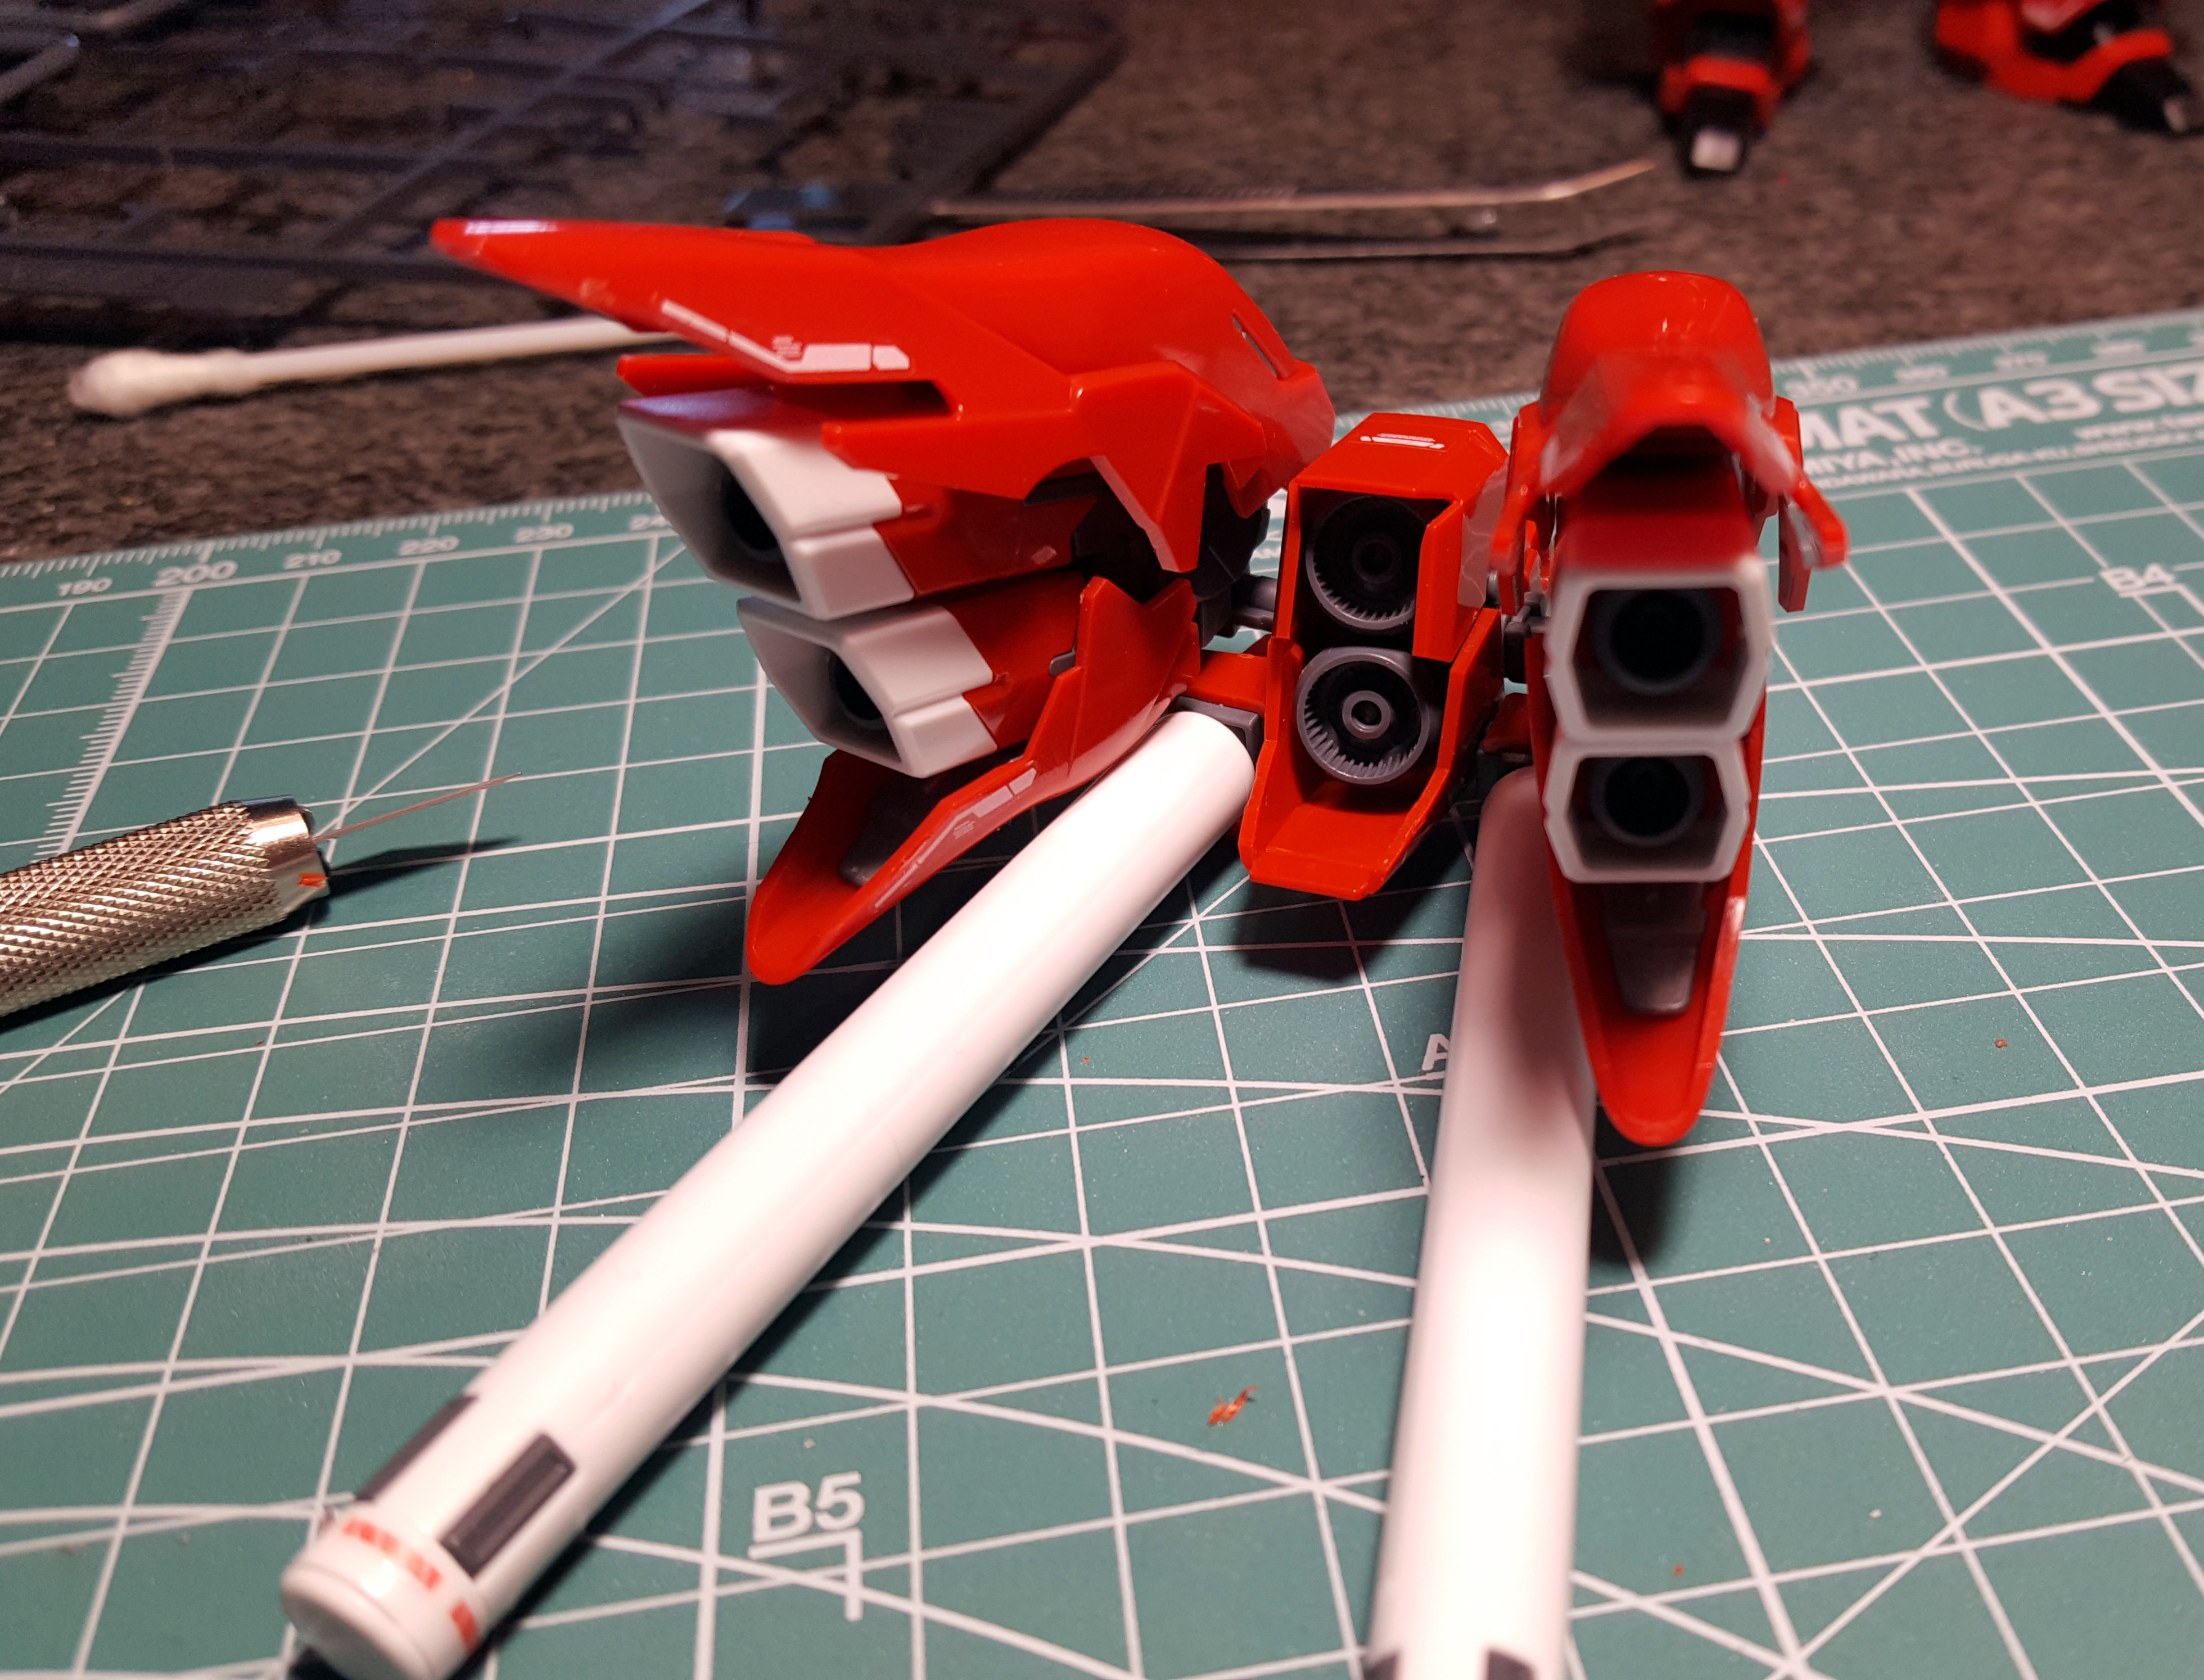
Everything here moves and opens and expands, and of course it’s also an insanely good-looking backpack that adds to the overall visual dynamic of the suit. You’re reading this because you’re a Gundam fan, so I doubt I need to explain to you that the Sinanju is one of the best looking designs in the franchise, and I think the backpack’s a big part of that.
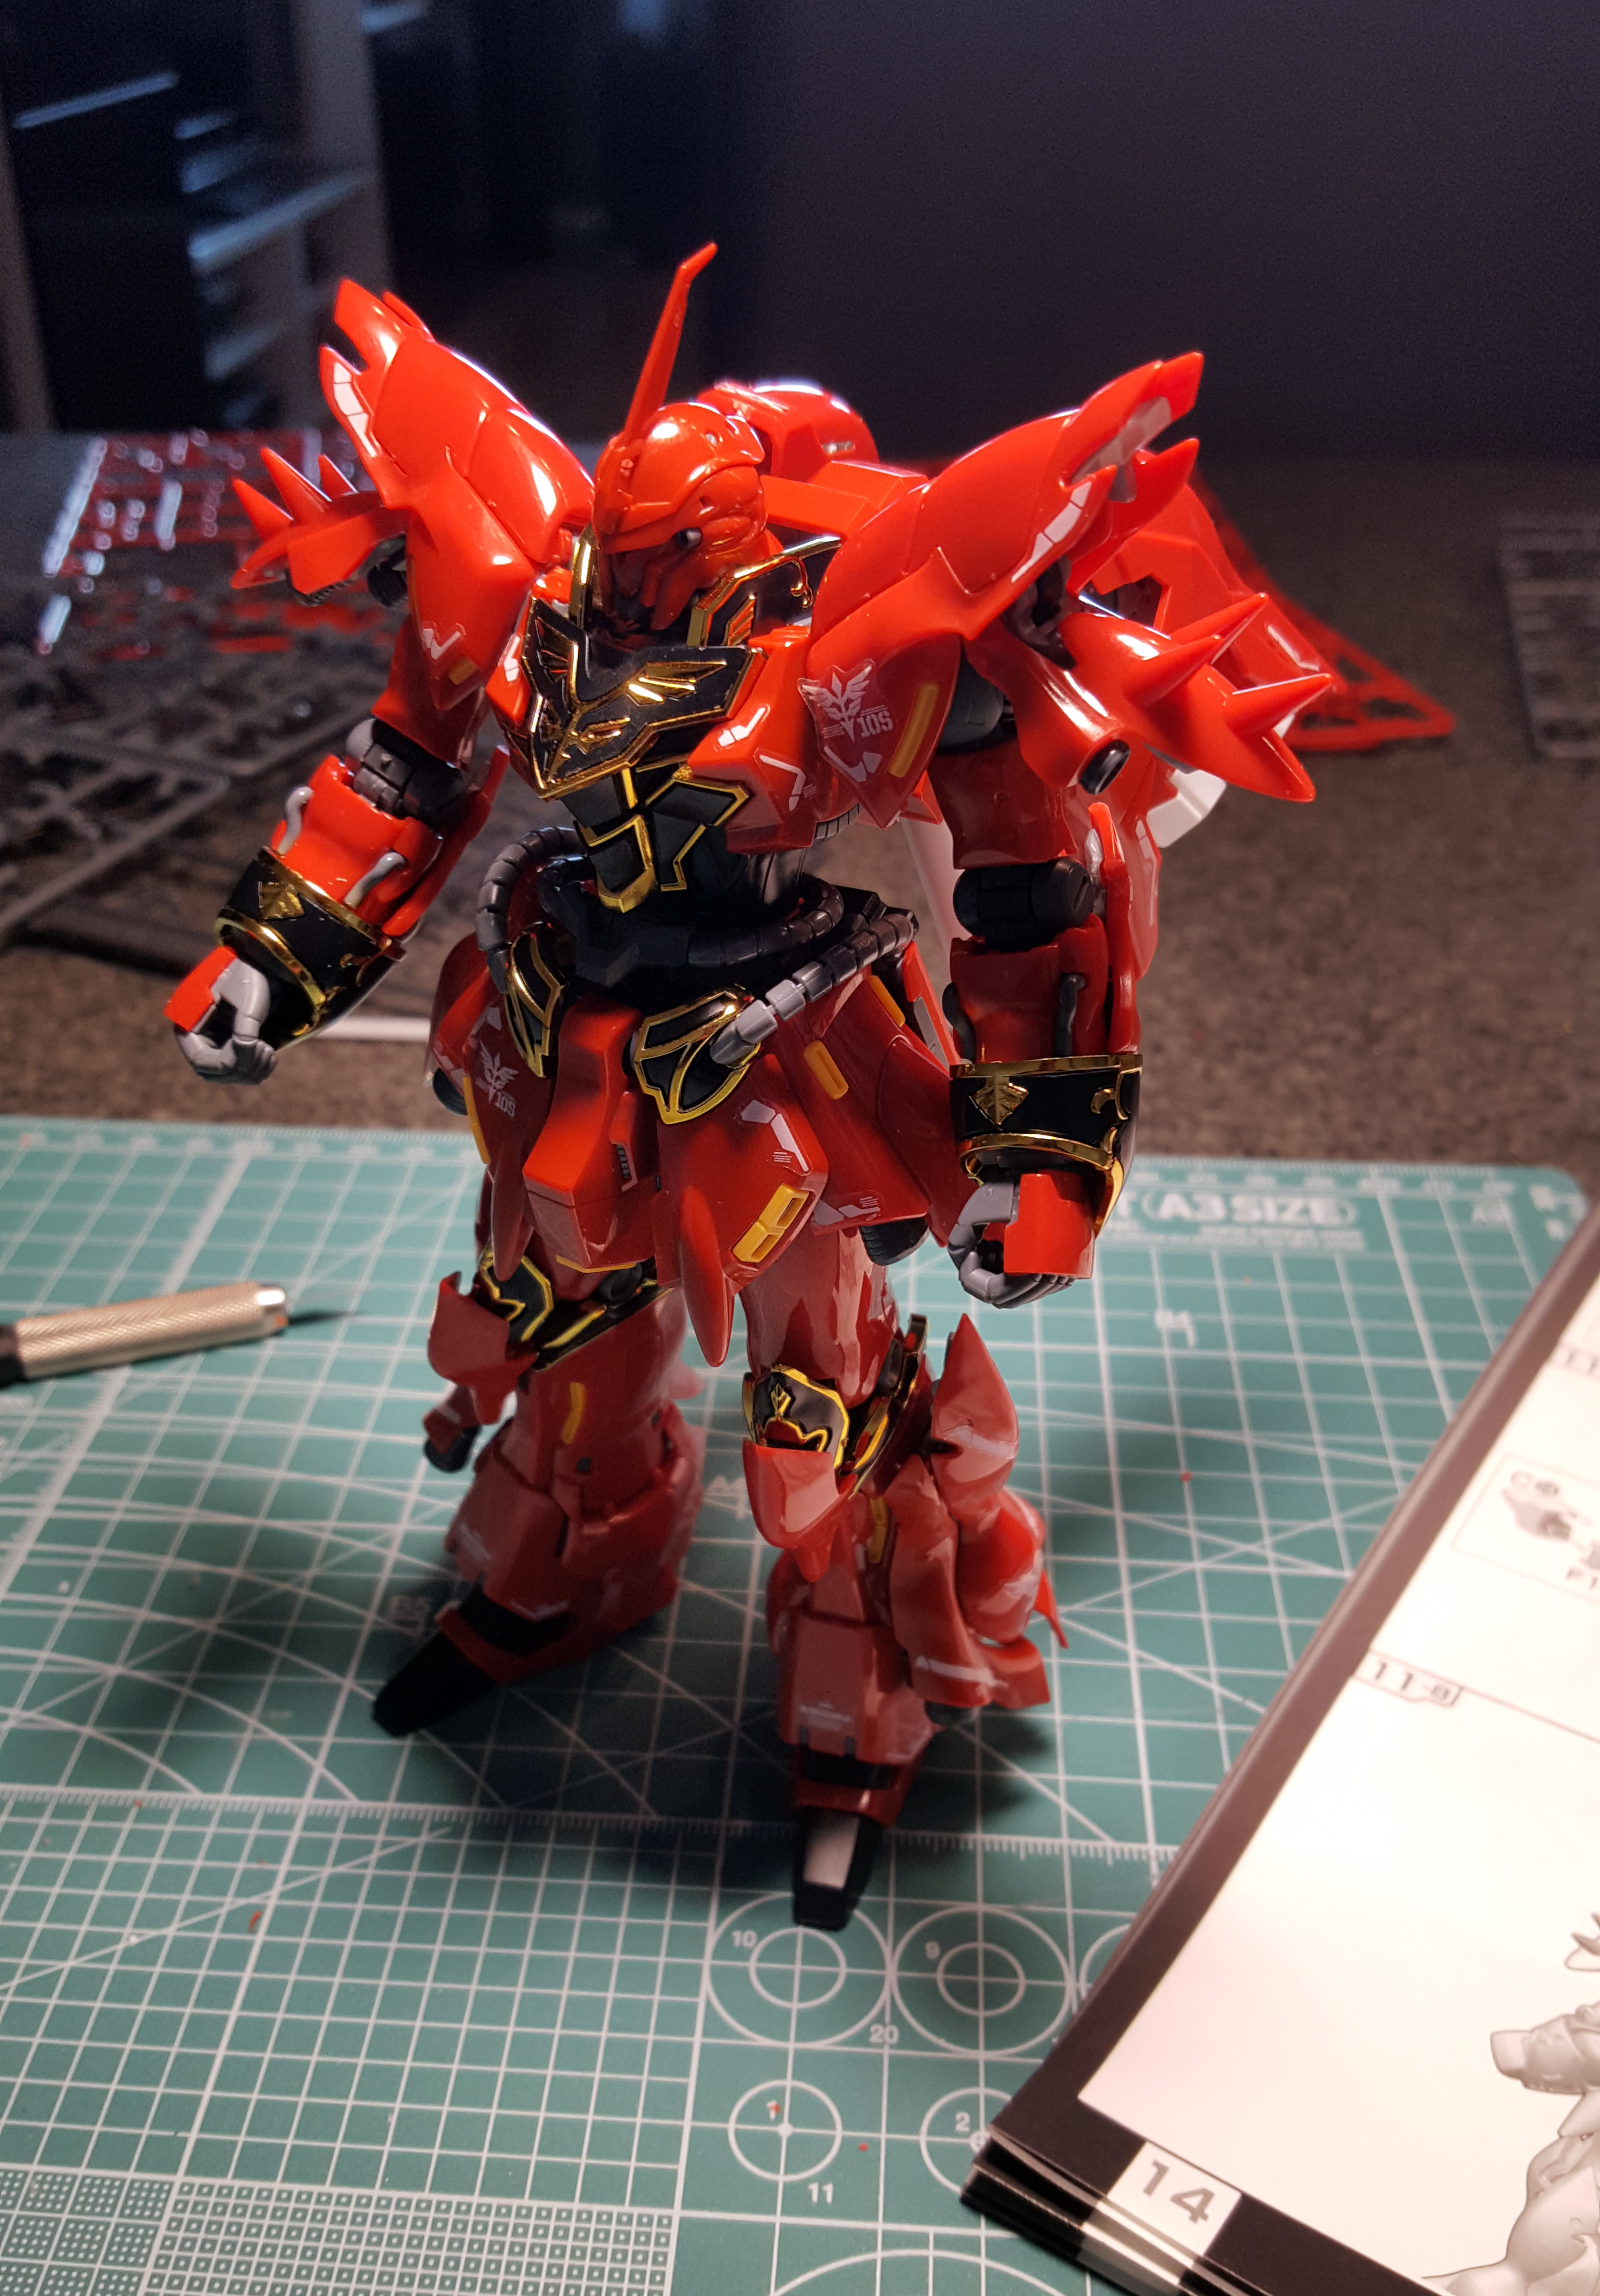 And here he is all built and ready to blow up a squad of ReZELs!
Except he’ll need some weapons to do that, so let’s talk accessories. Aside from the shield, you get the beam rifle, a grenade launcher, two beam sabers, two beam axes with a long and a short blade effect part for each, two weapon-holding hands, one open hand and two poseable hands, plus enough armor parts for all of the hands with one spare. The beam axes can be combined into one long weapon, and the grenade launcher opens so you can pose it as though it’s being reloaded, or it attaches to the beam rifle. There’s also a figurine of Full Frontal that’s so tiny that I couldn’t get a decent picture of it.


While this is certainly a good number of accessories, I’ll join the choir of those who complain about the absence of proper closed-fist hands and a bazooka. It really smells of BS that Bandai decided not to include these here and instead released an insanely overpriced option set with two bazookas, closed fists and a handful of other gimmicks. Needless to say, I’m not buying that set. One bazooka and two closed fists should’ve come with this kit, and don’t talk back to me because you know I’m right.
Also, the poseable hands suck. I’ve never been a fan of these because of how spindly and weird they look, even on the PG Unicorn, and here you don’t even get much poseability out of them because only the index finger is separate. Since they’re on the B sprue anyway, it’s nice that they included separate armor pieces that fit them so you could use them, but no thanks.
I may have to go back and paint the rifle and the beam axes at some point, I just didn’t have the motivation to even touch my airbrush when I was building this kit. As you can see, they’re molded in totally standard-looking bland grey plastic, and it just really stands out against the glossy finish of the suit and the shield.
Of course the main attraction in terms of accessories is the shield. It looks absolutely fantastic. Just look at all that raised gold detail. And don’t forget none of this requires painting – all the gold trim is separate parts.

You can also attach the beam axes and the grenade launcher to it, which is nice and actually works really well, but because of the extremely limited poseability of the arms and the fixed way the shield attaches, you can get basically one pose out of that and that’s it. Although admittedly it’s great to see that the arm has no trouble at all holding up this massive contraption.


Connecting the shield to the shoulder armor works much better. Getting the connector bit attached is frustrating and fiddly, but once it’s in there it’s very secure and holds the shield up really well.
Another thing that works surprisingly well is attaching the beam saber blades to the arms. The armor folds out like this to reveal a slot that mimicks a beam saber handle being stored in the arm. It all moves very smoothly and nothing pops off randomly.
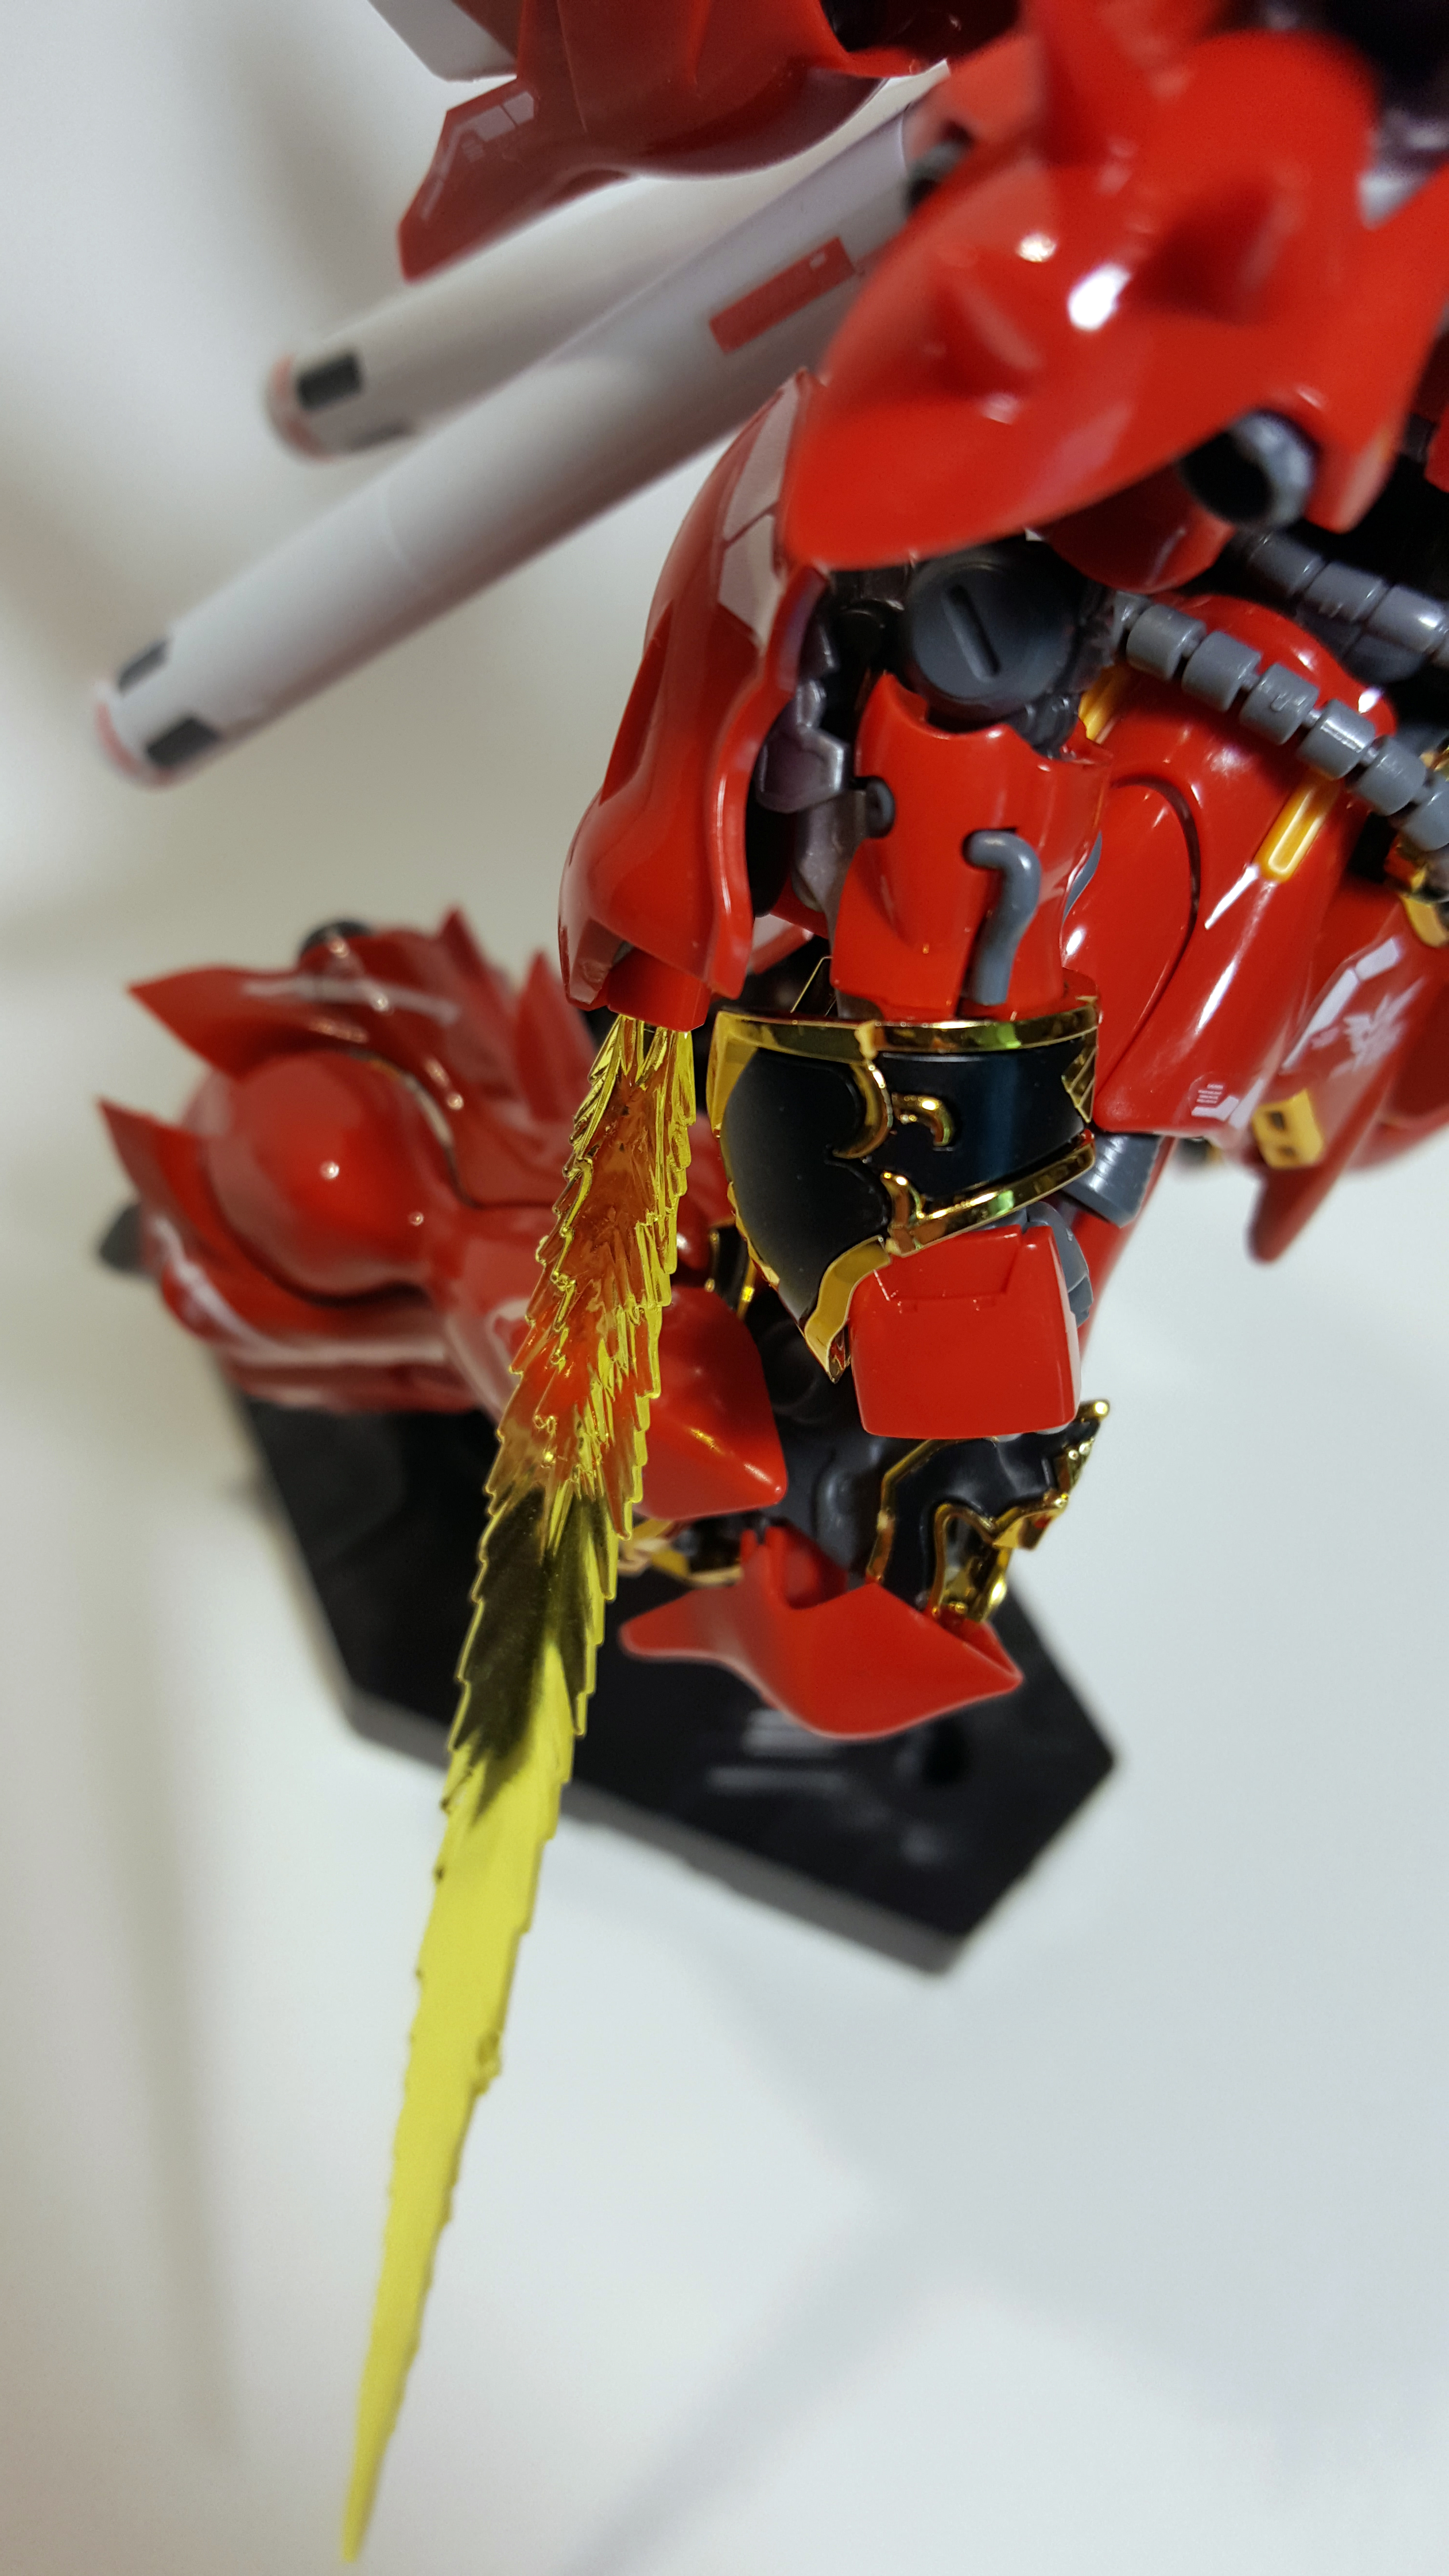
It also allows for some pretty cool poses, though I still don’t really understand why this is such a big deal to some people. I also like the beam saber handle in the hand, not to mention the wrist version would look better with, ahem, cough, proper closed fists.


And that’s it for the accessories. There are a few other gimmicks I could mention – the cockpit hatch on the chest opens and there are opening and closing armor bits on the shoulders and the legs. Instead, I’ll show you this.
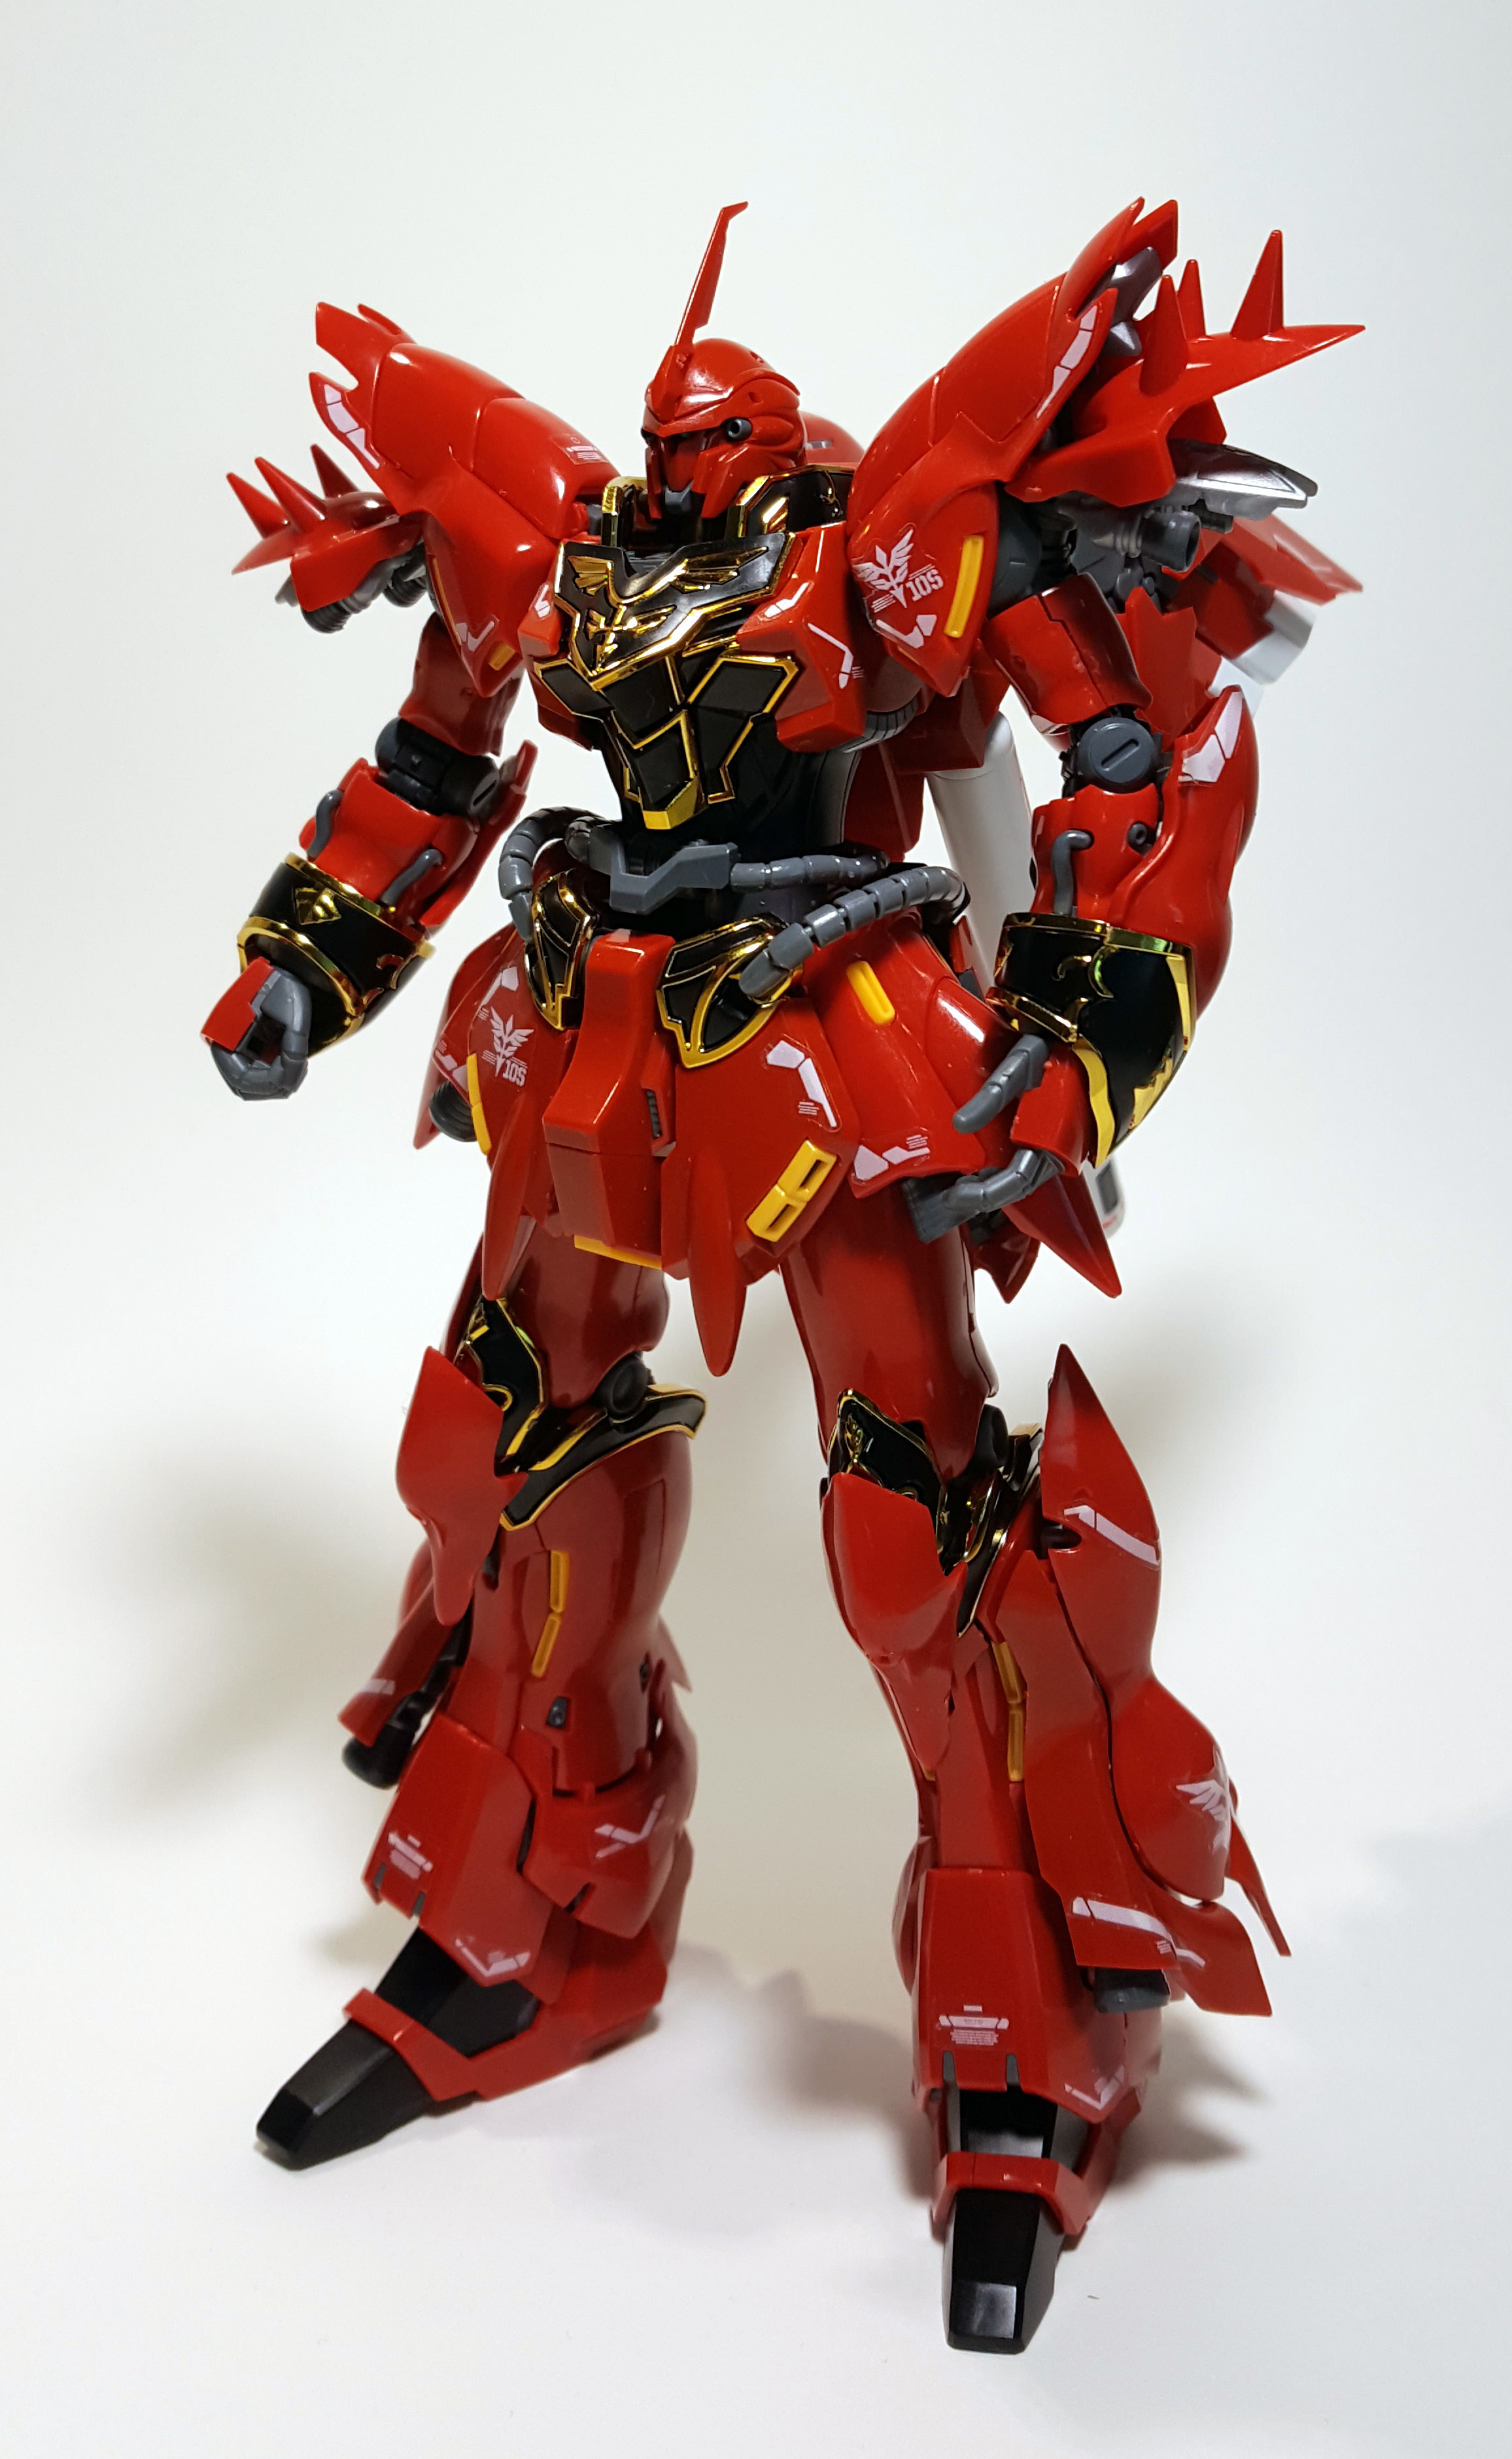
For all its faults, one thing you have to give this kit is that it stands up perfectly fine on its own with the backpack attached and not leaning forward at any kind of ridiculous angle. I’m also not really experiencing the problems other people seem to have with the waist being floppy – it clicked into place nicely and it’s been holding up fine.
Also, just pay attention to how good this kit looks in closeups. Depending on your screen resolution, you’re probably looking at it twice its actual size in some of these shots, and apart from the silvering from the decals and a few nubs here and there, it looks fantastic.
Here you can also see how I tried to fix the problem with that peeling Neo Zeon emblem. Sadly, it started peeling off again a day or two later. I really wish Bandai would include waterslide decals with all their kits for those of us who aren’t afraid of them. How expensive can that be? There’s so many kits that come with multiple sticker sheets of varying types already anyway. I really don’t get it. Sigh.
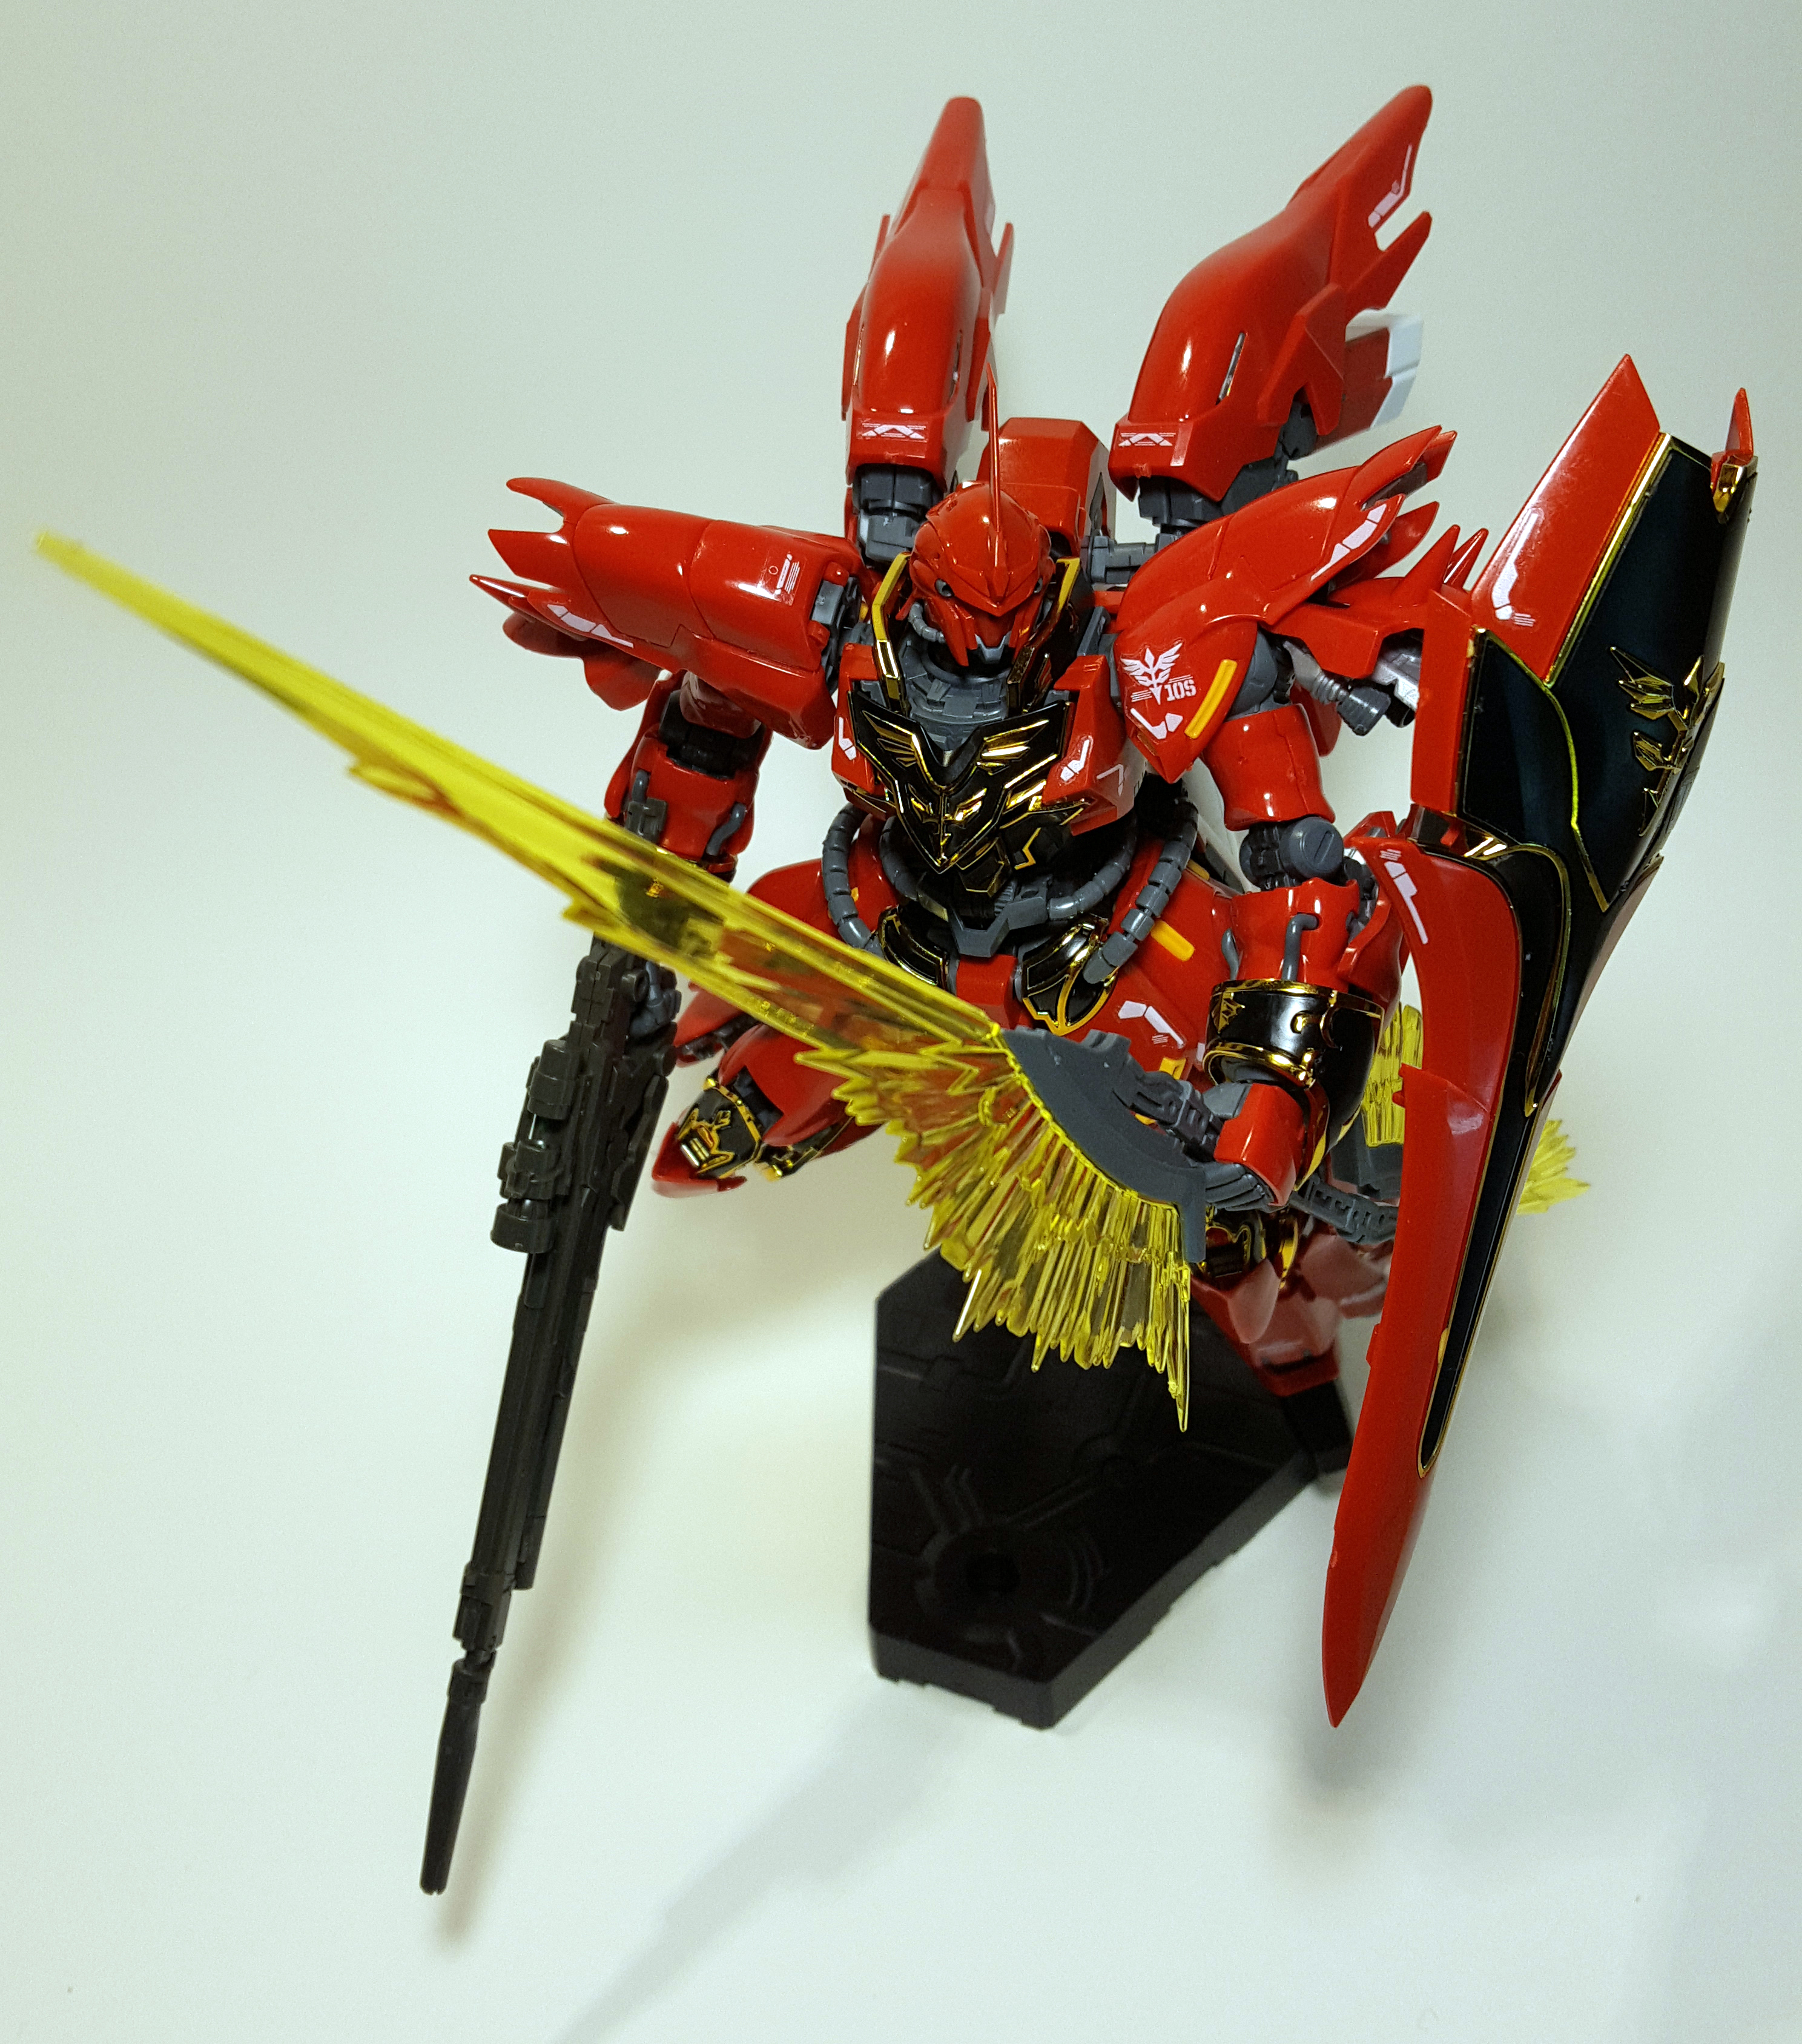
One final shot before we go. This is how I like to display the kit – airborne action pose, beam rifle in one hand, double beam axe in the other and the shield attached to the shoulders. Looks awesome.
Now, why did I say at the beginning of this blog that I don’t see myself buying too many more RG kits? It’s mostly down to the scale of these things, to be honest. I’ve never enjoyed working with extremely small and fiddly parts, and of course there are many of those on a complex kit of this size. This just wasn’t as enjoyable to work on as the MG and PG kits, and while the end result an absolute beauty to behold, if I’m honest, I just like my mecha models bigger. Maybe it’s just because my real love is Zoids, but I’ve always thought the 1/144 Gundams looked kind of puny.
Plus, while I’m impressed with Bandai’s recent successes at making their kits look great without any painting or even detailing, that’s not really what I’m into anymore, so it’s kind of lost on me. I’d just rather build something bigger and paint it. And if I really want a quick fix with a small kit, I’d rather build an HG kit that doesn’t take this long to put together. For some people, the RGs are probably the best of both worlds, but for me, it’s the opposite.
So should you get this kit, seeing as how everyone who has one seems to have kind of a love-hate relationship with it? You should get it if you like 1/144 scale Gunpla, and if you don’t mind that it’s fiddly and flimsy as long as it looks good, especially just out of the box. Because it certainly does that. It’s a beautiful, beautiful kit, and you won’t need so much as a marker to make it look fantastic.
It’s also flawed and kind of frustrating to work with, but the bottom line is, I have it displayed right next to my MG Sazabi Ver Ka, also unpainted but with panel lining, and the RG Sinanju looks at least as good as its MG ancestor. The glossy finish really makes the detail pop, and there is actually something about the small size that makes it more impressive once it’s all posed up and behind glass.
