
Zoids Wild Gannontoise Review
Remember how I said in my video review of the Gabrigator that the only other Zoid that could possibly give Gabby Gator a run for its money as my favorite in the new Zoids Wild line is Gannontoise? That’s exactly what happened.
Anyway, here’s what’s in the box. I haven’t really done a proper unboxing pictorial on here yet, so let’s take a look.


Zoids Wild parts always come packaged into three sets of bags labeled A, B, and S. A is the parts for the bone structure, B the armor, and S is all the other stuff like mechanical pieces, the pilot and the rubber caps.
Out of the ones I’ve built so far, the Gannontoise is the only one where the bone parts have this silver metallic color; the others were all a much darker gunmetal tone. Other than that, there’s nothing out of the ordinary going on here, this is pretty much what all ZW kits look like.
Assembly starts with the mechanism for Wild Blast mode.

")
Meaning it’s this BFG with the mechanism that drives it.


Next you plug the crank arms that will drive the legs and the rotating piece on top for WB mode onto the gearbox. I wonder why these cranks are separate pieces on these kits – hopefully it’s because they’ll come in different variations for later models.


The torso then goes together like so until you secure it with these two little clips that are almost as zoidy as rubber caps. At this point none of it does anything and you’re kind of left wondering how it’s all going to work. Note also the big handle that goes on the on/off switch.


Next is the head, which flops up and down suspiciously, but that’s remedied when the legs are attached.


See, the head simply rests on a tab on the front legs that will cause it to move up and down when the Zoid walks.


Now we add these rib-like parts that every ZW model has. It’s a bit weird how you put them together open first and then basically shut them, but that makes perfect sense when you later figure out that opening this stuff is how you activate Wild Blast mode.
The last part of bone mode is these two little pieces that armor panels will later attach to.


And we’re done. I won’t break down the attachment of the armor into steps, but here’s a before and after picture.


The Gannontoise has far more armor pieces than the others, unsurprisingly, and its bone structure is almost entirely hidden.
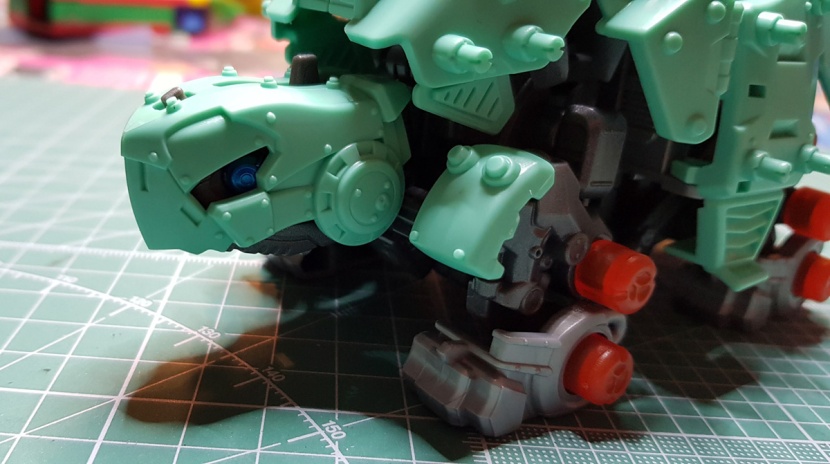
Also hidden is this.

Yep, that’s the head of the pilot. This one actually has a cockpit.
Now one last thing before we move on to the walking motion – the sticker sheet.
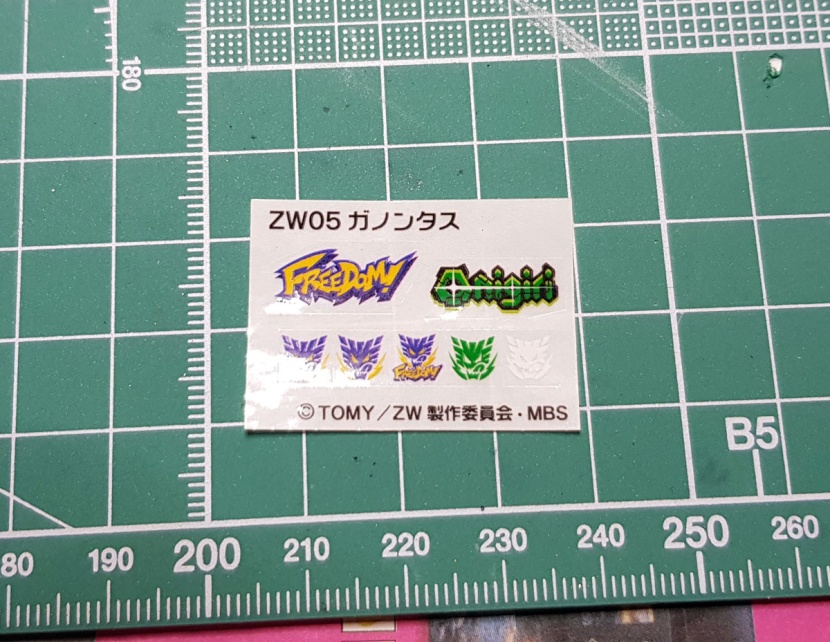
The good news is that these stickers are far thinner than the ones from the previous Zoids lines, so unless you’re pointing a light source directly at them, they look… well, about as good as stickers are going to look, I guess.
The bad news is, well, look at ’em. The Freedom logo looks so much like the Pokemon logo that my brain literally reads it as that everytime I see it. Sigh.
The other two battery operated models I’ve built so far came with these stenciled-looking number stickers that at least have a vaguely militaristic quality to them, but beyond that, I guess the days of Zoids as military vehicles are well and truly over. Except, you know, I’m now twice as motivated to paint all of these kids in olive drab and khaki, of course.
Anyway, if you want to see this Zoid in motion, here’s my Youtube video.
The verdict is that it’s really kind of a toss-up between this one and the Gabrigator for my favorite Zoids Wild kit so far. The BFG and the cockpit are really scoring points for this one.
I’ll probably snap up the Wild Liger tomorrow and film myself doing it for Youtube. Doing these written build reviews is far more time consuming, and frankly, I left the liger for last because it’s the one I’m least excited about. Sue me.

Awww that’s so cute.
LikeLike