
Tagged: strike gundam

Perfect Grade Strike Gundam WIP 2
Sooo…. after trying and failing to get decent pictures taken yesterday, not to mention I realized I forgot to take pictures of the “naked” inner frame on the limbs, I did a little better today. Truth be told, I’m still not entirely happy with these pics, and I’m a bit worried about how I’m going to do a decent photoshoot with this thing once it’s all done, but it’s good enough for a WIP update. Like last time, you can also check out my progress on Youtube.
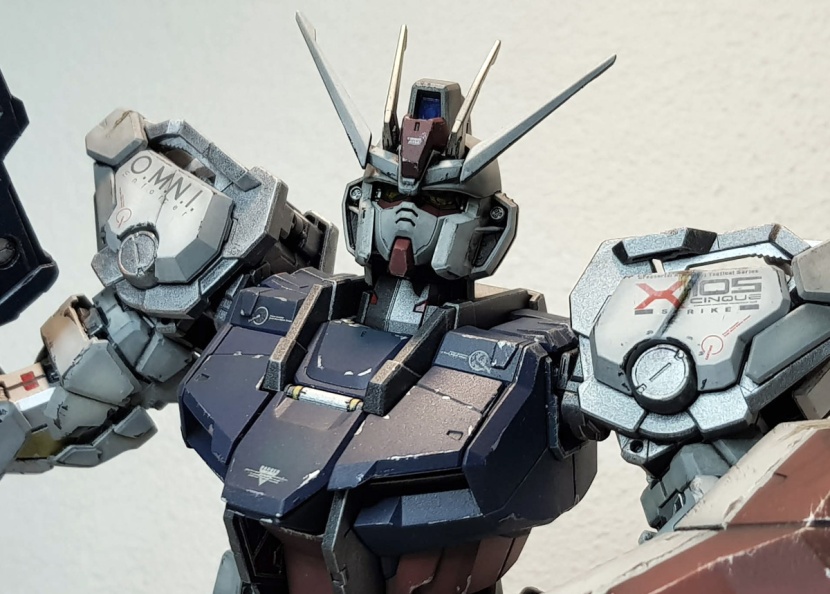
After sort of half-heartedly plugging away at painting the armor on this kit for literally months, I suddenly felt motivated now and actually got the entire rest of the inner frame done in about a week. I think finally seeing the torso and the head put together just made me see the light at the end of the tunnel, and I was also really happy with how it came out and wanted to see the kit finished.
Which isn’t to say that this build is done – as I’m writing this, I’ve started working on the Aile Striker, and I still think I might want to paint the base. I also finally managed to get the chrome stripped off the Grand Slam blade, so I’ll paint that as well, though I don’t know if I’ll have any use for it in the end, to be honest. And I might still paint the Armor *snicker* Schneiders, but that’ll really just be so I can tell myself I did everything. I have zero use for these stupid things, and I don’t see how I’m going to keep them foldable, so I also can’t stash them in the skirts.
Anyway, here’s what the legs look like.


My approach here was basically to decide on a color scheme first – silver, gold and red, all Tamiya. Then there had to be some sort of internal logic to how I painted the details. It’s not like any of this stuff actually does anything, but painting similar details in the same colors, I find, helps it look more like it could be actual mechanics. So pistons and all the round screw-like parts were painted gold, and I used red for small pipes to make them look a bit like they might be thick electrical wiring. I also used red for some recessed rectangles because I thought maybe those are lights; this isn’t a train, after all, it’s a robot from the future, so I’d think it has all kinds of electronic doohickeys making it work. And finally, silver for raised panels, basically to add some depth to things.


What ends up happening once the armor’s on is that a lot of the gold and silver sort of half shows through the gaps in the armor, which is exactly what it wanted; it suggests that there’s all kinds of moving clutter under there. And some of the detail, especially all those red tubes in the knee, only shows up when you bend the joint. To me, this suggests that this stuff is a bit more fragile and so has to be in a place where it’s covered by armor most of the time.
All of this was hand brushed with the exception of the silver on the back of the knee. I airbrushed those parts silver first, then masked off the area that’s silver now and sprayed gunmetal on everything else, followed by the red and gold details.
The hand brushing worked well enough , but as everyone knows, Tamiya paints are kind of a pain to hand brush, and I’m going to give Citadel a try soon. Tamiya’s are fantastic for airbrushing, but I’m really sick of dealing with how poorly they hand brush.
I’m also not entirely sure how I feel about the way the drybrushing affected the detail. On the one hand, it hides some of the imperfections, but up close I’m never quite sure if that’s really what it does or it just makes everything look messy. I got some of this stuff to look pretty sharp, and now… I dunno. I think I’ll try to go more subtle with the weathering next time I do a lot of detail painting.


The arms got basically the same treatment, but there are fewer parts and generally a lot less detail that’s actually visible, so there was just less to work with. My personal favorite is the gold piston that’s facing inwards on the lower arm armor and only really shows when you bend the hand away from it.
I really should have painted that gold panel on the elbow gunmetal instead, though. The way I went about everything was, I completely dismantled one of each limbs and kept the other one intact so that I could use it for reference, so with about 95% of what I did, I was sure of where it would end up and what it would look like, but it just didn’t occur to me that the gunmetal I painted on the elbow joint would read as being a different material underneath the silver showing up in gaps, if that makes sense. Not to mention, as you can see, the bicep armor has already damaged the gold. I’m pretty sure this is the only place on the kit where I have this problem. I guess I can get away with pretending it’s weathering (the armor really would scrape there), but… ergh.
For the most part, the one limb at a time approach worked really well, though, and I certainly recommend it for complicated kits like this one. I also don’t think it made it at all more time consuming, I could actually get through the second set of limbs pretty quickly because I had them all figured out from doing the first two.
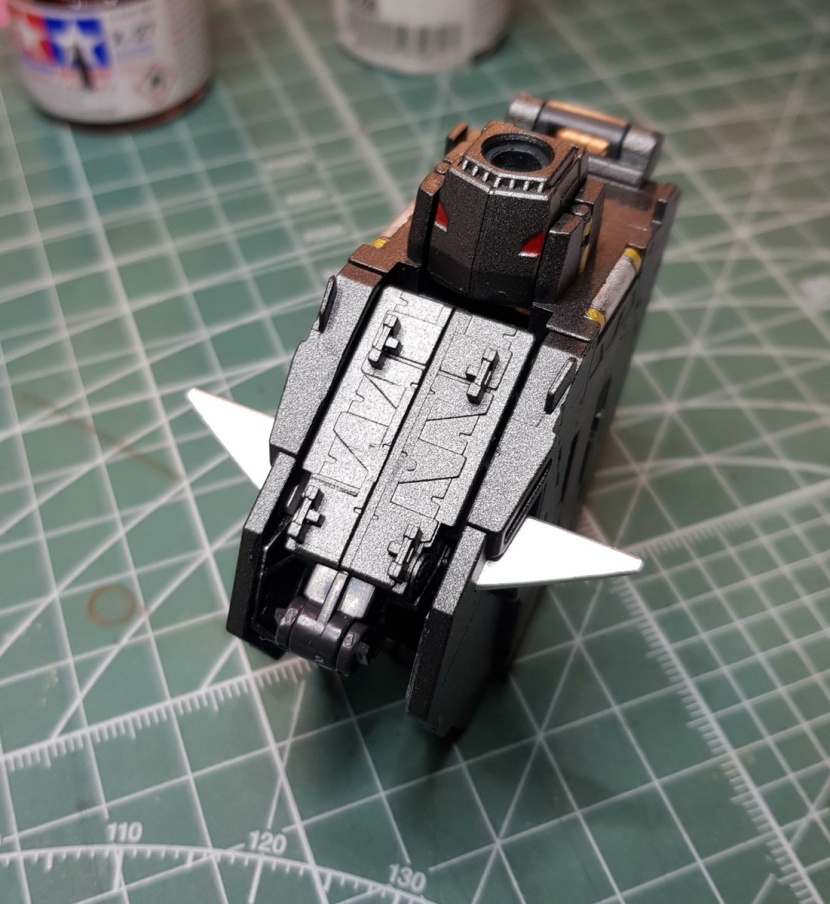
Some of the opening hatch gimmicks don’t work anymore – the sliding panels on the chest, as I said in the last blog, and unfortunately also the cool looking ones on the legs that flip open to the side. I decided pretty much during the snap build already that those weren’t going to be useable – even unpainted, I could only ever open them with a toothpick, so they would’ve needed to be modified to keep them functioning, and I don’t think I’m going to be displaying the kit with the hatches open much. I did want to do the ones on the shoulders, though, just because the detail underneath looks so cool.

Nothing you wouldn’t expect, of course – red tubing, silver raised detail, gold for some of the smaller stuff. I also masked off half of the outer flap that the thruster sits on so that it could be gunmetal on top and silver at the bottom.
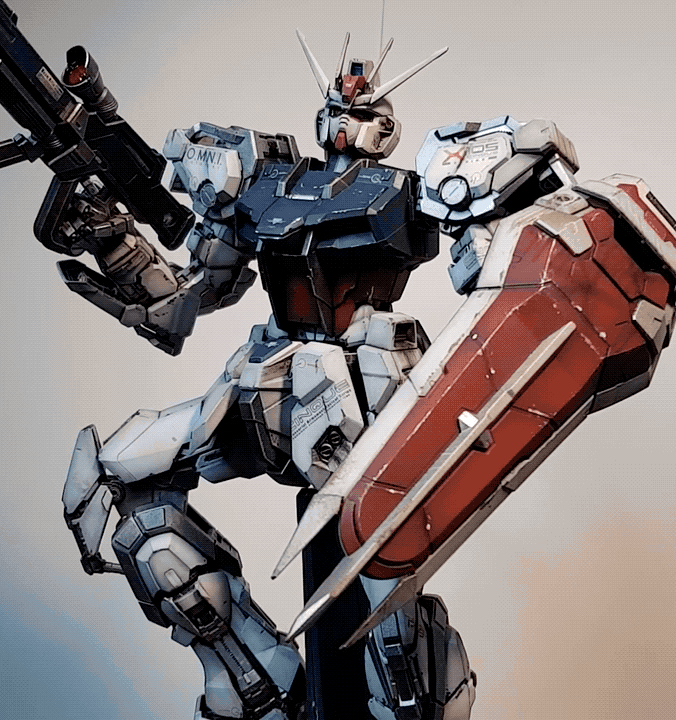
And this is where we are as of now. I don’t know why it’s so hard to get a good picture of this guy, you’ll just have to believe me that this is one of about 30.
Anyway, overall I’m really, really happy with how this is coming along. I’m spending a lot of time bitching about all the small mistakes that bother me in this blog, but being honest with myself about what did and didn’t go well is how I get better. And with all creative work, that’s ultimately the only thing that matters to me. Not to be the best modeler out there, but a better one than I was yesterday.
Also, I really have to say again what an absolute joy this kit is to work with. With the exception of what the elbow did to itself, everything here is so well designed that it still works fine after painting (although I did do a lot of masking on the moving parts, obviously), and despite it being an extremely complex kit, it’s just fun, top to bottom, and it looks amazing.
We’ll see when I can post the next update here – I won’t be around much over the summer, so I’ll just be chipping away a little at a time on the Aile Striker from here on out. I’m kind of hoping I can do something or other with the release of Zoids Wild, but not before the start of July.
Perfect Grade Strike Gundam WIP 1.5
I wanted to post a huge WIP update on my Strike today, but as it turns out, I’m having rather massive problems getting decent pictures taken of this damn thing because it’s too big. So instead, here’s my Youtube video. Rest assured that I’m not abandoning this blog for Youtube, but I wanted to get this update out there one way or the other, and if I can’t post the blog, I thought I should at least post the video here.
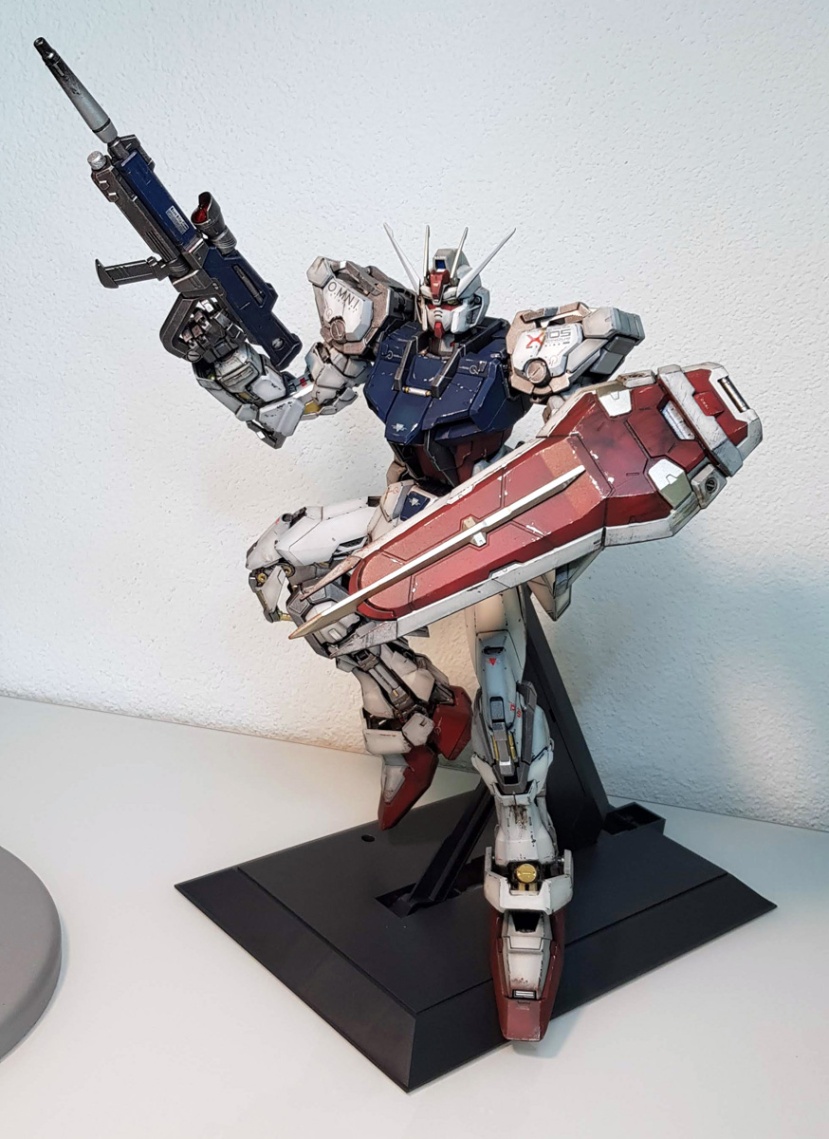
Anyway, the short version is, the MS, the shield and the gun are done, and I’m moving on to the Aile Striker.

PG Strike Gundam: WIP
If you just got here and your first reaction was “I’m not reading all that”, you can also check this build out on Youtube. This blog has far more info than the video, though.
Anyway, I don’t usually write WIP blogs, but I’m not sure I’ll have anything else to post this month, this build is likely going to drag into July, and I’m really itching to talk about it a bit. I’ll have a full review and photo gallery whenever it’s actually complete, but in the meantime… here’s where I am with my PG Strike. I posted a review of the snap build almost a year ago at this point and only now just finally got around to painting the kit.
I went about this one in the same ass-backwards way as on the MG RX 78-2 3.0 where I painted the armor first and then the inner frame. This continues to make perfect sense to me because a) seeing the kit with the armor on allows me to decide which parts of the inner frame to detail paint b) if I gunk up the inner frame with weathering (or while pre-shading the head, as I did here), I can paint over it afterwards and c) I have to pry the armor off for topcoating when it’s all done anyway because I want a shiny finish on the inner frame and matte on the armor.


When the armor was all done, it looked like this. Looking at it now, I almost miss the glossy finish and I kind of wonder if I shouldn’t keep that look sometime, somehow, on a different build, if I can find an excuse.
Notice also that the stand, while very functional, is beyond ugly. I don’t know what I’m going to do about that yet, but this is unacceptable.
Also, because I did it anyway and it’s kind of fun, here’s a comparison of the four stages of painting the armor. First the unpainted picture from the earlier build review, then just pre-shaded and gunk washed, then with chipping and heat streaks, and finally with the few rust streaks I did.


I did this mostly because one of the reasons I put off painting this one for so long was that I liked it in its unpainted form. Looking at this comparison now, I don’t know what the hell I was thinking. It’s really kind of funny what a difference painting makes.
Anyway, once that was done, I decided to paint the inner frame in sections. I usually prefer to take a more assembly line approach to my builds – prime everything, base coat everything, etc. But the idea of dismantling the entire PG Strike frame and painting it all at once was… frankly soul-crushing, just thinking about it, and so I decided to break up the process a bit, mostly to keep myself motivated. It also helps navigate the build a bit, though, because you can still remember where things go if it hasn’t been a week and you’re not looking at 200 parts.
I started with the waist section, mostly so that I could mount everything on the stand as I go.


As you can see, I decided to do quite a bit of detailing on the inside of the skirts. I actually think this stuff still shows – even if you only sort of see it peeking through, your brain registers that there’s detail there and not just a big chunk of gunmetal. It was also just really fun. I’m actually seriously thinking about getting some Warhammer miniatures because I’m having so much fun brush painting the details on this kit.
And here’s the waist section all put together.


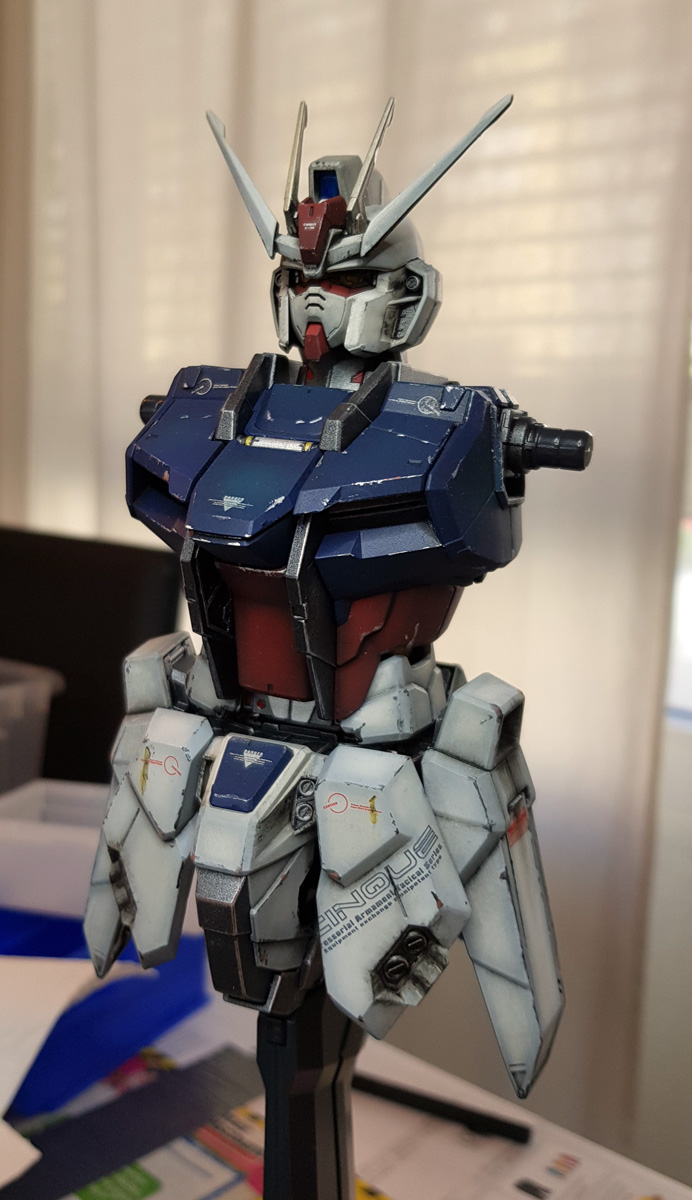
Working my way up, I did the torso next.
The lower half (you know, the actual waist, as opposed to the pelvis that we call the “waist unit”) gave me enough grief when I tried to put it together unpainted, and of course this didn’t get better with the paint on it. Luckily, this unsightly gap here isn’t visible once the upper torso goes on. Neither is the detail I painted around it, but oh well.


Here’s the cockpit assembly. I painted the pilot figure as best as I could given its tiny size and the fact that I couldn’t find any reference online, plus some inner detail where it’s somewhat visible from the outside.
These triangular fins are the same clear piece that’s painted clear red on the inside. On the outside, I painted them chrome silver, hoping to get a silver line on the chest vents, but you can really only see them if you peek in and the light hits them just at the right angle. Same with the gold/silver pistons next to the neck here, these get completely covered up by other parts and only barely show through a tiny slit if you know where to look.
What works beautifully, though, is what I did with the collar here.
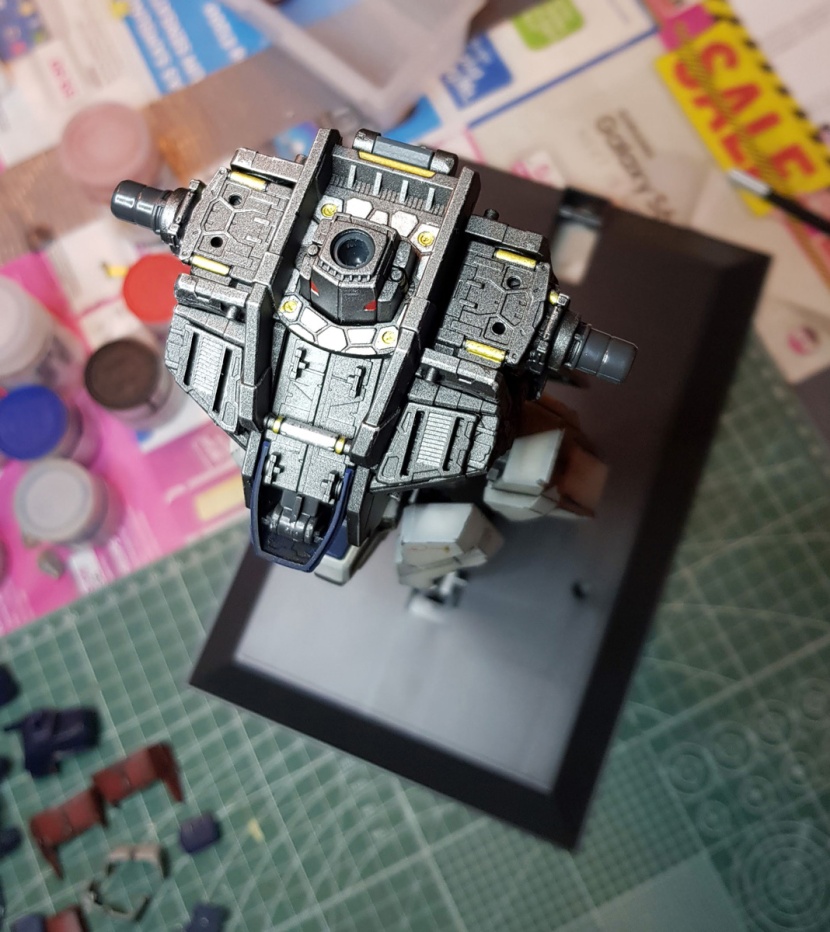
All that detail really helps make everything look more mechanical and believable on the finished assembly, and the gold pistons on the shoulders actually sort of show up as well.


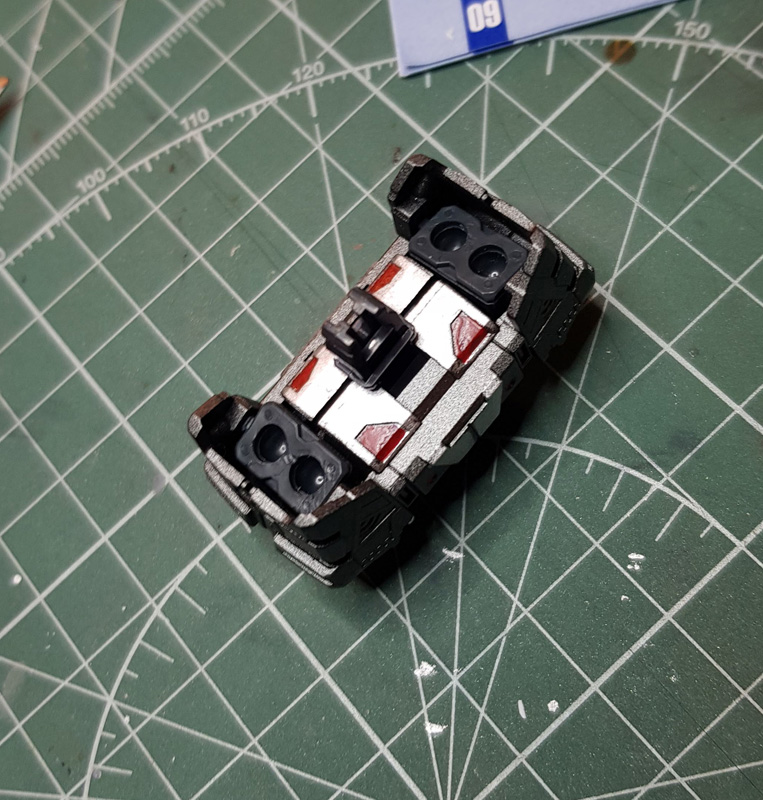
And that was the torso all done. I also painted all of the pistons gold and then drybrushed them white. Oh, and the inside of the hatch on the back looks like this.

It does fold out, so this isn’t completely pointless, but once I’ve got the Aile Striker on, this’ll never be seen again.
I’ll also paint the stuff under the hatches on the shoulder armor, so at least I’ll still be able to display that if and when I want to. The sliding panels on the chest don’t work anymore now that they’re painted, but I kind of expected that and didn’t do any detail painting underneath.
I also finished the beam rifle and the shield at this point. Pretty straightforward stuff – the beam rifle is gun metal with a few hand painted details in chrome silver plus the same blue over black primer as everywhere else, the camera lens is painted clear red on the outside and chrome silver on the inside.


The shield, like the gun, is considerably more scratched up and dirty than the suit itself, but that’s very much intentional – I figure this equipment would suffer much more wear and tear and be less meticulously maintained.


One thing that bugs me here is that the titanium gold pieces (my usual replacement for Gundam yellow) were a bit too obviously not weathered along with the rest of the shield. They do have white drybrushing on them, but at the moment they look a bit too pristine for my tastes, compared to the rest. I may try to alleviate this, but the problem is that they need to be topcoated separately and they’re basically never coming off again. We’ll see.
I haven’t finished the Grand Slam sword yet, and we’ll see what happens there. Once I had painted the handle, I realized that the chrome plated blade just looked ridiculous next to the painted parts, so I want to strip the chrome, but so far I haven’t had any success. I’m not a fan of this thing anyway, so at least if I end up destroying it in the attempt, I can’t say I’ll really care too much. Painting up the blade could be fun, though.
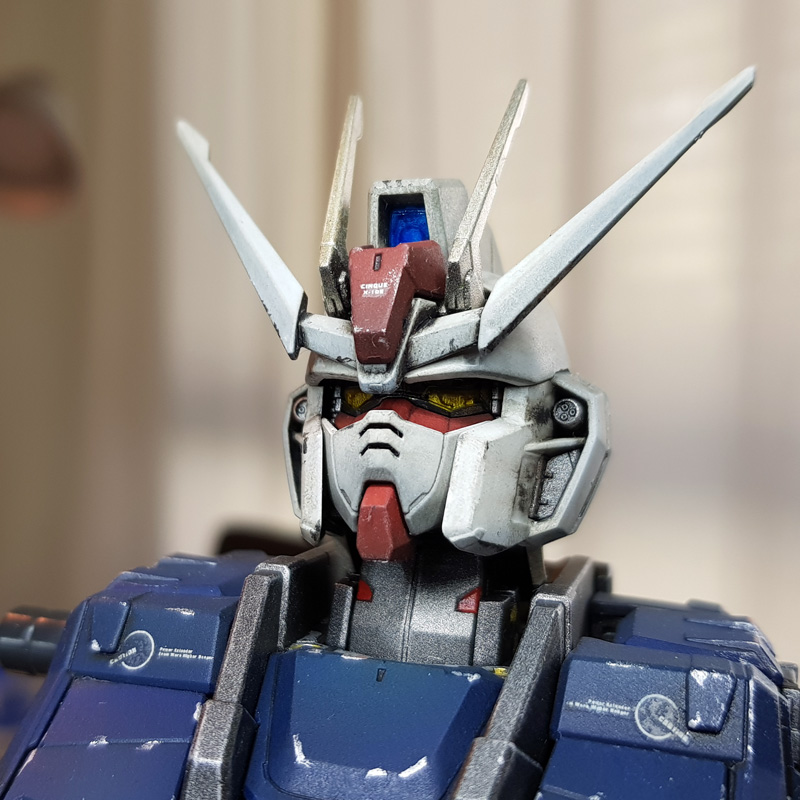
The last thing I’ve got so far is the head. Now I complained in the build review that the pre-molded eye piece with the clear and grey parts was dumb because it couldn’t be painted, but as it turns out, I was wrong. Here’s what I did.
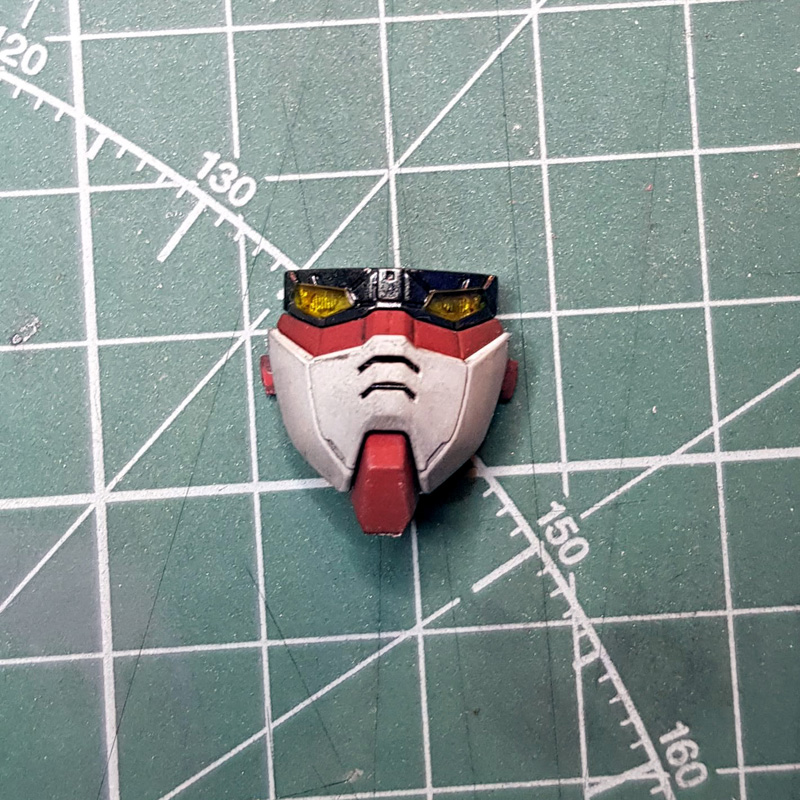
The clear parts are actually slightly raised – just a fraction of a millimeter, but enough for a small detail brush to bump up against them, so painting the area around it gun metal was a piece of cake. I also painted the whole thing gold leaf on the inside and clear yellow on the front for the clear parts, and boom, anime accurate shiny yellow eyes.
And yes, this means I won’t be able to use the LED anymore, but as I’ve said numerous times, I really think these head LEDs are pointless, especially the one on this kit because it just doesn’t work properly, and even when it does, it’s not nearly as bright as I’d like it to be. So I decided that if I was going to display this kit without the LED, I was going to paint it to look good without it, and I’m pretty happy with how it turned out.
Sadly, as per the rules of model kittening, for every small experiment that goes right, something simple that you’ve done a million times before goes wrong.
I wanted to paint the cameras silver on the inside and clear blue on the outside, and I just couldn’t for the life of me get a decent coat of blue on the big one. You can’t really see it anymore now that it’s inserted, but the paint pooled in the middle, and even after stripping and reapplying it did the same thing again, so I gave up. Sigh.
Otherwise, the head was a pretty straightforward affair. Since all the mechanical detail gets covered up, I just drybrushed it chrome silver over the gun metal and left well enough alone.
And that’s it for this WIP update. As I’m writing this, I’m getting started on the limbs, which will no doubt take a good bit longer than the torso what with how complicated the legs are. I kind of want to be done with the suit before the 21st because that’s when I’m going away for work until the end of the month, but we’ll see. I’ve been at it for months, so no point in rushing things now.
Not to mention I haven’t even primed the parts for the Aile Striker. Ideally I’d have that painted and gunk washed by the 21st so the oil paint can dry while I’m gone. And then there’s the base. I don’t even have a plan for that yet, all I know is I’m not leaving it unpainted.
