Tagged: bandai
All My Stuff, February 2018 Edition
So here’s what happened, right.
On one of the Facebook groups for terminal supergeeks that I post on, I mentioned that I have around 200 motorized Zoids on display, and I was asked to post pictures of what that looks like. So tonight I thought I’d just snap a few pictures of my shelves in bad lighting and leave well enough alone, but then I realized that of course I had a lot of Gunpla and other stuff mixed in with the Zoids, and a lot of what’s on the shelves requires an explanation, and I, uh, well, here’s a bunch of shitty pictures of my toy and model collection, taken in the worst possible lighting conditions, with way more blathering about them than anyone in their right mind would want to read.
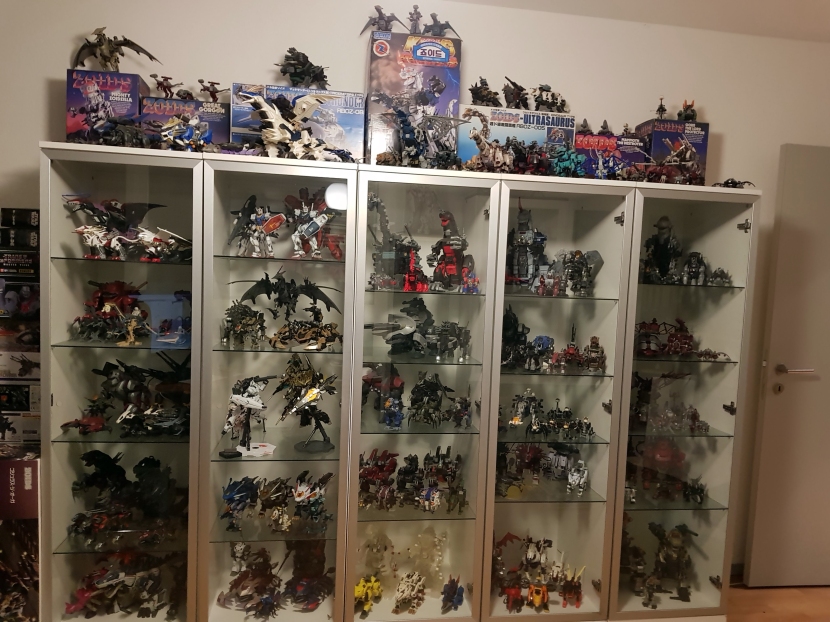
And let’s just jump in at the deep end. These five cabinets are from an Ikea series of office furniture that no longer exists, and I really, really wish it still did so I could buy more of them. What you’re looking at, behind glass, is, from left to right then top to bottom:
- OJR Gilvader, King Liger, Battle Cougar and Gun Bluster; a complete set of Zevle with sadly unpainted pilots (I will get around to that one day, I swears); two Iron Kongs with swapped parts plus all of the customized and painted motorized models I’ve ever produced (this number is pathetic and it needs to change), plus a bunch of NJRs and other post-90s stuff at the bottom.
- Couple of MG Gunpla, painted and unpainted; all of my fully painted HMM Zoids, my MG Unicorns (Unicorn, Banshee, Phenex) plus the HGUC FA Unicorn tucked away because I don’t know what to do with it, and more post-90s Zoids at the bottom.
- OJR Ultra Saurus, Deathsaurer, Wardick, Gorgolauncher, and Brachios Mk II; OJR Madthunder and Dibison; lots of NJR and other post-90s stuff, including Crystal Deathsaurer and Gojulas on the bottom. These are down there because tbqh I hate them.
- OJR King Gojulas, Mammoth, Hammerrock and Storch; two shelves of OERs including a complete set of whiteheads; later stuff.
- Three more shelves of OERs (I have one of each in there, not including some more obscure stuff like the brown-wheeled Tank or different production variants), and more later stuff; that red Kong in there is an IKPK. There’s also an OJR Iron Kong Mk-II next to the IKPK that you basically can’t see because of the angle. It’s really pretty much impossible to get a good shot of this whole setup because the room’s too narrow.
On top is just a bunch of NJRs and Genesis models with a few OERs mixed in for good measure that I have dupes of. The post-90s stuff up there is either not under glass because I don’t like it, because I have dupes or because it just won’t fit, like the Seismos. I’m not happy about this, but whatchagoindo.
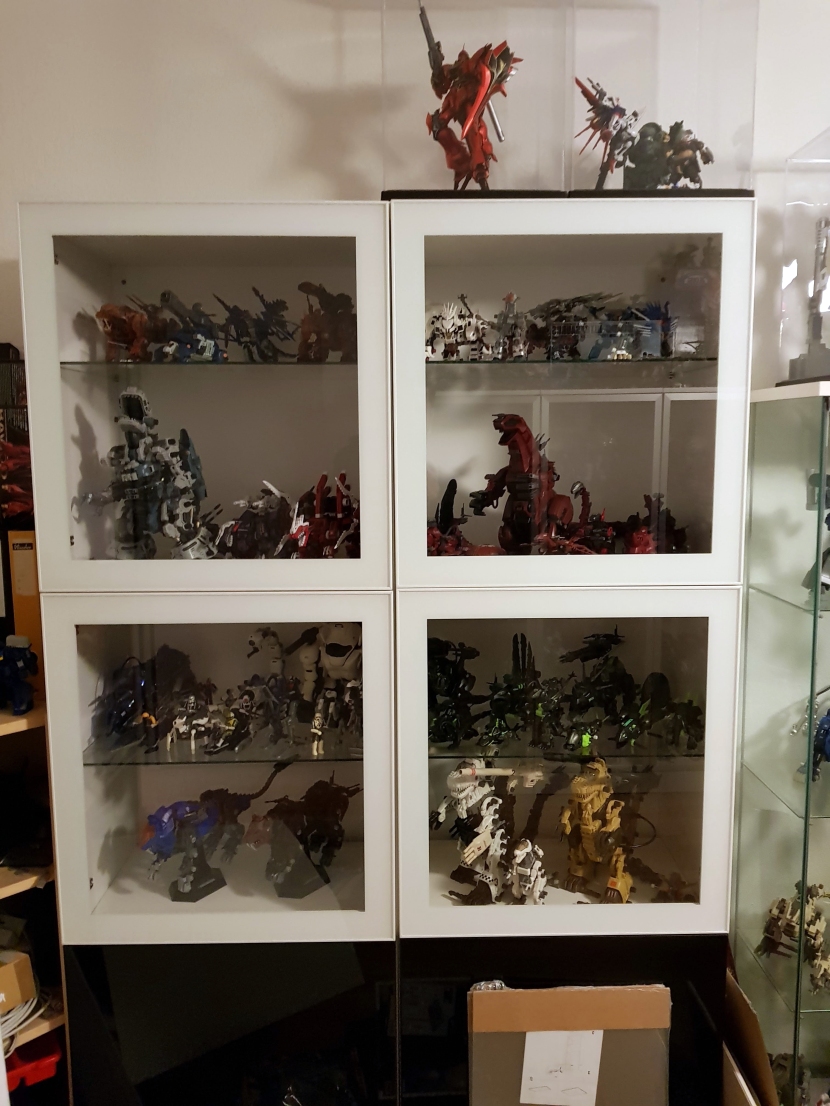
The second biggest display is made up of two shelves from Ikea’s Besta series. I can’t really find anything better at Ikea at the moment that has reasonably clear glass doors and isn’t wide open to dust like the Detolf on the right there, but it’s too dark in there and those stupid white frames drive me nuts. Anyway, top left is a bunch more HMMs, some partly painted, some completely bare, bottom is a complete set of Z24s and both Masterpiece models on their display stands. Top right is more HMMs and a Bloody Deathsaurer with a bunch of other NJR models that all share the same red color. This looks really cool up close, but for now you’ll just have to take my word for it. Below is a complete set of all black/green Guylos Zoids; the Deadborder and Dark Horn are the OJR versions, the rest are the limited ones that came out later. Below is a reissue Gojulas Mk-II, a Gojulas the Ogre, plus a TZ Strike Zilla and that nameless Terrared from the TZ line that only came in a bag.
On top are four Gunpla kits that I’ve blogged about – the candy painted Sinanju, the RG Strike, the 1/100 Gusion and the HG Grimoire; the display cases are “Model Covers” from a Japanese manufacturer called Hobby Base. They’re not that great looking in real life because they’re really just made out of thin clear plastic, almost like clear files, but they do seem to be 100% dustproof and they’re pretty affordable.
The Sinanju is meant to be in one of these, the others are really just in there because the case used to hold the PG Strike along with the RG, and the PG is currently in pieces because I’m painting it, so I put the others in there to protect them from dust until I get around to disassembling and painting them. And then I’ll need a bigger case because I’m adding the Aile pack to the Strike and it’ll be too big. Long story short, I don’t know what to do with this model cover or the stuff that’s in it, so it’s just kinda up there for now. Until recently I had a bunch of unbuilt kits stacked up there and I’ve just moved all of that to make room for more model covers that I have on the way from HLJ. And then I’ll figure out how to make this part of the display actually worth looking at again.

Here’s the Detolf next to the previous shelf. I actually hate this one and it sucks that this picture takes up so much space, but I guess it can’t be helped because of the dimensions. Up top is my PG Unicorn accompanied by its HGUC counterpart (I still need to do a writeup about this one, it was my first gunk wash), then three MP Transformers that I happen to have (that’s the original Optimus, and I still prefer it to the later version, even though it’s ridiculously out of scale), the Dino Expo set and a couple of Genesis Zoids that are just kind under glass because they always have been.
The Detolf seems to be pretty popular on the Gunpla internets, but I think it’s a shitty shelf. It’s not remotely dust-proof, terrifyingly wobbly, and it’s too narrow. I guess it works a bit better for Gunpla because they’re mostly vertical, but for Zoids, it’s crap.
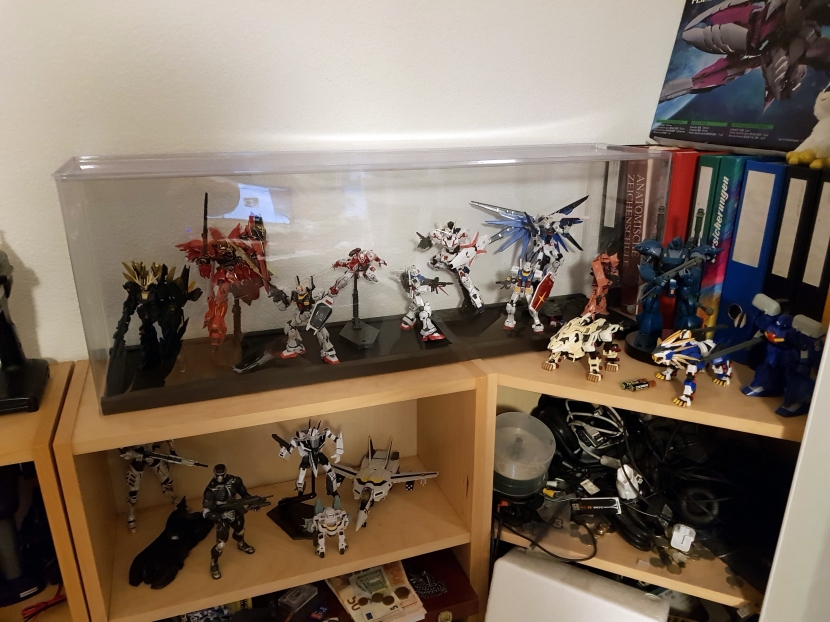
Here’s another Model Cover with most of my 1/144 kits. All RGs except for the Banshee, and I think with the exception of that GP-01, I’ve already done writeups about all of them. In the front are a Kampfer and a Xekueins from the Days of No Painting plus a KFM Liger Zero and a ZA Murasame Liger.
Note also the box of the Kyrosa weapons set. Spoiler alert: I’m building a Mechanicore Kyrosa at the moment. Will post WIPs… eventually. It’s taking forever.
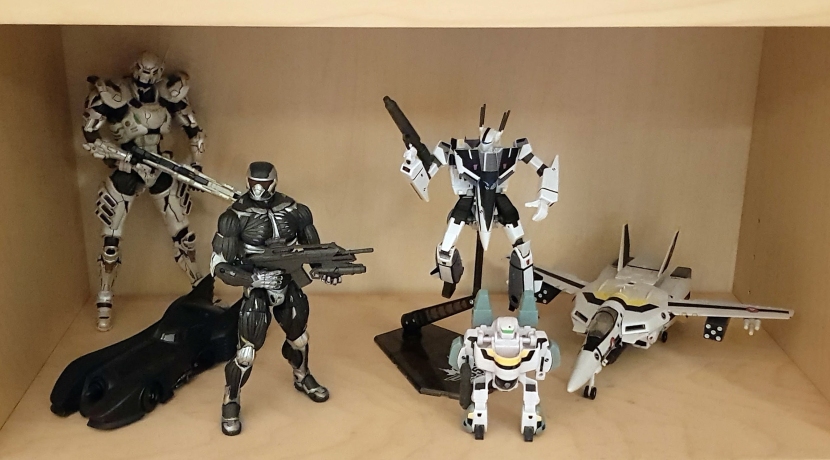
This is the shelf underneath, another thing that currently makes no sense. You’re looking at a Bandai Valkyrie, a Yamato Valkyrie (the one in jet mode), an SD Valkyrie of unknown origin, a Crysis 2 Alcatraz and a Vanquish Sam Gideon, and a Bandai Batmobile that’s mostly unpainted and thus doesn’t deserve protection from dust.
This will change soon; I have two more Macross action figures on the way that will form a nice display with these three, and I bought another Bandai Batmobile to do it again with a proper paintjob. The two videogame action figures are probably going in boxes.
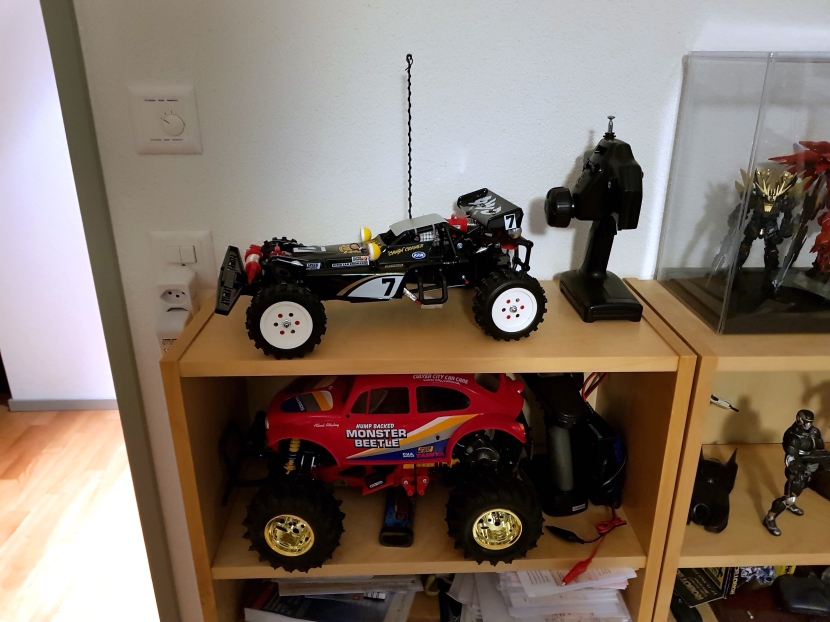
And because why the hell not, here are my Tamiyas. Hotshot and Monster Beetle, both the reissues, of course. The Monster Beetle still needs its pilot, but I’m not done painting that one yet. I also still have an Avante waiting to be built, and then I think I’m done scratching this particular childhood itch. I do have to say that the Hotshot makes me particularly happy, though. I had this weird obsession as a kid with dune buggies, and the Hotshot is basically the archetype for me.
And that’s it. I’m always moving stuff around as I add more kits, and as I mentioned above, I already have more display stuff on the way, so I’m giving it a month at the most until something changes again here, but for February of this year, that’s… almost everything. I also have two Revoltech Star Wars figures in another room and a massive McFarlane toys collection from the 90s (i.e. before the Zoids NJR started and got me collecting what I really wanted again) that I’ll probably never display again because I just don’t have the space.
Real Grade Astray Red Frame
Yep kids, another update already. As I said previously, I’m really behind with documenting my builds, and I just finally had some time to snap some pictures. So here’s the Astray Red Frame.
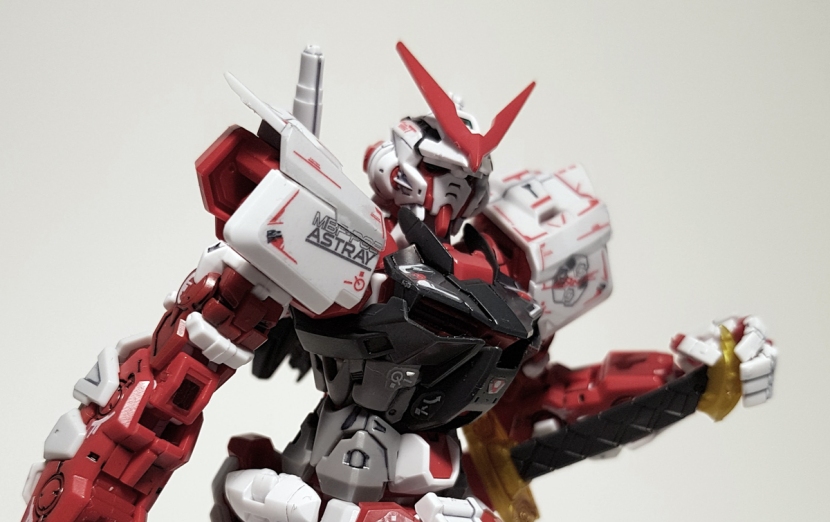
I really just bought this kit because I looked at it online one day, and an idea for a pose popped into my head that I couldn’t get rid of until I got the kit. Turns out, though, I really like this one, and I may get the PG someday. If and when I prove to myself that I can paint another PG and not just the Unicorn, that is. Anyway, here’s what’s in the box.
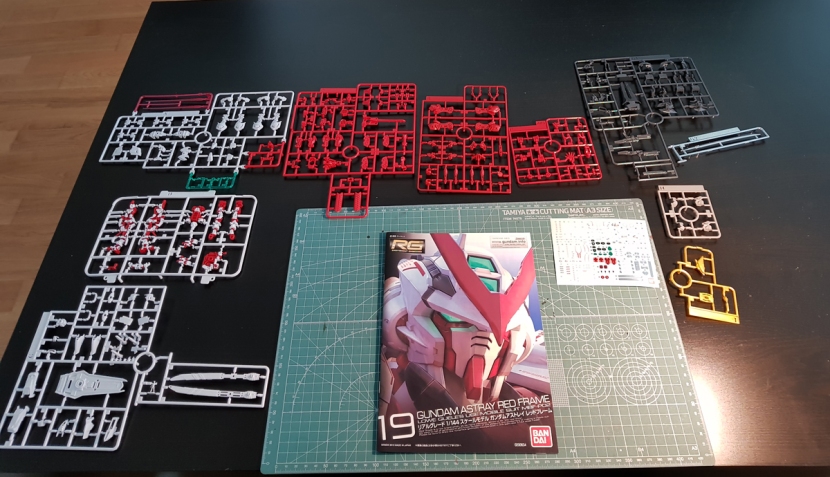
As you’d expect, it’s not much. The Astray has a lot of visible inner frame, which means few armor parts. I went with my now-standard method of panel lining everything on the sprues and then cutting/trimming all the parts before assembly here.
In a frankly shocking break with RG tradition, you don’t start the assembly with the feet, because the feet don’t come off the inner frame part for the legs. They do totally have you slap on the foot armor first, though.
There are definitely more parts on the legs than you’d think – the armor pieces layer over one another to create all sorts of interesting visuals. The inner frame is also molded in two different colors, as you can see, which looks pretty striking.
The waist section is a pretty simple affair, other than the opening gimmick that allows for extra poseability. Everything comes in two parts, though, with an inner red piece to add detail, which you probably know by now is something I really like.
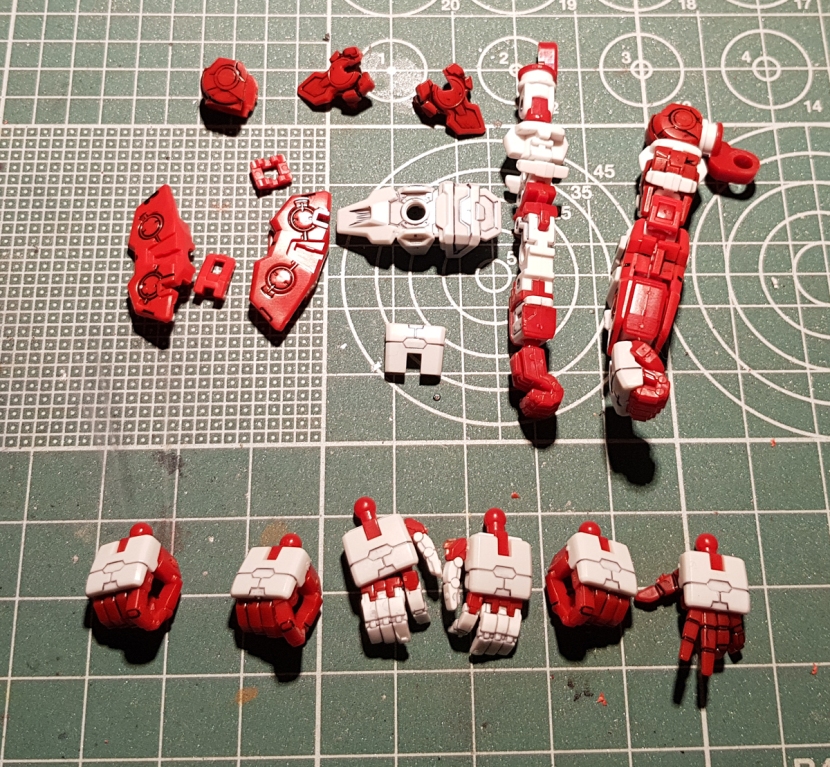
The arms are really simple, with barely any armor parts. Also pictured here is the array of hand options. Unfortunately, only the poseable hands come molded in the correct colors, but other than that, the Astray is one of those kits where they got it right, and of course you could paint the fixed-pose hands. Although white over red is a nightmare, and as you can see, I couldn’t be bothered.
The torso also has a good bit more parts than you’d think. You put the arms on first, then the armor parts. I do so like this torso design, and the RG captures it perfectly.
And here are the steps before the Headless Hessian Stage. The shoulder armor is really simple, but it doesn’t appear as boxy as it looks here once the stickers are on and you pose the kit a bit. You also add this waist piece with the side skirts. Nothing fancy here, which is why I grouped these steps together.
Regular readers will also notice you-know-what.
The head is a Real Grade head and so it’s frickin’ beautiful, of course. The v-fin takes a good bit of force to snap on, though, so keep that in mind.
The eyes here are actually just a clear piece. There’s a sticker, but I accidentally destroyed it when I put the parts together, and frankly, it’s not necessary anyway.
The backpack is maybe the most unusual looking part of this MS. It’s super sleek and doesn’t seem to serve much purpose other than holding the beam saber handles.
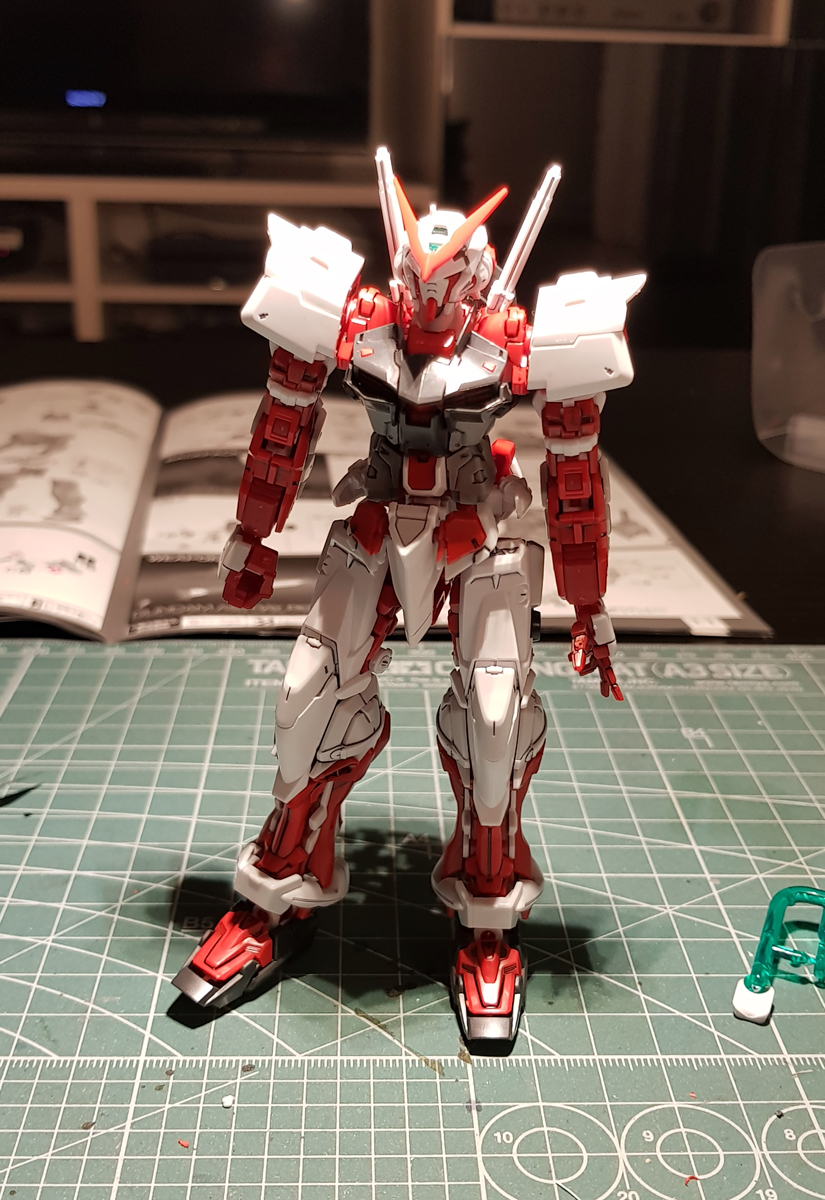
And here’s the suit all put together sans stickers and weapons. Looks pretty good already, but check out these accessories.
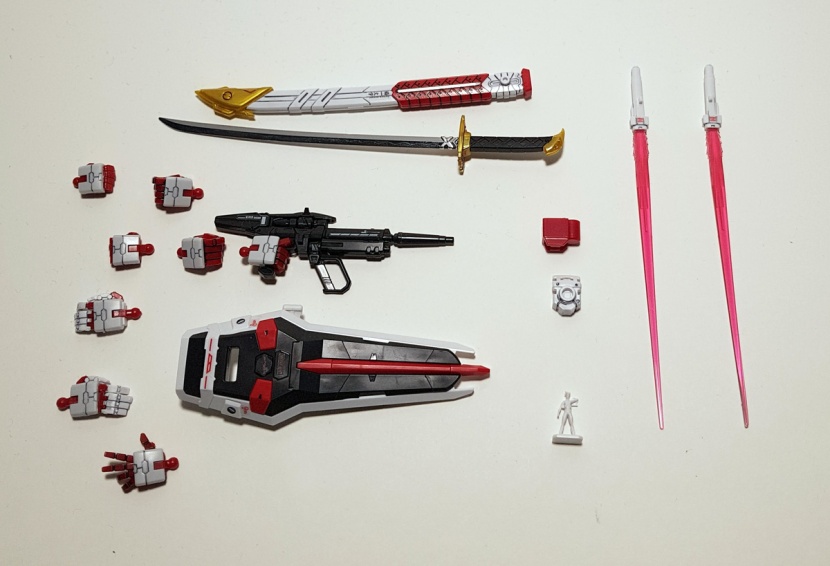
Yeah, that’s a lotta swag. You get two beam sabers, the shield, the beam rifle, the Gerbera Straight katana and sheath, an extra part to mount the sheath on the hip instead of the leg, an action base connector, a pilot miniature and the eight hands I talked about earlier. Now usually I’d complain about the dummy beam saber handles on the backpack, but the more I think about it, the more I come to favor these separate ones with the peg because the folding pegs on other RGs are a nightmare and just don’t friggin’ work. Everything here looks great and works perfectly.
Which is why I took a lot of pictures. This kit is just so easy to work with that it’s hard to resist. Everything clips into what it’s supposed to clip into and stays there. The only issues I had were the toe armor falling off exactly once, and one of the legs popping out of its socket once or twice. Otherwise, I haven’t had an RG photoshoot that went this smoothly since the Mk-II.
I will say, though, that while poseability is certainly serviceable (and it helps that things don’t pop off left and right while you’re posing the kit), it’s not as good as you’d expect it to be given that there’s really no armor to get in the way of anything here. For as spindly as they are, the ankles move very little, the disproportionately long lower thighs make a lot of poses look weird, and a lot of the joints just don’t move the way you’d expect them to and need to be twisted and yanked around to get them into position.
That’s it for my criticisms, though – this kit certainly gets my stamp of approval. It’s fun to build, looks good, poses well, it’s about as sturdy as an RG’s going to get, and it comes with tons of cool accessories. I guess some people are just going to dislike the kit’s overall appearance, but if you like the way it looks, you absolutely need to have this.
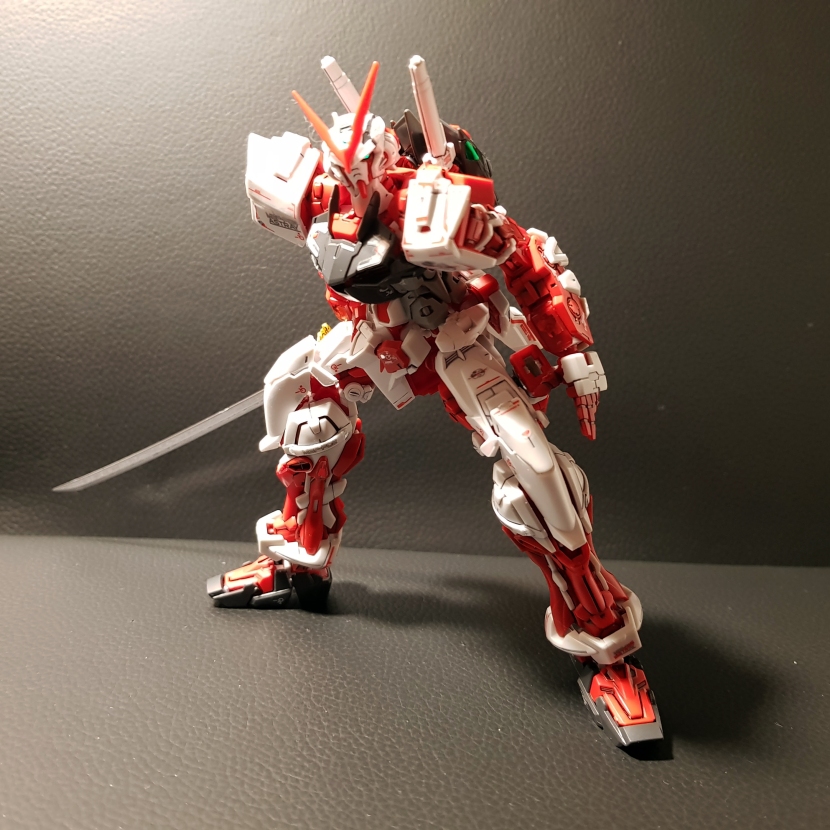
Oh, and that pose I bought the kit for? It couldn’t quite pull it off. This is as close as I got.
HG Grimoire
Okay, so here’s what happened, right. If you follow Gunpla, you probably saw the big HGBD announcement, and one of those kits is the Grimoire Red Beret. So I looked at that, looked up the original HG Grimoire, decided I liked that better anyway, and here we are. Now I did go looking for reviews before I bought the kit, and it struck me that there’s almost nothing out there. Given that this is a really nice kit for an HG, I think it definitely deserves a bit more attention than that, so I decided to write up a full build review before I take it apart for painting again. You know, at some point in the next decade when I get around to it. Anyway…
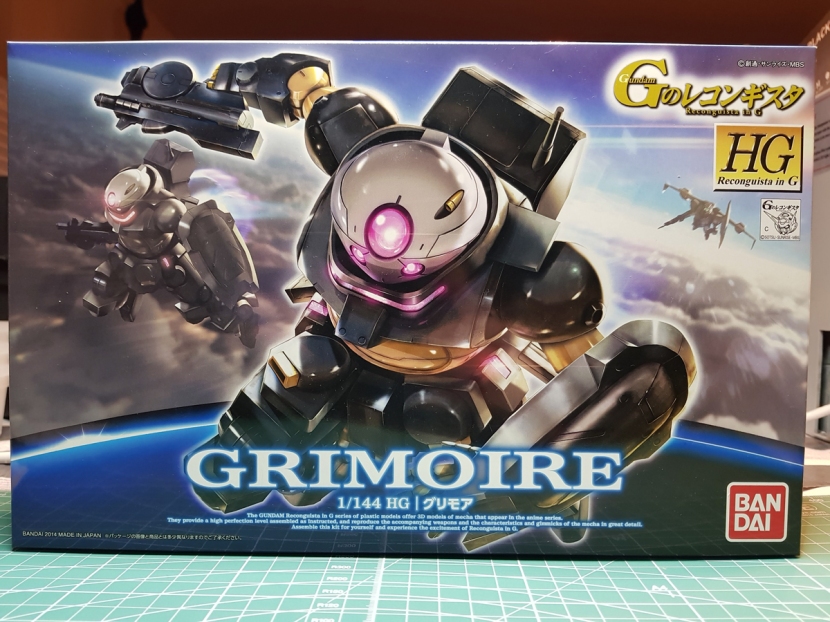
Behold ye the arts of the boxens. I’m sorry, but I really like this box, and since nobody seems to have this kit, I thought it would be worth showing.

And here’s what’s inside. I’d say this is pretty simple even for an HG, especially considering the kit isn’t even that old. The simplicity does come at a cost, though – this kit has a lot of visible seam lines, especially on the arms. Very few detail stickers, though, most of it is molded in the correct colors.
By the way, if you’re wondering about the newspaper, I tried a different setup for this review, mostly because I got this awesome new LED lamp with a magnifying glass in it, and I must say I’m rather happy with the result. And the lamp. Man, I love this lamp.
The head, tied for my favorite thing about this suit with the fact that the torso is basically a sphere, consists of a whopping four parts and a pink foil sticker that goes underneath the clear parts to make them pop. This works really well, as you can see.
As you’d expect, the torso is basically two half spheres plus some bits and pieces on top. That shiny pink stripe is a sticker. Looks okay, but it’ll no doubt start peeling sooner or later, and I’ll definitely be painting this with my usual clear over silver somehow.
The waist section is a bit more involved because there’s more moving parts. Of course the pink stripes here are also stickers, and for some weird reason, so are the vents on the rear skirt, but not the ones on the front.
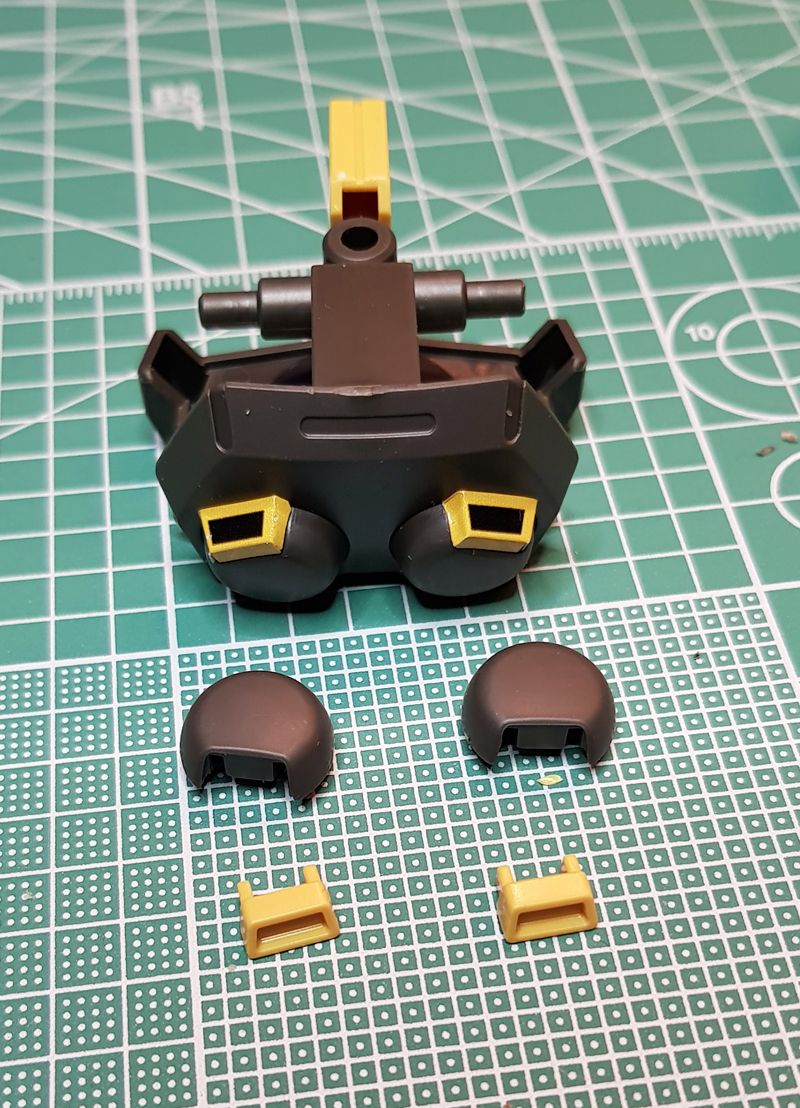
I took this picture becuase it really just baffles me. The rear skirt is one solid piece that you have to slap the stickers on, and for the front skirts, these round parts with the tan vents are molded separately. I really don’t understand why they couldn’t just mold four of these.
The elbows are… sort of double jointed. As you can see here, there’s an off-center polycap in the lower arm, but all it does is to allow the elbow a tiny bit more clearance so that it can at least move 90 degrees despite the bulky armor.
Next are the legs, which as per the laws of Gunpla have the most parts. They also look really cool, except for that round vent on the kneecap, which is another sticker. Not exactly the most poseable, but everything works well enough. The way the ankle armor clicks into the leg with that one ball joint is kind of odd. Don’t think I’ve ever seen this before, but then I don’t build too many HGs.
And finally, we have the backpack, which consists of a whopping three parts, and then you have all the sections done and ready to be plugged together.
But hark! Accessories.

It’s not much, but it’s better than you think, as you’ll see in the pose pics below. The kit comes with a gun that’s just two halves sandwiched together and a sticker for the camera, an extra open hand, a shield with an adapter (the shield is literally just one solid part) and a little Rambo knife.
You also get these two beam… rope… things. I don’t know what these are, and as much as I’m always happy when the weapons on a Gunpla kit are something a bit out of the ordinary, they’re kind of silly and I don’t know why you get two of them.
I really like the gun, though – I really wish more kits came with pistols and SMGs instead of the same old beam rifles.
As you’d expect based on the kit’s simplicity, it poses okay, but you’re not going to get it to do any kind of crazy contortions. I don’t see why you’d want to, though – having a beefy suit like this do gymnastics would just look silly anyway.
For some reason the weapons just look really good with this kit – I especially like the pose in that last picture with the wrist bent upwards, but even the knife looks cool. It’s also really sturdy and stands up pretty well – I had a lot of fun doing this little workbench photoshoot, and I can’t wait to paint this thing and really make it shine.
So in case you haven’t guessed by now, yes, I absolutely do recommend this kit. It looks good just out of the box, and painting it should be a ton of fun because it’s nice and simple. I also just love how unusual it looks – there’s enough samey-looking Gundams and Zakus out there, and we could use more weird ones like the Grimoire. Which is why I immediately preordered the HGBD version after I built this one.
1/100 Gusion/Rebake Build Review
Sometimes when you’re in the deeper throes of a painted build, it’s nice to take a break from the serious modeling work and just snap something together. I bought this kit during the HLJ holiday sale and for some reason it jumped the backlog queue in my mind. I think I was just a little sick from all them samey looking Gundam robots. This one certainly looks different.
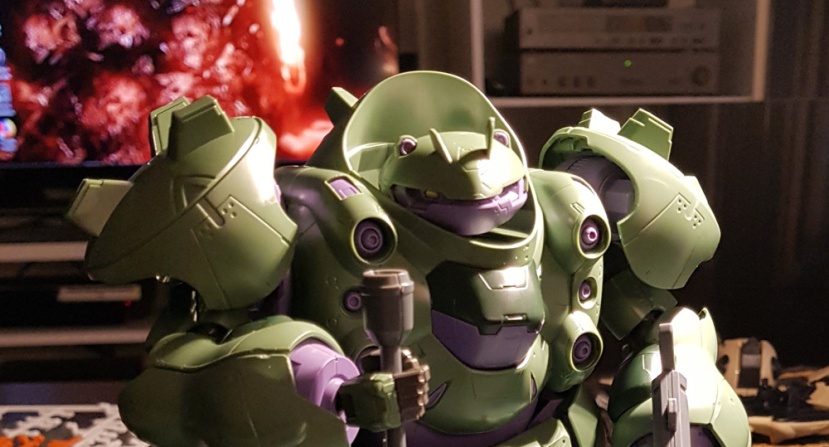
Now in case you don’t know this, the Gusion/Gusion Rebake kit contains parts for one complete inner frame and all the parts to either deck that frame out as the Gusion or the Gusion Rebake from Iron Blooded Orphans. Now I haven’t seen that show yet, so I don’t really know what all this is about, but I guess the Gusion somehow gets changed to the Rebake version, and that’s Bandai’s excuse to package the two as one kit.
That doesn’t really even make sense in theory – every single version of the Barbatos has been released as a separate kit, and those look almost the same to anyone like me who hasn’t seen the show. In practice, it means that you’re paying a whopping 5000 yen, more than some MG kits, for a no-grade 1/100 kit in a big box full of extra parts you can’t use. Because even if you don’t paint the kit, you’re likely just going to build one version and display it that way. It just doesn’t make any sense – this should’ve been two kits.
But I really wanted the 1/100 Gusion, and when HLJ had this kit on sale for 60% of the price, that put it in the range of the other IBO 1/100 kits, so I finally got one. And since I certainly always wondered how this thing goes together, given how different the two versions look, I figured I’d write up this build review in case anyone else has been wondering.
The first thing you put together is the inner frame. It looks the same as all the other IBO frames, but that’s not a bad thing – this is a really well engineered frame. It’s super-poseable, stands up really well because of the large feet, and it manages to look very detailed despite being relatively simple in terms of construction. It doesn’t have a mechanism for sliding thigh and arm armor, and you only get fixed-pose open and holding hands, but otherwise, it’s basically an MG frame.
The instructions then have you build the Rebake first because it’s built on the complete frame, unlike the Gusion itself.
First up is the chest armor. Very simple stuff, leaving a lot of frame exposed, which is good. Those torso pistons deserve to be seen.
Up next is the head. There’s a chin piece here that I forgot to add, which I didn’t notice until long after I’d dismantled the Rebake and put the kit together in its Gusion form. I guess we’ll never get to see it with its head assembled correctly. Sigh. You’re also meant to wrap stickers around the fins on the center armor piece so that they’re in their correct color. I think it’s really weird that this is necessary here – the fins are considerably larger than the little white pieces that go on the cheeks, so why are those molded separately, but not the fins? Of course this is easy enough to paint, but it’s still an odd choice.
Next are the arms and the shoulders. Nothing particularly interesting here, but also no stickers, so that’s good.
Up next are the legs and feet. There are two stickers here, but other than that, the leg armor’s nice – as you can see in the second picture, poseability stays decent enough with the armor on, although the knees don’t bend 180 degrees anymore. The more important part, though, is that the feet lose none of their articulation, thanks to that little hinge pictured in the middle that the white armor piece sits on.
Next are the skirts, including that massive back skirt which is probably my least favorite aspect of the Rebake’s design. It has its uses – it doubles as a shield and you can store all of the suit’s weapons on it. I just don’t like the way it looks, it’s too bulky compared to the rest of the suit, and the fact that it’s obviously meant to look like it’s a repurposed version of the Gusion’s back armor doesn’t help.
The backpack is pretty involved, as you’d expect, because of those arms that tuck into the big bulbous booster packs. This gimmick works surprisingly well, and the backpack is also obviously the suit’s most striking visual feature.
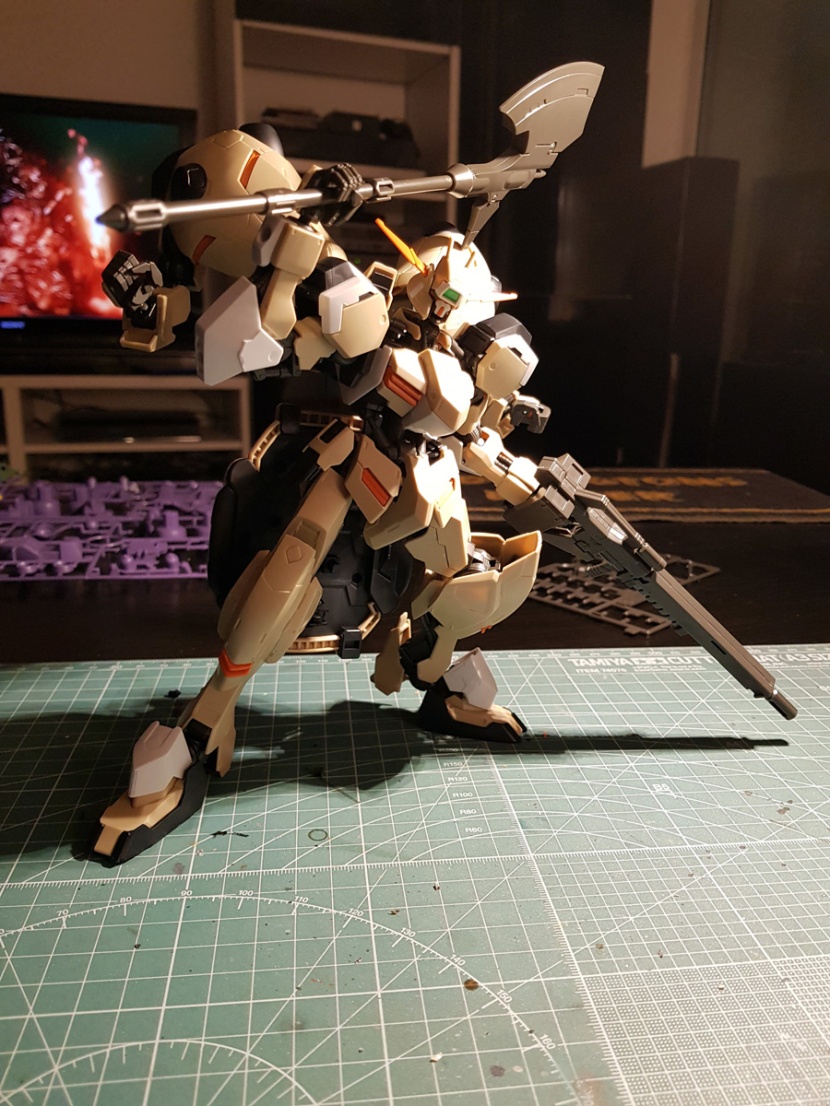
And then you add the weapons and you’re done. I realized long before I got this far that I actually like the Rebake version quite a bit and really didn’t want to have to dismantle it to build the Gusion. I guess we can add that to the list of reasons why this kit is a dumb idea.
Anyway, the conversion to the Gusion starts by stripping everything off the inner frame, including the head and half the legs. All you keep is this.
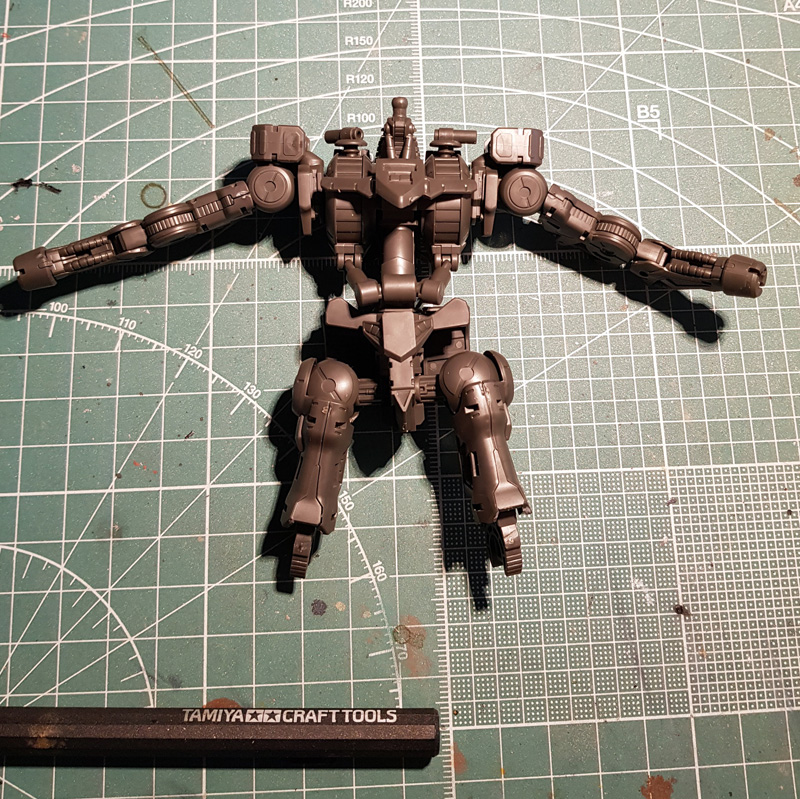
And then you unplug the arms and legs as well because they’re not attached directly to the torso frame when the kit is built as the Gusion. That explains how a suit that is basically twice the width can supposedly be built on the same frame. Because it really isn’t.
Assembly then continues with the torso. You build this massive Y-shaped contraption to mount the arms and shoulders on first plus an extension for the pelvis, then slap the armor on. It’s all hollow, so it’s not very heavy and the frame’s waist joint can support it fine.
Next is the head. The eyesockets aren’t molded in the correct color, so you’re supposed to use stickers for them, but since I’m still going to paint this kit, I didn’t do that, of course, plus it doesn’t really seem necessary – the head looks fine this way.
The arms and legs consist of a fair number of parts, but that’s just because there are thrusters everywhere on this suit, and they’re all molded separately for some nice color separation. Mechanically, there’s nothing interesting going on here, and the armor basically kills the frame’s poseability. The shoulder pads, especially, as nice as they look, practically trap the arms completely.
It’s hardly surprising, though, that a kit this bulky isn’t particularly poseable. You can get it to hold the hammer up with one hand if you try hard enough, but it’s leaning against the armor and would drop down if you so much as touched it here. And the pose in the instructions where the suit’s holding the hammer with both hands is impossible to do, I’m afraid. The handle’s too short – I’m thinking I might try to mod it using the pole from the Rebake halberd, but we’ll see. For now this has basically re-entered my backlog because I have no idea how I’m going to paint it, I just wanted to see it all snapped up, really.
So, should you get this kit? I’m not sure I’d recommend it. I thought it was a fun build for sure, and both the Gusion and the Gusion Rebake look really cool. But I’m really glad I didn’t pay full price for this, and it’s not just because of the pile of Rebake parts I now don’t know what to do with.
While the kit has a full inner frame in both versions, there’s a reason Bandai isn’t marketing this as Master Grade – it feels like an overgrown HG in many ways. A lot of sections are just one big part that could have been broken up into smaller pieces to make something more interesting, the Rebake especially has a lot of stickers to make up for the lack of color separation, and the Gusion, while solid, is less poseable than some HGs I’ve built. And yet you’re expected to fork over the price of a MG kit for it.
I guess what I’m saying is it’s a nice kit, I’m glad I have it, it was fun to build and I’ll certainly enjoy painting it, but don’t pay 5000 yen for this thing.
MG 2.0 Gundam Mk-II AEUG Ver.
Ever since I built the Real Grade Mk-II, I’ve maintained that the ol’ 178 is my favorite Gundam of all time, so this was a real passion project for me. Despite the fact that it was super-important that I didn’t screw this up, I still decided to use the kit for a couple of experiments in terms of colors and techniques, and the short version is, I’m really happy with how most of it came out. In fact, I think this is my best paintjob to date. The plan was to do a more muted version of the classic Gundam colors with dark blue, titanium gold and brownish red, plus pre-shading and weathering. As much as I like the MG 2.0 version of this suit, the colors are just way too cartoony and toy-like for my tastes. The Mk-II is a badass war machine, and I was hoping my color scheme would bring that out more.
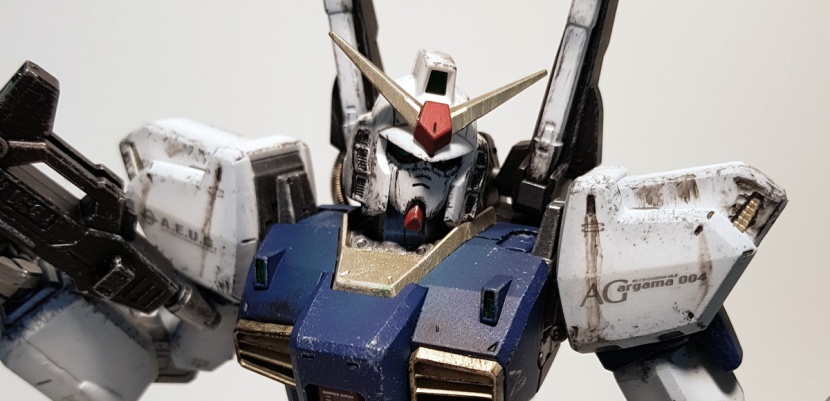
The general process here was basically a slightly updated version of what I did with the RX 78-2. I base-painted, shaded and highlighted everything, then snapped it together, did the weathering on the armor, then pried it off again for the final top coat. I did paint the inner frame before assembly, though, so no build review this time, I’m afraid. The short version of my thoughts on the build is, it’s simple, but effective. Everything is really solid and works perfectly, but the kit’s also pretty old and simple, so it’s not exactly an engineering marvel.
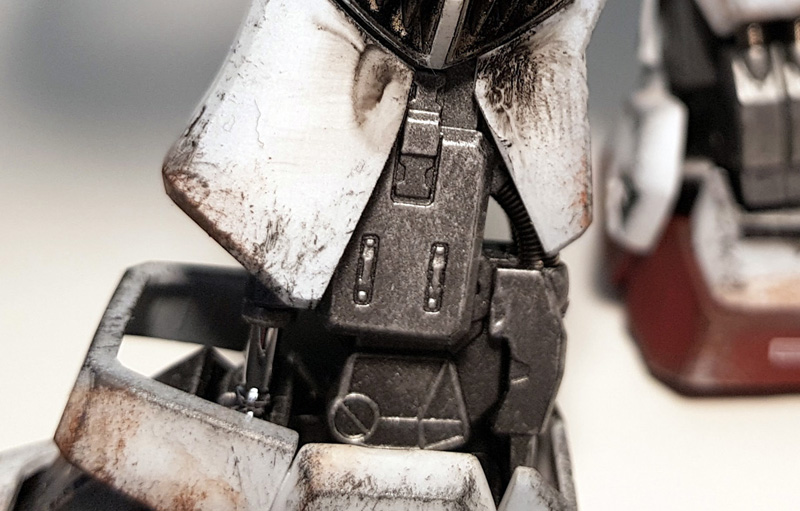
The inner frame is all Tamiya gun metal over Vallejo’s black primer. I painted all the parts separately, topcoated them (Vallejo satin varnish), snapped them together, then drybrushed everything with Tamiya’s chrome silver, followed by another topcoat. This way, everything was topcoated at least once, and it was still a relatively efficient way of getting it all done. I didn’t do any detailing on the inner frame – I briefly considered it, but it’s not like I’m ever taking the armor off again now that it’s all painted and in place. With hindsight, I could’ve done a little something on that large exposed section between the shin and calf armor halves.
I did run into a few issues here and there where moving parts that I thought would be hidden turned out to be visible and needed to be painted, and the knees would probably need to be modified to avoid the paint getting peeled off the first time you bend them. I’m really not sure how to avoid any of this with future builds, though – there’s only so much you can anticipate before you just slap the paint on and hope for the best.
Replacing the bright yellow with Tamiya’s titanium gold is something I’ve been meaning to try for a while. Ever since I fell in love with this color when I used it on the Death Stinger, basically. I’m really happy with how it came out – it still reads as yellow, but less garish and more… I dunno, realistic, I guess. As usual, I drybrushed the parts with white, then topcoated it with Vallejo satin varnish to preserve some of the metallic sheen.
The red on this kit is really bright and oversaturated out of the box, and another color from my Death Stinger build that I’ve been meaning to re-use was this red brown/red mix. This time I kept track of how I did it – it’s exactly 50/50. I applied this over a white primer with black pre-shading, and it gave me exactly the muted, desaturated red that I wanted. The scratches and chipping were done with chrome silver drybrushing.
On the blue parts, I tried highlighting for the first time, using my own custom mix. The base coat is just Tamiya’s blue over a black primer to make it darker, and it didn’t seem like pre-shading would work. Initially, I was a bit worried that the highlight on the shield was too bright, but after the decal and the weathering, it seems a lot less obnoxious and I kind of wish I’d been more bold with the highlighting on the chest, if anything.
Obviously I did the most work on the white parts. First I primed ’em white, then pre-shaded with light grey. As with the highlights on the blue parts, the pre-shading originally looked too intense, but the weathering took care of that. Now it all blends together very nicely and helps bring out the shapes of the armor more.
The weathering started with scratches and chipping in gun metal, but this time I didn’t brush the scratches on individually as I did on the Gun Sniper (where it worked) and the RX 78-2 (where it kinda didn’t) and instead used a mix of just simple drybrushing over the edges and dabbing a very frayed brush down vertically to create a few more individual scratches and chips on the surfaces. This is easier to do than detail painting and actually ends up looking more to scale.
Next I did the panel lines, which was a bit of a struggle. Vallejo’s gloss varnish is kind of sticky at first and takes some time to cure properly. And despite the fact that I really gave it several days to cure and I just used india ink heavily thinned with water, it was still a problem to wipe off excess and mistakes in some places, plus some of the panel lines, especially on the face, were made so shallow by the paint that it didn’t work properly anymore. Not too big of a deal because I was going for a weathered look and thus a bit of unevenness actually works, but it was still frustrating. As is the fact that the topcoat attracts dust like glue in the time it takes it to cure. I’m considering other options at this point, but I’m not going back to spray cans.
The streaking worked much better – I just did the vertical streaks by dabbing on a bit more thinned ink and then wiping it across the surfaces with a brush. And finally, I added some heat streaking around the vents by drybrushing on Gunze flat black, as per my usual method.
The feet also have some brown and grey sponged on, same as on the RX 78-2, because they would be dirty. I didn’t slop any dirt on the rest of the kit, though, because with hindsight, it really doesn’t make much sense that the same dirt would be on the shoulder armor.
If you look closely, you might also be able to see that I originally wanted to do the paint chipping with a sponge and actually started this way on the feet, but I realized pretty quickly that it didn’t look the way I wanted and switched to drybrushing.
Notice also that the white armor on the left foot is cracked. It just snapped in half when I tried to take it off for topcoating, so I kinda had to run with it and pretend it’s supposed to be battle damage. I stopped trying to take apart the feet, though, and instead masked off the inner frame.
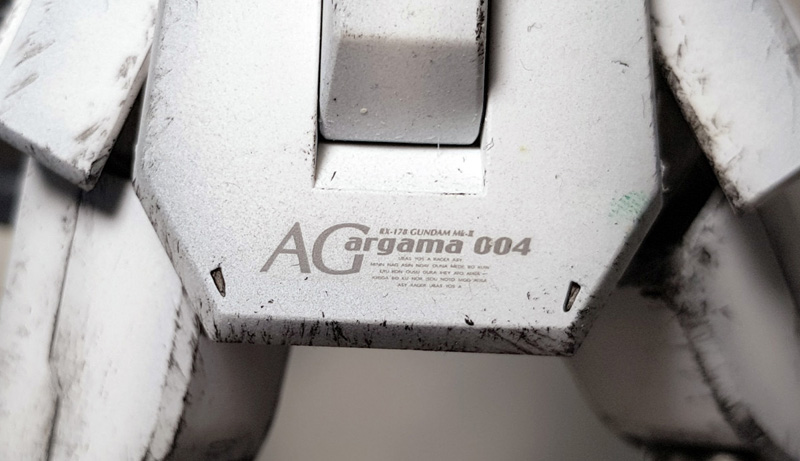
Also, a quick word about the decals – these are Bandai’s official waterslides, and they are fucking fantastic. The material somehow manages to be so thin that the edges practically disappear once they’re topcoated, yet it’s still stiff enough to be easy to work with, unlike some third party waterslides that fold in on themselves and crumple up when you move them around. The waterslide sheet also has multiples of almost everything and a ton of extra markings that I could’ve used in lieu of the same grey box everywhere if I wasn’t such an idiot and had realized it early enough. I’m really happy I got these.
The backpack is black with silver drybrushing to match the guns and because I didn’t know what else to use here. Notice also that I replaced all of the cloth tubing with coil springs from Wave. The cloth tubing is purple to match the color of the inner frame, so it had to go, and I’ve always liked the look of these springs.
Doing this was a gynormous pain in the ass, though. The springs are the exact same diameter as the cloth tubing, but since they’re not elastic, almost every part they come in contact with needed to be modified to make way for them, and I also broke off one of the parts on the knees that you slide a piece of tubing on because I applied too much pressure. I’m very pleased with how it came out, in the end but this was clearly the most troublesome part of the build.
Once all the weathering on the armor was done, I pulled it off the inner frame again to topcoat all the parts individually. Apart from the aforementioned leg armor piece breaking in two, I managed to do this without damaging anything, but I really need to either give up on shiny inner frames or start modifying armor pegs so taking the pieces off for topcoating doesn’t take two hours anymore.
The final touch was the cameras and the vents, which I wanted to keep shiny and thus added after the topcoat. The cameras are clear green over silver, and the vents are gunmetal. I actually painted the gunmetal sections on the ankle armor before the final topcoat, but I quickly realized that was a mistake. They were easy enough to mask, but it’s really just poor planning.
As for accessories, you get what you’d expect with a Mk-II: the rifle with two spare clips to attach to the shield, the bazooka plus one spare ammo pack, the shield, the vulcan headphones, and two beam rifles. Like the suit itself, it’s nothing fancy, but it all looks great.
The dark parts on the bazooka were painted black with silver drybrushing, then topcoated semi-gloss. The barrel has some mild pre-shading around where the dark parts connect plus, obviously, drybrushed soot around the muzzle. I also painted the rear vent grill silver and the camera clear green over silver.
The rifle was really straightforward, as you can see. Gunmetal and black, silver drybrushing on everything, clear green on the camera. Also, the usual black soot around the muzzle. It thought about doing some detail painting, but it looked good as it was, and with the general muted look of the build, I didn’t want to clutter up the gun like a christmas tree.
The main attraction in terms of accessories is the shield. I dunno, I just love Gundam shields for some reason. The colors are the same as on the suit – blue over black primer, the brownish red for the slit, white with light grey preshading and titanium gold where the yellow stickers would go. The projectile impact mark was done with the same drybrushing technique as on the RX 78-2; that just worked too well for me not to recycle the idea. I also chickened out and didn’t do any actual impact damage again. The rest of the weathering effects are the same as on the suit itself – chipping, drybrushing, streaking.
The bad news is that since I also painted all the inside mechanical parts gunmetal, the shield doesn’t contract anymore and I had to shave off a good bit of plastic on the inside to get the parts to fit once they were painted. Oh well. I like it better at full size anyway.
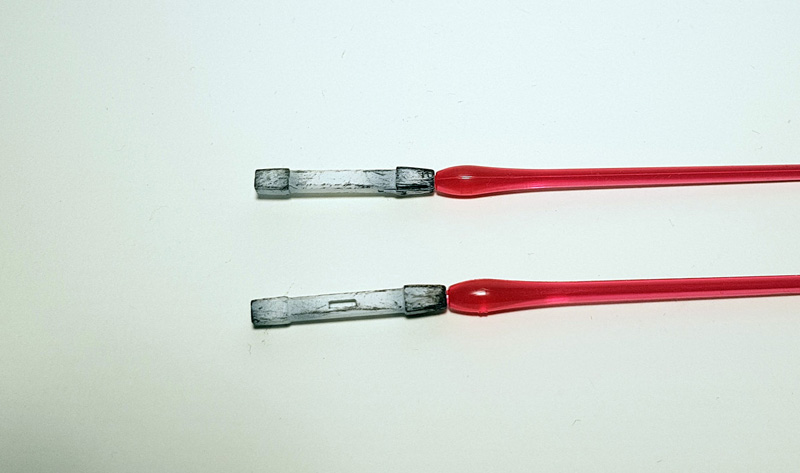
Nothing much to say about the beam sabers – some mild pre-shading, scratches, and heat streaks because it really is a science fact that beam saber blades cause heat streaking. Honestly, you guys.
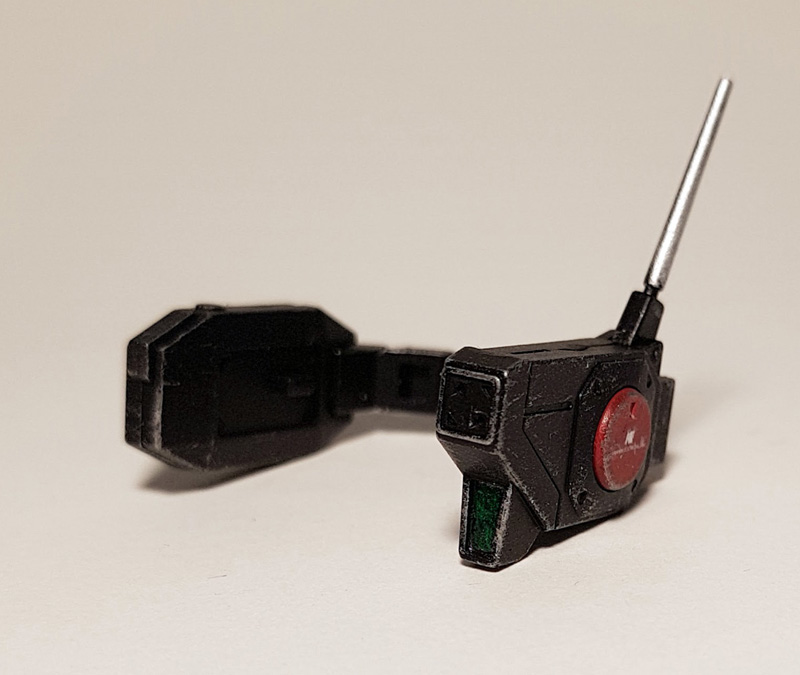
And finally, the vulcan headset. Same stuff as everywhere else here, except I painted the antenna chrome silver. Black with silver drybrushing, clear green over silver for the camera, brownish red for that one round piece, you get the idea.
The kit also comes with a diorama base, by the way, but I decided not to use it for the time being. I much prefer displaying my kits in action poses, so it just seemed like a waste of time.
And here he is all put together. Poseability, as you can see, isn’t all that crazy, but certainly good enough for a kit that’s well over a decade old at this point. The legs have sliding armor parts, possibly a first for an MG, and of course that’s become a staple of Gunpla design now. Everything else just does its job and looks good doing it, really. The one thing that really kind of sucks is that the hip joints are just a polycap on a ball not the modern universal joint we’ve come to expect. This really doesn’t work well and hampers poseability a good bit. No Seed pose with this one.
As I said at the top, I really think this is my best painjob to date. Pretty much everything came out exactly the way I envisioned. The muted color scheme works better than I’d hoped, and I finally got the pre-shading right. The weathering is a bit heavier than I’d planned, but the more important thing to me is that it looks more to scale than on pretty much all my previous weathered builds. There’s still stuff I would go back and change if I could, but there always is, and I feel like I’ve learned a lot from this build. Maybe what makes me happiest is that I finally got vertical streaking that looks the way I wanted.
I’m thinking what I have to try next is some different paint types and materials. I’m still working more or less exclusively with water-based acrylics, and I really want to try some oil paint washes and pigments. I was actually originally going to use pigments for the dirt on the feet here, but I didn’t have the right color, and I knew the sponge would work, so I defaulted back to that. I also really need to start puttying seam lines. This kit has some nasty ones that I wish I’d fixed, but I’ve never done that before. We’ll see.
For now, I’m really enjoying how satisfying this build was. Everything worked more or less exactly the way I thought it would, so while it all took longer than I expected, the whole process was more or less frustration-free and fun. I picked up some new tricks along the way, and the end result looks exactly like the very specific idea I had, except better.
Oh, and before I forget, do I recommend this kit? I most certainly do. At least if you don’t mind the OOB color scheme or intend to paint it. It looks a tad dated at this point and doesn’t have the amount of surface detail we’ve come to expect of Gunpla in recent years, but other than the hip joints, it can still hang with modern MGs in terms of poseability, and it’s really, really solid. Nothing spectacular or unusual, everything just works really well, nothing pops off, and the build is fun.
Real Grade Aile Strike Gundam
Yeah, I know, where the hell have I been. Like I said last month, I have actually been building lots of things, I just really haven’t had time to take pictures. Winter means it’s usually dark when I’m home and since I rely on daylight for my photoshoots, it’s been hard to find time to snap good photos of my build. I may have to get a photo booth or just live with night pictures for the next few months.
Anyway, while I was waiting for the Skygrasper to go with my PG Strike, I decided I’d build this kit to tide me over. I was also in the middle of painting an MG Banshee Norn, but since I was kind of going through a slump with that one, I figured maybe actually finishing a kit would, I dunno, help me regain my Gunpla mojo.
Also, Real Grades are like crack, and I can’t stop buying them.

The RG comes with the Aile Striker unit, obviously, unlike its PG ancestor, but the parts count still isn’t that crazy. It’s only the 3rd kit in the RG line and still relatively simple.
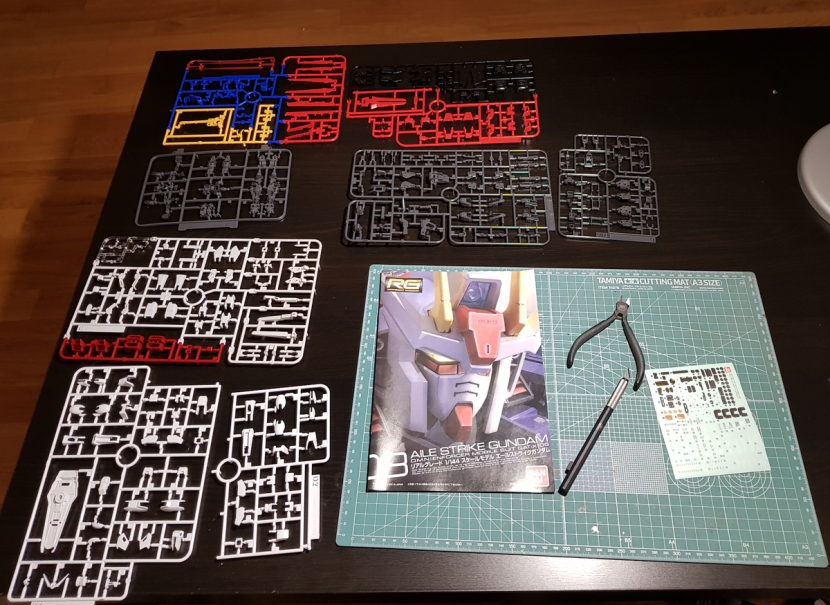
Note also the small sticker sheet. There’s an obnoxious amount of foil stickers, but only 74 regular markings, not counting multiples. Certainly far less than for the RX 78-2 and the Zaku that immediately preceded this kit.
Partially motivated by this, I decided to try something new and panel line this one. I never did this on Real Grades before – many of them look cluttered as it is, especially once you get the stickers on, and I always thought it was weird to have so many “real” panel lines because of all the parts separation on the armor and combine that with panel lines that are painted on. With hindsight, I’m glad I did it, and at least the Freedom probably could’ve used it too.
The way I decided to go about this was, I panel lined everything on the sprues with liquid ink Gundam markers – black for the blue and the dark red parts, grey for everything else. This seemed by far the fastest way to get the job done, and when you’re using these markers on bare plastic, it’s actually best to let them dry for a while anyway. For some reason, when they’re dry, they wipe off the surfaces more easily than when they’re still wet, and they stick to the panel lines like glue. So I just did basically a pin wash on everything first, then cut the parts loose and wiped off the excess during assembly. By the time I got around to each individual part, it had had enough time to dry to make cleanup really easy.
Once I’d cut all the parts off the sprues, I ended up with this.
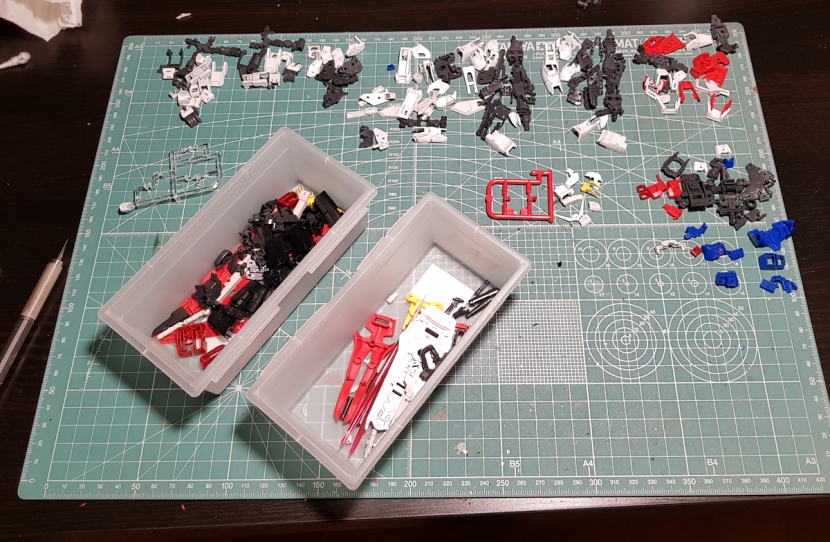
The trays contain the parts for the Aile Striker and the weapons, the rest is sorted by the steps in the instructions. It took about four hours to get here, and those four hours weren’t particularly enjoyable, but then again, they were followed by 90 minutes of uninterrupted assembly, so that part was really fun, and I’ll probably build all my RGs like this from now on.
Now stop me if you’ve heard this one before, but the build starts with the feet.
As you can see, they look nice (note the color separation on the soles) and consist of quite a few parts. As usual, though, articulation becomes virtually nonexistent once you get the armor on. Y’know, it’s an RG, so… yeah. That’s what happens.
The legs are one of my favorite things about any version of the Strike, so I was really looking forward to the next step, and it didn’t disappoint.
There’s not as much going on here as on the PG – the way the knee armor moves is far more simple, and the side pistons aren’t connected to the ankles. But the legs still look really, really nice with all the parts separation and the inner frame showing through the gaps. Right about here I also realized that panel lining this kit was a good idea as there’s tons of small detail on every armor part that pops nicely once it’s lined and adds to the mechanical feel of the legs.
The skirts are also relatively involved – each of them consists of two parts, and the side skirts have three because of the opening hatch for the Armor *snicker* Schneiders.
And I swear, you guys, this was the first build I documented with my new phone, and it did that thing where only the feet are in focus again. Both phones are Samsung. Do Koreans have a foot fetish? Sigh.
The shoulders are a disappointment, I’m afraid.
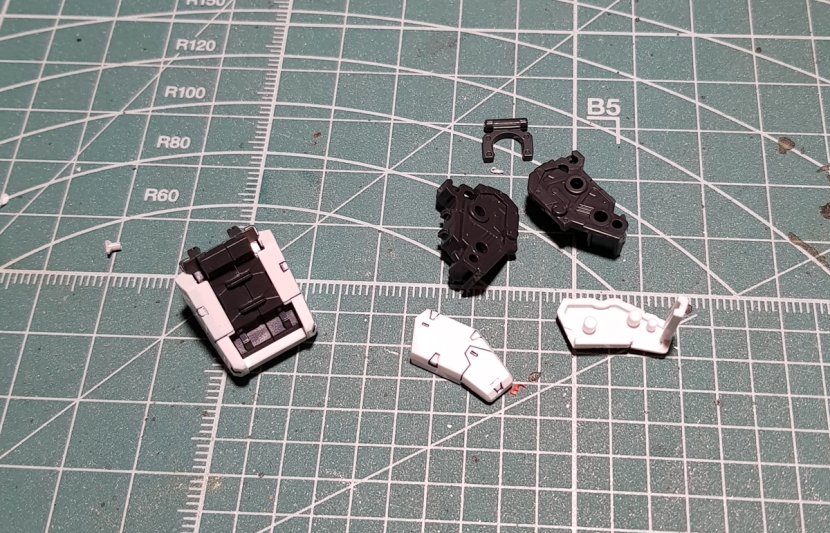
It’s ok that they’re this simple because they don’t really have to do anything, but they just look blocky and ugly. In fairness, there’s another part for each of them, but they don’t tell you to do this until you plug the arms into the torso – it’s the contraption on top that folds out where the add-on parts attach that come with the Skygrasper.
The arms aren’t all that hot either. Of course this is kind of inherent to the design of the Strike, but to me they look like a bunch of dice stacked on top of each other. That straight line down the front really is a bit much.
Also, the closed fists on the B sprue are the usual cat’s paw hands that nobody in their right mind would want to use, and since there aren’t any other options, you’re stuck with the articulated hands. And no, I won’t stop saying that those are ugly. Because they’re ugly.
The torso’s next, and I’m happy to report that it’s very detailed and much less frustrating to build than the PG’s torso.
I also still think the Aile Strike looks like a Camaro that thinks it’s a robot that transforms into a plane. Just, y’know, for the record.
Other than the opening cockpit hatch revealing the usual empty pilot seat, the torso doesn’t do anything, but it doesn’t need to – it’s just where you plug in the Aile Striker, after all.
The head is next, and, well, what can I say – it’s a Real Grade head, so you know what to expect.
Everything’s molded in the correct colors, and the detail is great. Like on the Freedom, though, the camera piece is inexplicably molded in clear plastic instead of the blue shown on the box, so you’ll have to paint it if you want accuracy. I skipped that this time because I’m still miffed about how dark it came out looking on the Freedom.
I also have to say that looking at the kit in real life, I don’t really think the head’s too big. That’s a common complaint about this one, and looking at pictures I always kind of agreed, but now that I’m looking at it on my shelf, it’s really fine.
Anyway, since I have the PG sans Skygrasper, of course the Aile Striker was the main attraction for me. It was getting late at this point, but no way was I going to stop without getting to see the suit with the wings on.
Speaking of the wings, for a pair of what’s basically straight airplane wings, they do consist of a lot of parts, which of course means they look really nice.
Up next are the boosters, which are also very detailed. They also come with a bunch of foil stickers that go behind those red grills, if you’re into that sort of thing. I didn’t use them.
And once the boosters are done, you plug it all together and your Aile Striker pack is done.
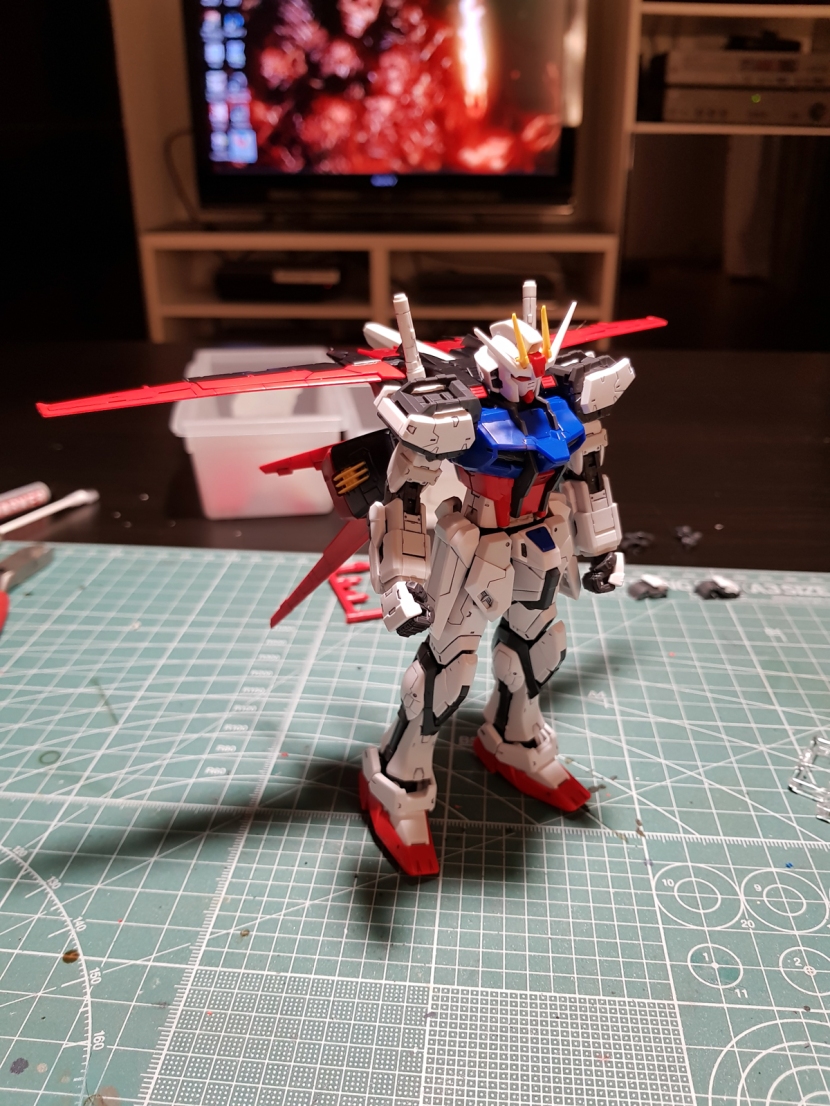
Now here’s the real shocker. You see that? No, not Gravelord Nito in the background. The kit is standing up straight. Only leaning forward a little. With that giant backpack on. I don’t know how that’s physically possible, but I saw ‘er with my own eyes, mister.
Now, accessories. The instructions actually tell you to build these before the Aile Striker, but I skipped ahead and then built the weapons the next day.
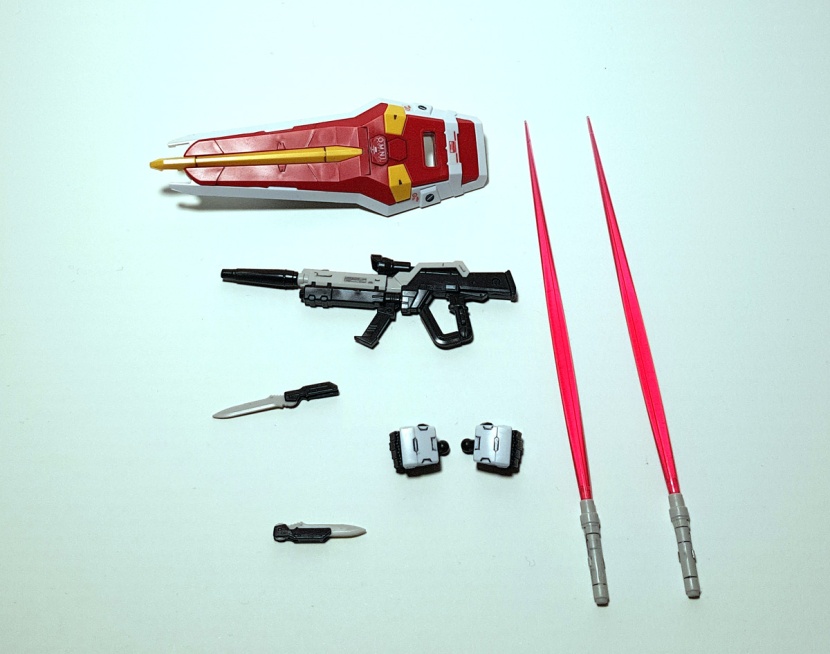
It’s not much – you get two beam saber effect parts, closed fist and articulated hands, the beam rifle, the Armor-Schneiders (no, I didn’t type that without giggling), the shield and the usual action base connector. It all looks very nice, but it’s not perfect.
The camera piece for the gun is also molded in clear plastic, and attaching said gun to the hand is a massive pain because the tab that folds out is so loose that you end up folding it back in instead of getting it into the palm about a dozen times before it works. There’s a trigger finger hand that comes with the Skygrasper set, but that doesn’t work either.
I also don’t like how the beam saber handles that go on the back are dummies and you have to store the real ones that actually go in the hands separately, especially because you only get two of the top pieces that the blade effect part plugs into, so you have to swap them out if you want to pose the kit with the sabers. Just seems like a totally unnecessary omission to me. And finally, while the Armor-Schneiders are actually better than their PG counterparts (they’re two separate pieces instead of the pre-molded stupidity on the PG), the hands can’t hold them for shit, which is why there are no pictures here with them.
Poseability is ok, but those side skirts do get in the way of a lot of leg movement, I’m afraid. Somehow, though, probably because of the backpack, almost every pose you do with this kit looks really cool.
As you can see, I did end up using a good number of those foil stickers for the wings, and for some unfathomable reason I actually quite like them. I don’t know what’s wrong with me.
Anyway, I’ll have another blog coming about the RG Strike someday – I also bought the Skygrasper with all the extra weapons, but there’s so much in there that it really does warrant a separate entry.
Meanwhile, do I recommend this kit? Absolutely. Other than the shitty hands, it’s very solid without sacrificing poseability – one of the least fragile RGs that I’ve built for sure. Of course if you’ve never liked the Strike or generally refuse to buy SEED kits, this one won’t change your mind, but I happen to be a fan of this particular design, and the RG is a very nice representation. In fact, I have a second one that I plan to detail paint and matte coat.
Real Grade Freedom Gundam
A while back, I tried to order the MG Freedom 2.0 from HLJ, basically because absolutely every review I’d read or watched on Youtube was gushing about what a great kit it is. turns out my attempt to get one fell right into the time when it was temporarily OOP, and while I waited for that to change, I decided to get the RG to pass the time, basically. Well, that, and apparently I’m now one of those people who can’t stop building RGs, and I needed an excuse for another one.

But while the MG 2.0 might be some sort of shining example of its class, I have to say the RG is profoundly middle of the road. Nothing seriously wrong with it and like most RGs, it looks pretty enough, but I do have a lot of small complaints that kind of add up, and I’m just not particularly impressed with it overall. But let’s take a look at the build first.
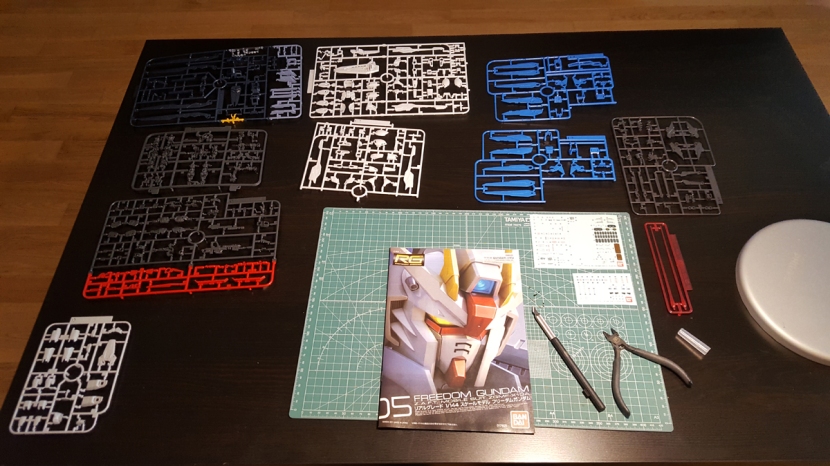
Here’s what’s in the box. That’s a surprisingly small number of parts for a Real Grade kit of a mobile suit with a massive backpack, and I’m afraid that brings me to my #1 complaint, which is that this kit is just kind of underwhelming in the complexity department.
As per usual, you basically work your way up from the bottom, starting with the feet, followed by the legs. Also as per usual, once you slap the armor on the inner frame for the feet, the joints become essentially useless. The knee bend is the 180 degrees you’ve come to expect, and otherwise there’s not much going on here. Because this is the Freedom, the legs are fairly spindly compared to other suits.
One word of warning – the last picture here points out a peg on the inner frame that’s very easy to mistake for a sprue nub. Do not cut off this peg. There’s a booster that attaches to it, and since (as you can probably guess) I accidentally cut off the peg on one of the legs, I ended up having to glue the booster. Not that that’s a big problem or anything, but it’s annoying, so, like… don’t do it, okay.
Up next is the waist section, which consists of a measly ten parts plus the inner frame. There’s one missing in the picture that I didn’t notice until I’d started assembling, but this is pretty much it. Now sure, part of the reason for this is that the Freedom has the massive rail guns instead of side skirts, but it still kind of tells you something about the amount of detail here. I could’ve done the same “look how few parts” shot for every section of the kit, this one just kind of stood out to me.
Note also that my camera did that thing again where only the feet are in focus. Sigh.
Up next is the torso, which is also nothing too spectacular, although the color separation is nice enough.
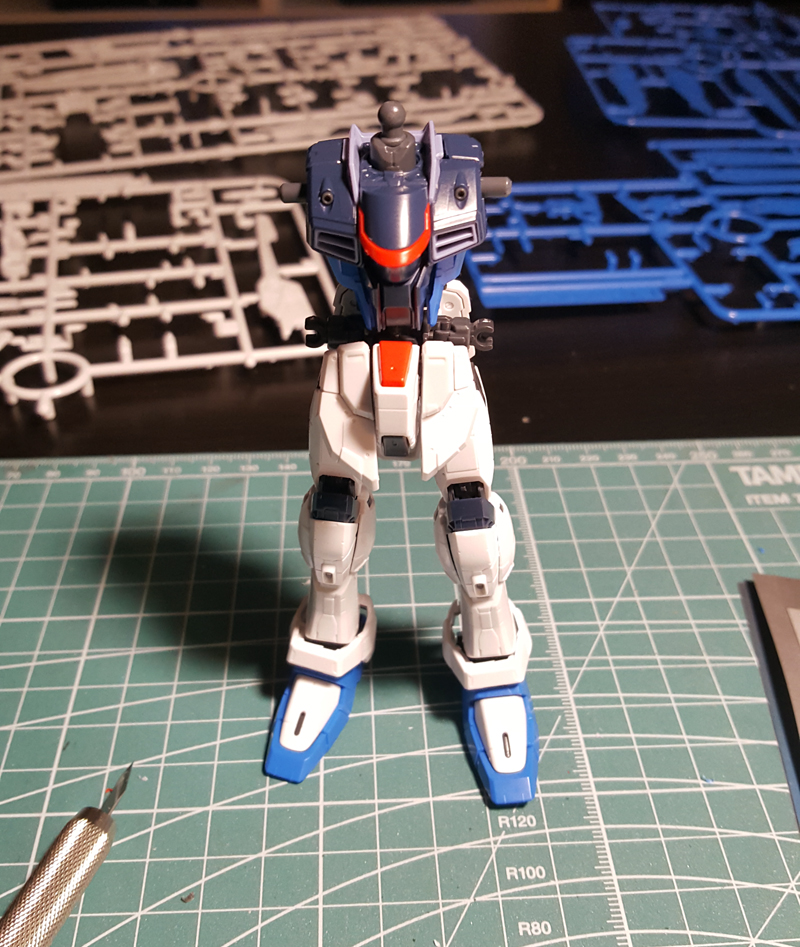
The waist only looks so spindly here because there’s a white armor part there that I forgot to put on, and I didn’t realize this until I was all done and started raiding the sprues for the parts for the weapons. Could I have gone back and taken these assembly shots with the error corrected? Sure. But then you guys couldn’t tell what an idiot I am, and that wouldn’t be any fun.
The shoulder armor is another disappointment. There’s a decent amount of color separation with the grey, white and red, but look at that booster. It moves, sure, but there’s no inner detail, it’s just one solid block of blue. I’m sorry, but I’ve just kind of come to expect this kind of detail to be done properly on RG kits, i.e. the grill should have been a separate piece in a darker color. They did do this on the rail guns, but not here, for some reason. Weak.
Now the arms are a bit more interesting. If you look at the way they attach to the torso, it looks like something’s gone wrong at first, but what you actually do is that you plug them onto the peg at a 90 degree angle, then turn the peg backwards into the torso. This allows a good degree of forward movement, so that the Freedom can actually cross its arms, which helps if you want to use the beam sabers in Darth Maul mode. Also, of course the elbow bends more or less 180 degrees.
The head is probably the most detailed section of the kit. Tons of great color separation, and it just looks excellent all around. However… yes, I have a complaint here too. The camera is molded in clear plastic, and there isn’t even a sticker to remedy this. The box picture clearly shows a blue camera, and there’s literally no reason at all why it couldn’t have been molded in clear blue, like the green camera on the Mk-II, and it would’ve looked fine. Needless to say, I had to go back and paint this as it just looks unacceptable.
Up next are the rail guns, which are another section of the kit where the color separation’s done right. They fold up into these still relatively chunky side skirts that really improve the overall look of the suit. Obviously these are the reason why the legs need to be so spindly, and once they’re on, it all makes sense.
Then we get to the wings. Now you’d think these would be the most annoying part of the kit to build, but they were actually what I enjoyed the most. They just work really well, and it’s interesting to see how it all comes together.
Notice also the nice detail with the overlapping dark and lighter blue, the red stripe on the guns, the inner detail in the boosters, etc. Clearly whoever designed these knew that the wings are the main attraction on the Freedom.
Of course the downside is, once they’re on, you’ve got yourself a drunk robot who can’t stand up straight. You can get him to stand with the wings folded and pointing down because they touch the ground, but that’s it. The whole thing is just way too heavy for the kit to hold it up. There’s pretty much no way to display it without an action base, and the point could be made that the kit should come with one. Other than that, it’s really not a problem – the connector piece that’s included with the kit works fine and dandy, and in all honesty, I don’t see why you’d want to display this one any other way than airborne.
Notice also that I took the second picture after I’d finally realized the white waist section was missing. It does, um, look better with it, doesn’t it. *cough*
And finally, here’s a shot with the shield and the gun, OOB sans decals.

And in case you hadn’t guessed it, that’s my segue to, yes – accessories.

Of which there aren’t a whole lot. You get two beam sabers, the gun and the shield. You also get two articulated hands, a trigger finger hand, an open one and the two semi-closed fists that come with the inner frame.
And that brings me to perhaps my biggest complaint about this kit, which is that the hand options are so stupid that I still can’t quite believe they’re an actual thing on an actual Gunpla kit. The “closed” fists on the B sprue, as you can see in the build pics, aren’t actually closed, they’re these half-closed fists that look like they’re supposed to hold weapons and otherwise evoke something like a G1 Transformers toy. Except they can’t hold any of the weapons. The beam sabers don’t fit in them, and even the handle on the shield is too big. So if you want to use the beam sabers or the shield, you’re stuck with the articulated hands, which, as I’ll never tire of pointing out, look ugly, especially when you combine them with the better looking fixed pose hands, like, oh, say, if you want the beam saber in one hand and use the perfectly nice looking open hand to go with it.
Oh, and also, the camera for the gun is molded in the same clear plastic as the one on the head, so that also needed to be painted, which is why the scope is empty in the final build picture, in case you were wondering. And what you can’t see is that the muzzle part fits on its peg so tightly that I ended up with a massive stress mark on it. That’s… not something I expect from Bandai.
I really think painting these parts made a big difference, but I’m also a bit miffed because the clear blue came out so dark that it really looks like glossy opaque paint, especially on the head. Still looks better than before, but I’m going to have to insist that the clear parts should’ve been molded in blue.
The stickers, as you’d expect, are many, and many of them are tiny. I thought it was kind of amusing that there are two sticker sheets, especially because the smaller one consists mostly of something like two dozen copies of the same “circle with illegible text next to it” marking. It’s as if they were all done with the kit, and then Hajime Katoki stumbled into the office drunk that evening, looked at what they had done and yelled, MORE STICKERS.
The kit comes with markings to either do it up as a generic ZAFT suit or as Kira Yamato’s personal suit – or so I’m told, I actually haven’t seen SEED yet. I just went with the Kira markings because I thought the ZAFT emblem looked to busy.
Poseability is pretty good – you’d expect a kit like this to be a brick, but it really isn’t. The folding skirt rail guns work well, the guns in the wings fold out, the arms and knees move well enough, and the kit has more mobility in the waist than most Gunpla kits, which helps get some more “natural” looking poses.
The articulated hands, aside from being ugly, don’t really work well here, though; the pegs on the beam sabers are too small and don’t help them stay attached at all. You’re going to have these falling out of the hands left and right if you want to use them.
The kit is also just flimsy as hell in general. If you’re wondering why I didn’t try more poses even though I just praised the kit’s poseability, it’s because it took me half an eternity just to get these ones right. Everytime you move one thing, something else gets knocked out of whack, and it’s not just the wings, it’s everything. Getting that one pose with all the extra armaments pointing forward made me want to throw the kit out the window and drive my car over it a couple of times.
I’d say this is another case of “recommended if you like the way it looks.” It’s not a particularly fun build and it’s somewhat disappointingly simple (I seriously considered doing panel lines here, which I never do on RG kits), but once you slap all the stickers on and you get it into a good pose, it does look pretty impressive. But if you’re looking at pictures and you’re not sure whether you like it, actually having the kit in your hands probably won’t change your mind.
Perfect Grade Strike Gundam Build Review
I was originally going to hold off on posting anything about this kit before I finish it, but I did want to do a full build review, and I ended up taking so many pictures that I figure it’s probably better to break this up into two or more blog posts. We’ll start with this build review, and then I’ll probably do a more in-depth review of the OOB kit and ultimately a discussion of my paintjob, whenever that’s finished.
Note: as usual, that plan lasted about as long as it took for it to come in contact with the real world. I finally finished painting this kit almost a year later, and you can check it out here.
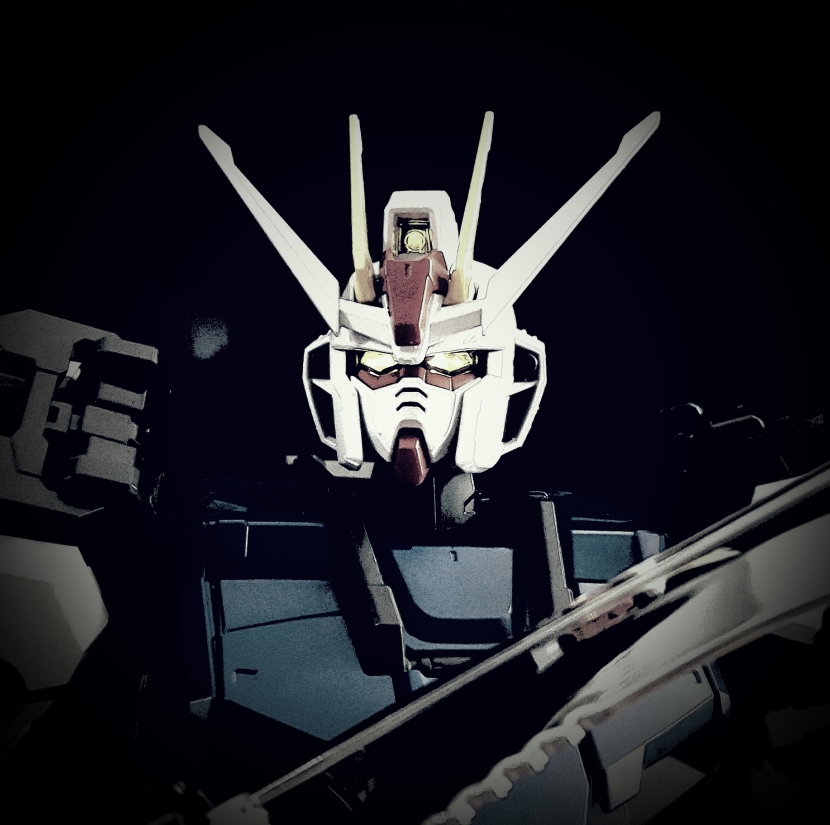
Anyway, the PG Strike came out in 2004, so it’s no spring chicken anymore, but after having snapped it together, I have to say it holds up fine. Since it’s over a decade old, it seems to predate most Gunpla blogs and Youtube channels out there, and there aren’t nearly as many reviews as of more recent kits. All the more reason for me to give you a detailed look at it, of course.
The box isn’t much bigger than the MG Sazabi Ver. Ka’s, and with the Unicorn being the only other PG under my belt, I was a bit surprised by the low parts count. It’s been a while since I built the Sazabi, but the two kits are probably similar in complexity. The Strike is hardly a daunting build, it’s just big because it’s 1/60.
I won’t bore you with a detailed play-by-play of all the sprues, let’s just look at what’s interesting from today’s perspective. For one, you get three die-cast parts that go in the legs and the hip. Apparently they used these a lot more often in earlier PGs, but I don’t quite understand what they’re for. Probably to make the joints tighter, but I wonder if they don’t just destroy the polycaps in the long run.
The yellow bag contains the parts you need to assemble the LED unit because apparently there were no pre-assembled LED units in 2004, and the chrome plated sprue has the blade for the preposterously named “Grand Slam” sword and a bunch of pistons that are all over the kit, but mostly hidden under its armor.

You also get two manuals. The “construction manual” is the one with the actual building instructions. The other one has the guide for the stickers and a whole bunch of Japanese text and artwork detailing the suit’s features and (I assume) its backstory. It also has a page that seems to say that the Sword Striker and the Launcher Striker are forthcoming, but as we know by now, that never happened. The kit does have what appears to be attachment points for them on its shoulders, though.
The first thing you build is the feet. It was kind of a recurring theme for me during this build that the kit reminded me of RGs in some ways, and this was one of them. You put together the the jointed inner frame, then you add the armor to it. Note the nice color separation on the underside of the feet.
These red parts snapped together with a really violent click, though, and I’m more than a bit worried about what’s going to happen when I try to take them apart for painting. One of the ways you can tell this kit is old is the much harder plastics used and the tight parts fit in a lot of places.
Up next are the legs, which are by far the most complex and also the best part of this kit. For some reason I got it in my head that I wanted to cut all the parts off the sprues before I assembled them, and I ended up with this.
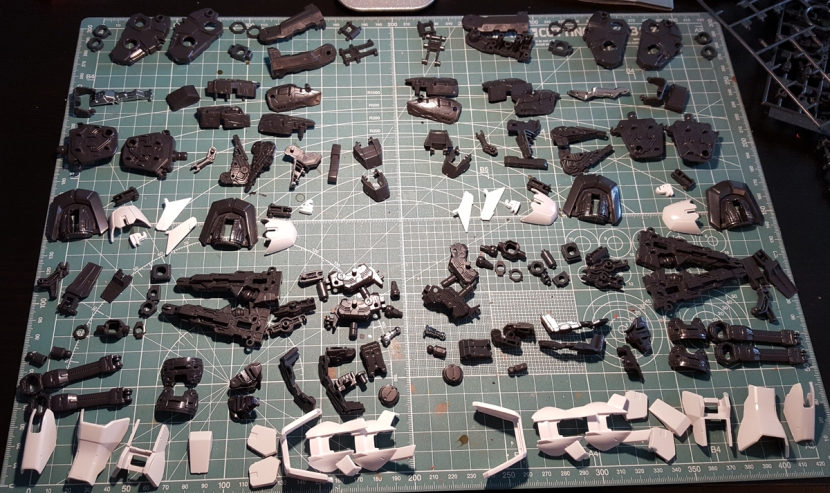
Ulp. And this isn’t even everything, of course I forgot some stuff.
The first thing you do is sandwich one of the die-cast parts in between two plastic halves for the knee. You can see the shiny metal in the middle there. Looks neat, but I don’t know how I’m going to paint this.
Next you attach the upper thigh to the knee. It contains this fairly complicated hinge mechanism that allows the armor plates to shift out of the way of the knee so that it can do a full 180 degree bend. Another way the kit seems a bit like a precursor to the RG line.
It already looks pretty cool here, but wait’ll you see it with the armor attached.
Next is the lower part of the knee assembly with a mechanism that’ll allow the knee armor to move around when it’s attached.
Note the frankly insane amount of surface detail on the inner frame. Sadly, 90% of this gets covered up by armor, and it’s also crazy shallow, making it difficult to paint. At this point, I’m not sure what I’m going to do with all this yet. The easy copout solution would be to paint it black and then drybrush silver all over it so that at least the detail will pop, but we’ll see.
This is the assembly of the shin and ankle. These two long parts that are pointing outward in the fourth picture then fold down and attach to ball joints on the ankle, which makes them move up and down when you move the ankle side to side. It’s quite striking (haha) in real life because the entire lower leg seems to be in motion when you move the ankle, but in static pictures, it kind of loses its impact. There’s also an opening flap on the back and a hydraulic piston. In fact, the shin is more complicated than the upper thigh. as it has moving parts on all four sides.
And then you plug the legs together. Up until this point, they’re actually identical. The only difference between them is the direction in which the hip joint is attached and one armor piece in the back.
Oddly enough, the hip joints are more or less cube shaped. With my spotty knowledge of Gunpla history, I find myself wondering at which point it became standard for these to be spherical. They tuck in between the armor parts rather nicely, anyway.
Here’s a look at the knee bend. Note how the knee armor first pops out, then moves backwards to become flush with the leg again at full bend. This works 100% smoothly, and it looks fantastic. You also have to love the overall patterning of the white and off-white armor with the dark inner frame showing in the gaps… like you’d expect on an RG today.
Unsurprisingly, the waist unit and the skirts are a far more simple affair than the legs. The skirts generally consist of about four parts each, including the side ones with the opening hatch to store the knives.
What’s really disappointing to me is that for some reason the vent on the side skirts is molded into the white armor and not into the grey inner frame part behind it like on the other skirts. That seems like a really weird oversight. I’ll just paint this, but it’ll be a pain – the vent is almost a centimeter deep. Sigh.
The waist unit also contains the final die-cast piece to form one of these moving hip joint mechanisms that never made much sense to me.
Up next is the torso. Spoiler alert: this was the one part of the build that I did not enjoy.
It starts out interesting enough as you build it basically from the inside out, beginning with the cockpit seat. The seat can slide forward and has a screen in front of it that folds up and down.
Once this section is done, though, there’s problems. You next build the shoulder joints, basically, which attach via these slits seen on the side above.
And while these look nice what with the four chromed pistons and they also work very well once you have them on, parts fit here is a disaster. Basically, one of them was so loose that I was wondering if it was meant to slide up and down as part of the kit’s articulation, and then I tried to put the other one on, which was so tight that I had to shave off some plastic to even get it to fit.
I kind of mixed up the next few steps. What you see here is the front cockpit hatch and then the chest armor, basically, which slides over two clear pieces (that end up being more or less invisible, like so much of the cool detail on this kit) to form part of that distinctive looking Camaro chest grill. What, I’m not the only one who thinks the Strike looks like a Camaro, right? Guys? You guys?
Uh, anyway, I don’t think this is the order you’re supposed to do it in according to the instructions, but what I did next was assemble and attach the lower half of the torso, seen here first without and then with the armor on.
This section was damn near impossible to put together, which is why I forgot to take a picture of it separately. I don’t know if I just screwed something up, but basically it consists of two halves with a polycap and a hard plastic cap wedged between them, and absolutely nothing fits. I squeezed, I cursed, I took it apart about five times to check whether I’d done something wrong, and then I just shaved off plastic until it would close up well enough to clip the white armor pieces on it.
The waist joint is still holding up fine, so I didn’t end up destroying anything, but I was pretty concerned that I would. I’m not sure if this is my fault or the kit’s, but it sucked.
The last thing that goes on is what I decided is the backpack, and then you attach the torso to the legs. The proportions are a bit exaggerated because of the camera angle here, but the Strike does have extremely long legs for its torso.
And yeah, I know that’s not a backpack, and I know there’s nothing there because it’s where the Aile Striker goes, but it amused me to think of this as the backpack because it’s a Gundam and they all have backpacks.
On to more pleasant business: the head!
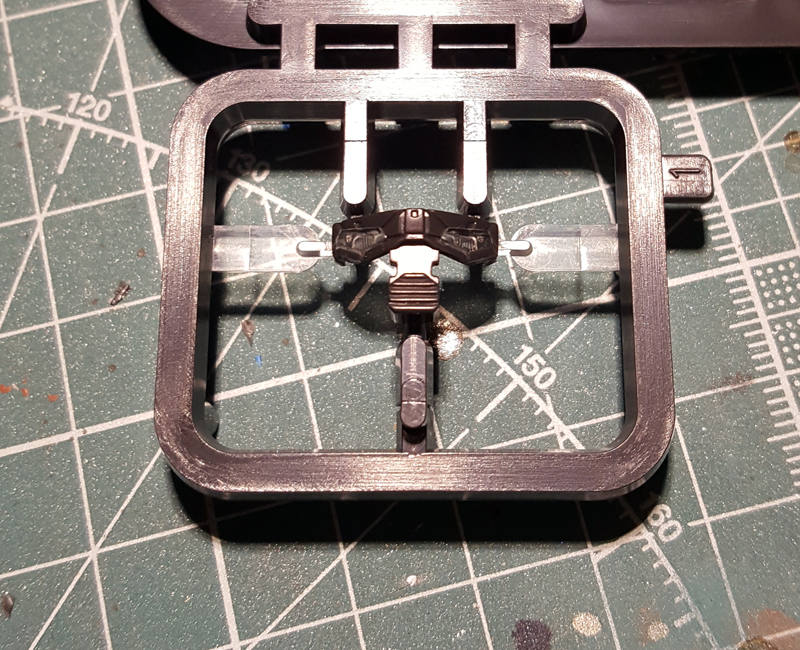
The first thing you’re likely to discover is that the eye piece is actually on the same sprue as the hands, and it comes pre-molded in grey and clear plastic. Since I always have a difficult time getting the eye stickers on straight, I thought this was a great idea for about ten seconds. Then I realized it’s just about impossible to paint the grey plastic here to match whatever I’m going to do with the inner frame.
Then there’s the assembly of the LED unit, which the instructions expect you to get right based on a picture that looks like it was photocopied in 1985. It also doesn’t work too well, to be honest. Maybe I assembled it wrong, but it seems to require a good bit of pressure on the battery to get the contacts to work, and even after bending them outward a bit, it still turns on and off randomly.
You assemble the inner parts of the head, and the LED unit fits right in there with its power switch sticking out the back. Sadly, the switch is covered up once you get the armor on, so you have to take that armor piece off to switch on the LED. It certainly looks better this way, though, and honestly, I don’t know how people really use these light-up gimmicks. You can’t leave the batteries in there anyway, they’ll leak and destroy the kit.
Note also that the vulcans are separate parts, which seems excessive given the lack of parts separation in the side skirts mentioned above, but I guess if you want to paint them a different color from the rest, it’s easy enough to do.
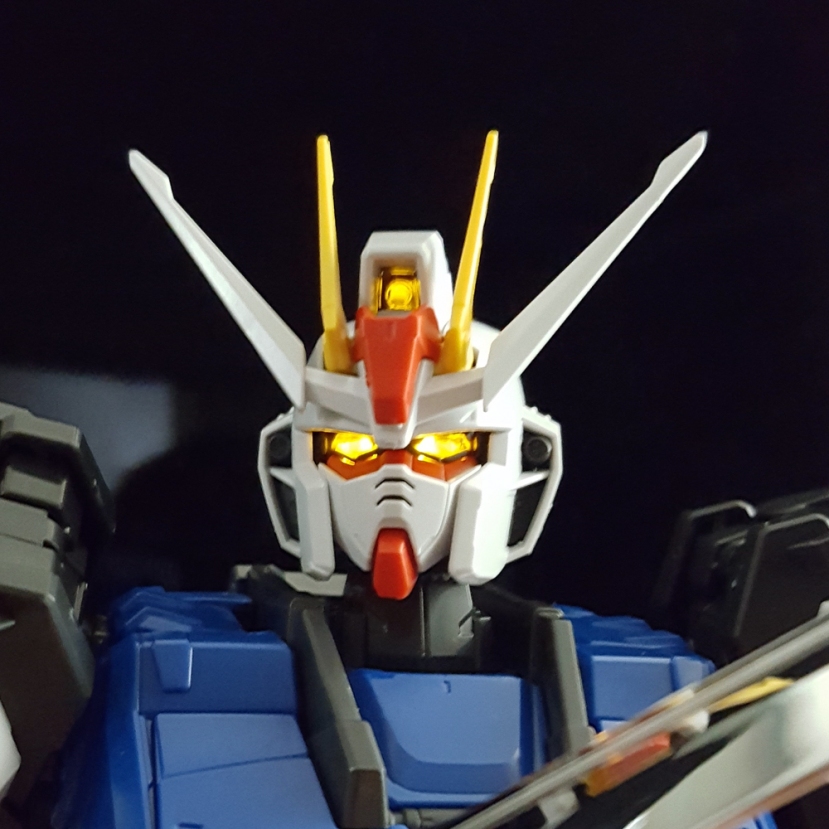
And here’s the head all done with the LED lit up. I must say, it’s a very nice-looking head. Tbe LED isn’t anywhere near as bright as the current units, but it does a decent enough job of lighting up both the eyes and the camera.
For some reason the instructions tell you to build the weapons at this point, which I didn’t do because I’m not crazy. Everyone knows the weapons are supposed to be the thing you realize you still need to do when you think you’re done. And why would I build weapons for a suit that doesn’t have arms? What madness is this? And why am I asking so many rhetorical questions?
So anyway, I skipped ahead to the shoulder armor. Nothing too complicated here – everything opens and moves, but the construction is fairly simple. You will have to glue those flaps on the front and back to their hinges, though, they don’t stay attached at all.
With the arms, I took the same route as with the legs and cut all the parts off the sprues before I started. They’re actually pretty complex as well, but as you can see, the parts count is considerably lower. I also had Kira Yamato stand there for the picture because this deep into a build, strange things amuse me. Note that the miniature stands up perfectly without a base.
The Kira miniature is actually really cool and I’m half thinking I might try to paint it. We’ll see. I do suck at miniature painting, so there’s that.

Assembly of the arms starts with the shoulder joints, which are also cube shaped.
Next is this hinge mechanism that goes inside the biceps and then attaches to the elbow. As you can probably guess, its purpose is to make the armor plates move out of the way to allow for more articulation, and as you should also be able to guess by now, this not only works beautifully, but also looks fantastic.
You then assemble the lower half of the arm, which is… jointed in the middle. With pistons. Not anatomically accurate if we’re looking for human anatomy, but it does allow the hands more room to maneuver than the stupid ball joints that every Gundam’s hands are mounted on, so it definitely helps, especially with some sword poses.
Here’s a look at the completed arms with and without armor, and at the elbow bend. I don’t know about you, but when the arm’s bent all the way, it looks to me like it’s been taken apart and reassembled. It’s so cool how everything on these limbs shifts and moves.
Next we have the hands. I don’t have much to say about them other than I’m still not, and never will be, a fan of fully articulated hands on Gunpla kits. The PG ones manage to look sort of okay because of their size, but even these have this weird gap between the palm and the first finger segment that just looks spindly and stupid. On the plus side, the Strike’s hand armor comes in two pieces, one of which moves slightly, and they’re different colors.
And yes, that is the hand gesture that you think it is.
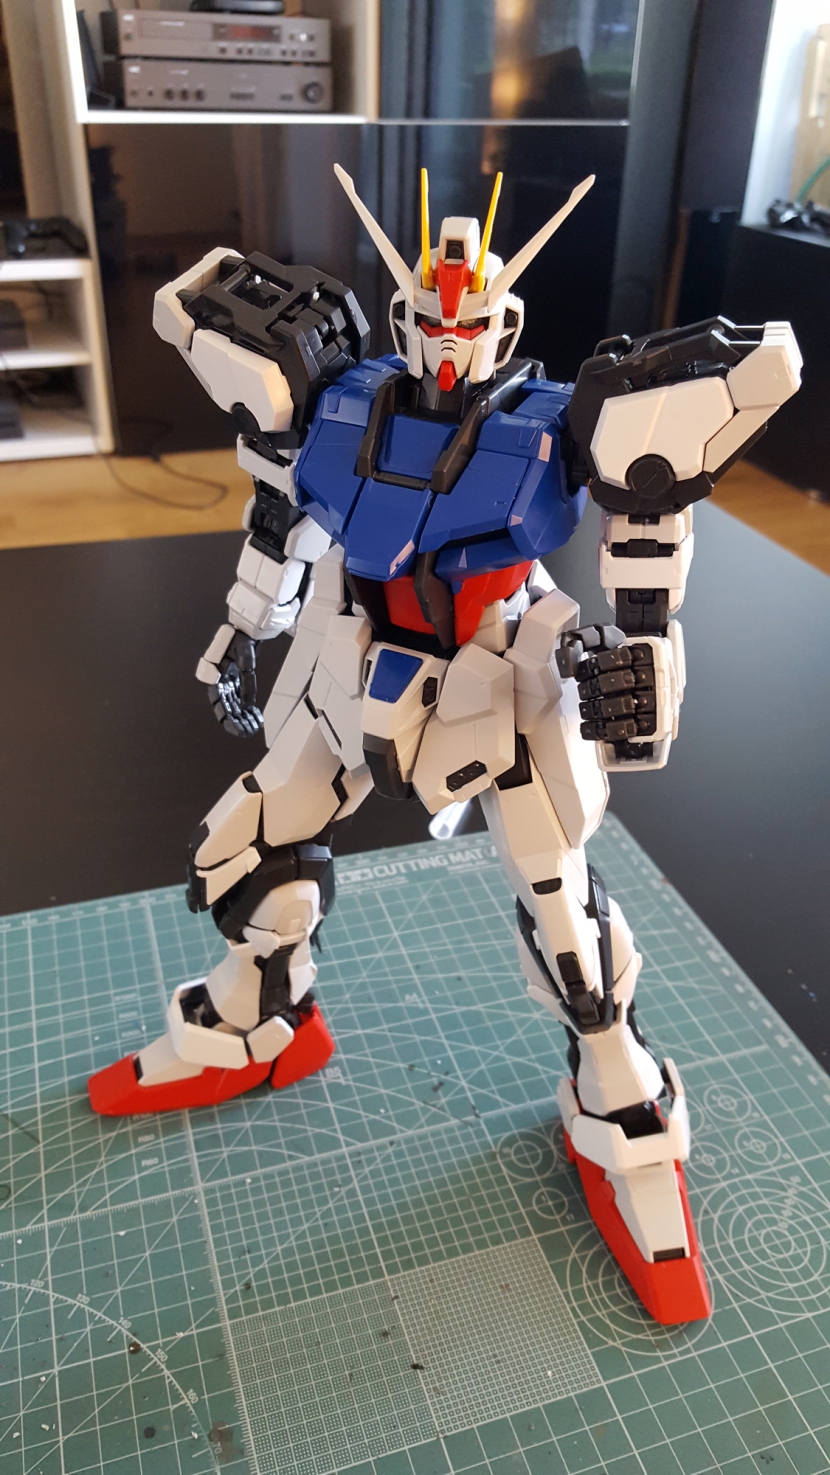
Here’s the Strike Gundam all snapped up, waiting for his weapons. Unlike with the MG RX 78-2, for some reason, I had no trouble at all getting a good picture of this guy. He looks great from just about any angle.
Anyway, on to the accessories. I was pretty dismayed when I started on the beam rifle because it seems to largely consist of just two halves that you snap together.
But then you realize that the additional outer casing parts actually cover up most of it, so there’s enough parts separation to make painting this in a reasonably interesting way easy enough, and most of the seamline gets covered up as well. It actually looks ok on the barrel, too, for some reason.
Fun tidbit: the trigger is a separate part. It doesn’t move. It’s just a separate part.
Also, there’s a little grenade in the launcher that you can take out. Take that, Sinanju.
Then there’s the Grand Slam sword, which only has the second dumbest name out of the accessories you get with this kit.
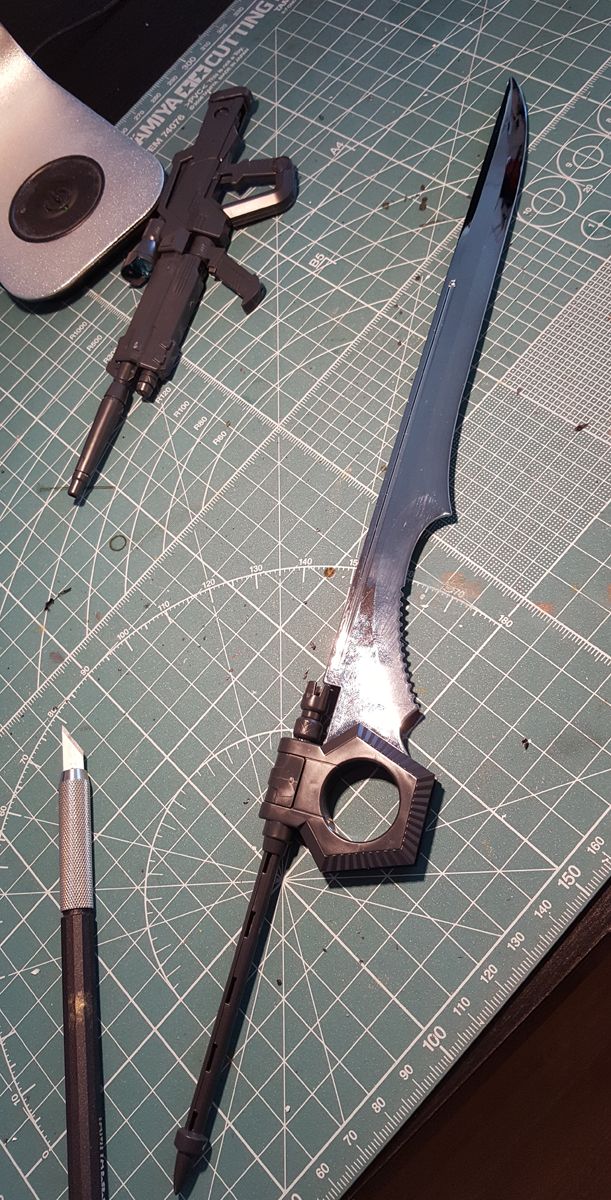
It’s absolutely gigantic, but honestly, I’m not a huge fan of this thing. The handle looks… well, like nothing, really, and while the coating on the blade certainly does what it’s supposed to do, it also means this thing’ll be a problem to paint if I want to do some weathering on it, for example. And the blade is slightly bent, probably as a result of the coating process.
I’ve just never been a real big fan of giant blades on mecha. I like swords and knives fine in other contexts, but why would the Strike Gundam swing around a surfboard blade the size of a house if beam sabers exist?
Speaking of blades, here are the “Armor-Schneiders”.
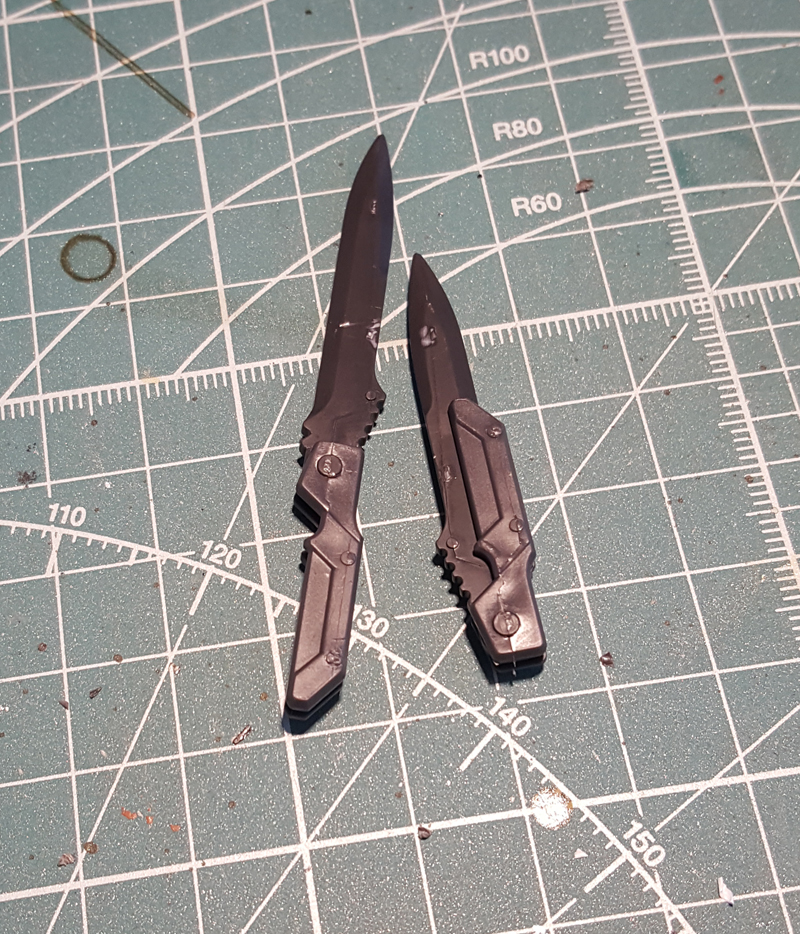
I can’t type that without snickering. See, German is my first language, and yeah, “Schneider” does translate to cutter, but it also means tailor, and like the English word, it’s a very common last name, and it just sounds like about the last thing you’d pick as a threatening, cool name for a knife. I’m sorry, but I guess my own language just doesn’t sound scary to me no matter how many bad WW2 movies I watch. Your mileage may vary.
A more objectively observable problem with these things is that they come pre-assembled on the sprue with the hands, which has zero benefits other than the fact that they’ll be a pain in the ass to paint and nub removal, as you can see, was a problem too. I don’t understand why this was done at all. Two parts for the handles, one for the blade, and they could’ve been on one of the grey sprues. I may just ignore these when I paint the kit, to be honest.
The shield goes together about how you’d expect. It has a little moving blast shield part for the slit, an attachment mechanism for the arm and a handle, plus some very nice red/yellow color separation. I really like that there’s a clear part in the slit – I’ll be doing some battle damage to that.
The attachment piece actually clicks into an opening mechanism on the back of the elbow, which works extremely well, and you can attach it either behind or on the side of the arm. It’s extremely well thought out, and because the suit also has similar contraptions on top of the shoulder armor, it doesn’t look out of place at all.
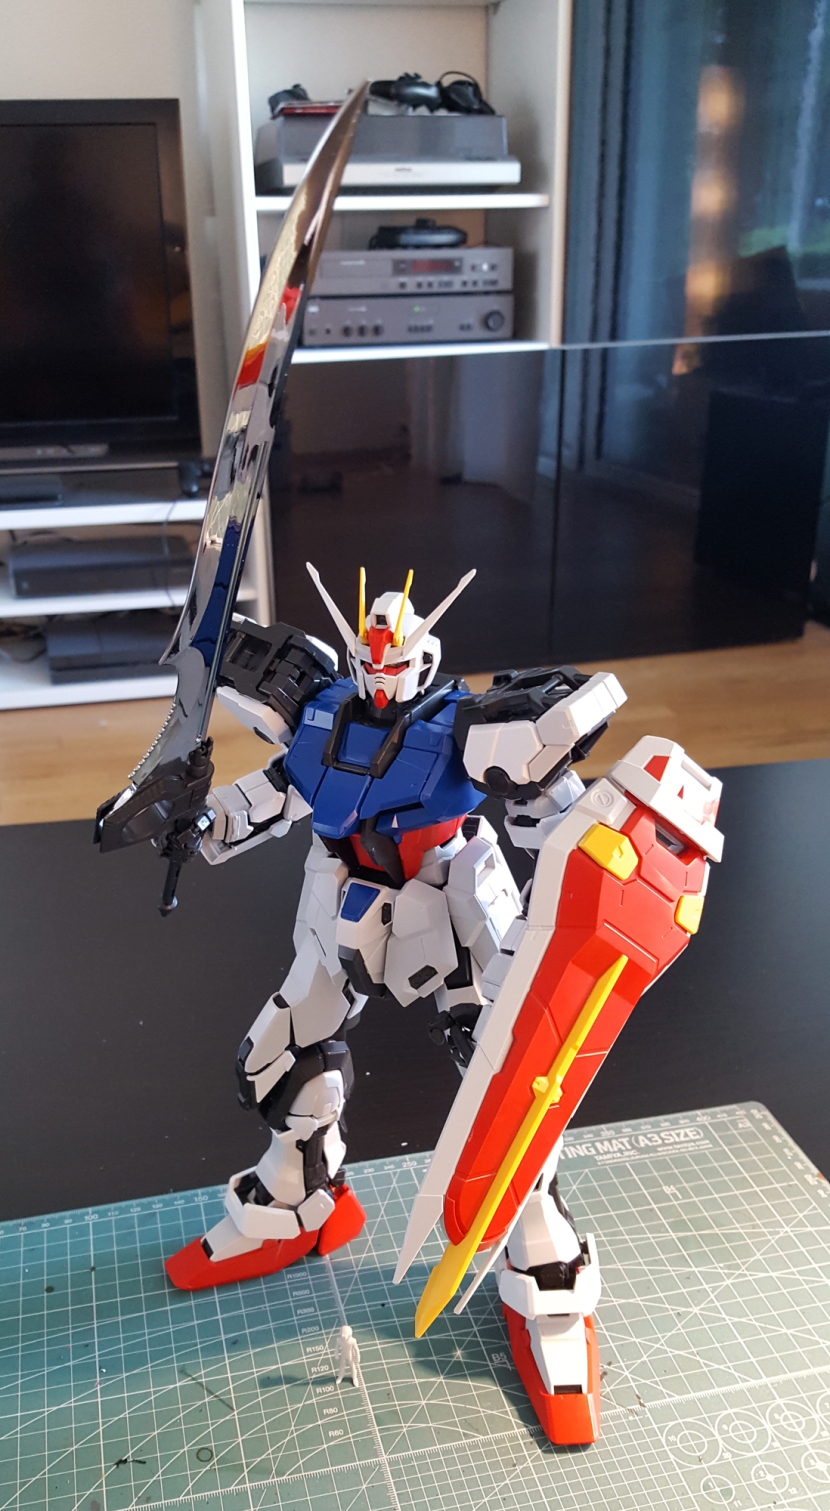
And we’re done. Yes, I posed him with the sword I just said I don’t like. What you can’t see here is that you can also attach the rifle to the… let’s say the belt, as with most Gundams. It attaches very firmly, and between that and storing the Armor *snicker* Schneiders in the side skirts, the Strike can actually carry all of its equipment. Would’ve been cool if there had been a way to mount the sword and/or the shield on the back, though.
Now I’ve complained about a few things here and there, but make no mistake, the verdict on this kit is a resounding “buy this fucking thing.” For a PG, it’s relatively cheap, and despite being well over a decade old at this point, the engineering holds up 100%. I can only imagine how this kit must’ve blown everyone’s minds back in 2004. It also really doesn’t look dated at all – there’s a very modern sleekness to the overall appearance of the kit. The MG FAZZ, for example, came out only a few years before, but the kits look like they’re a decade apart. I really came away from this build thinking this kit must’ve been way ahead of its time.
Where it does show its age is in some odd choices when it comes to parts/color separation and the occasional parts fit problem where it suddenly feels like a Kotobukiya kit. As of this writing, I haven’t tried to take apart the inner frame yet, but I know it’s going to take forever, and I very much fear I’ll break something. But then again, the parts fit isssues are really only in the torso – everything else is fantastic, and the legs in particular are incredibly fun to build.
And when it’s all put together, you have a version of the Strike Gundam that’s about as poseable as it’s beautiful. I keep staring at it and I can’t find a single square inch that I’d change. Everything about it looks great.
So that’s it for the snapfit. As I said at the top, I’ll probably do a more in-depth review of the kit in OOB condition with a pose photoshoot. It’s likely going to be a while until I paint it – I’m still waiting to get the Skygrasper kit, and I kind of want to see the Gundam with the Aile Striker attached before I finalize any decisions on color choices and weathering. Plus everytime I look at the damn thing, I want to play with it. Did I mention I really like this kit? Because I do. I really like this kit.
Real Grade Unicorn Gundam: Build and Transformation Review
So today we’re doing something a little different. I just got my RG Unicorn in the mail, and I thought since the kit is brand-spankin’ new and there aren’t all that many reviews of it out there yet, I’d snap it together and write this. It’s not every day I get to actually write about something that hasn’t already been out for half a decade, ahem.
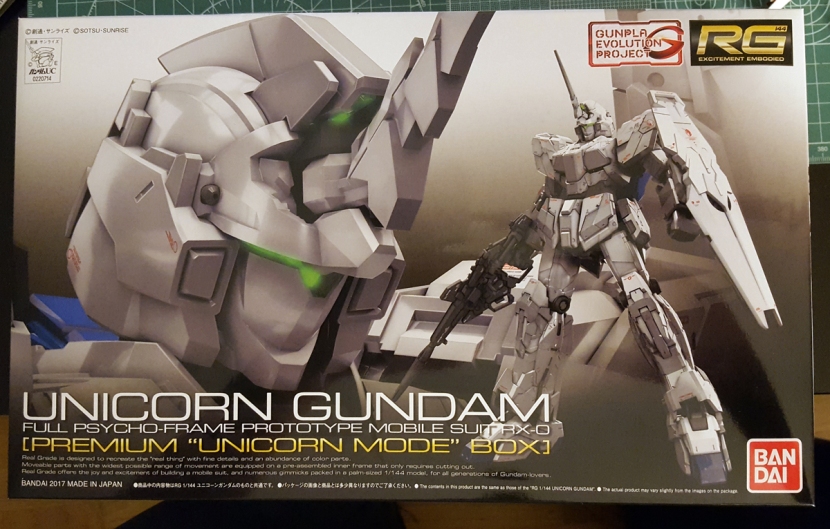 I was lucky enough to snag one of the last of these “Premium Boxes”. I’m really not sure why I cared enough to buy both this and the regular version. Other than the artwork on the front, the only difference is this:
 The box contents are exactly the same. Given my well-documented soft spot for Unicorn mode, I kind of wanted the premium version, but it’s really not that big of a deal if you missed it, unless you’re the completist collector type, in which case, have fun with the scalpers on eBay.
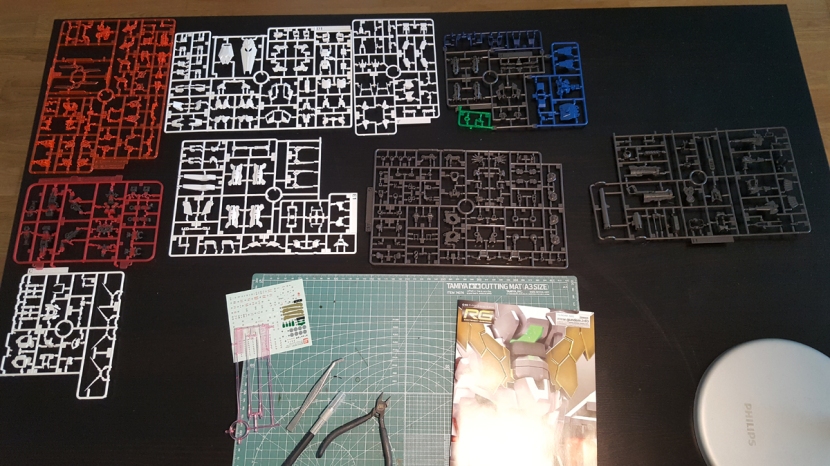
Here’s what’s in the box. It’s a surprisingly manageable number of sprues, but as you can see, there’s a ton of parts per sprue. For some reason, four of the sprues have a number 1 next to their letter, but there’s no number 2. I wonder if this means we’ll get 2s of these sprues with future variants like the Banshee that’s inevitably coming (and it better not be a frickin’ P-Bandai release, either.)
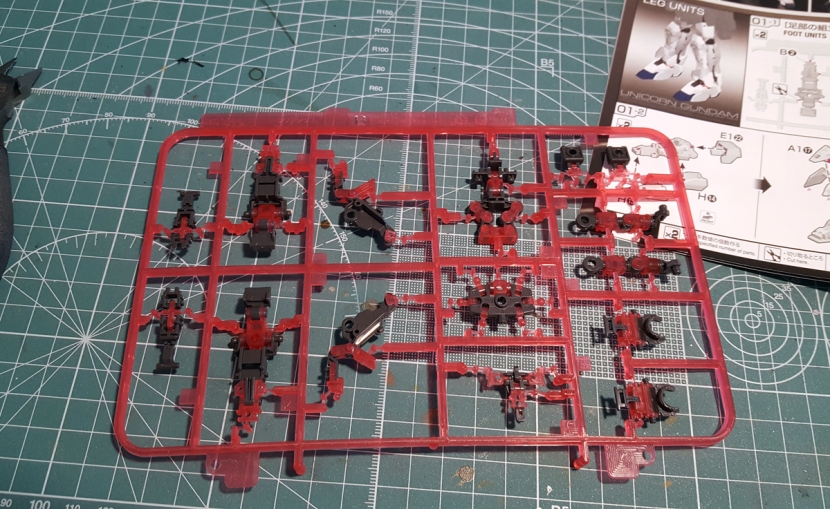
Here’s a look at the B sprue, which I’m guessing everyone has seen by now. It really does consist of clear red and opaque grey plastic, although, as you can see in the previous picture, most of the psychoframe parts are on their own sprue.
Also this. 
Yep, nearly everything in the instructions is translated to English. I’m not 100% sure, but I think Bandai started this with the High Resolution Barbatos, and apparently it’s now happening with the RGs as well. The translations are good, and while I never felt like I needed them, they’re nice to have as they do further clarify certain things, and I’d always wondered what exactly all that text said. It’s also cool to see Bandai finally acknowledging that they’re actually selling to an international market.
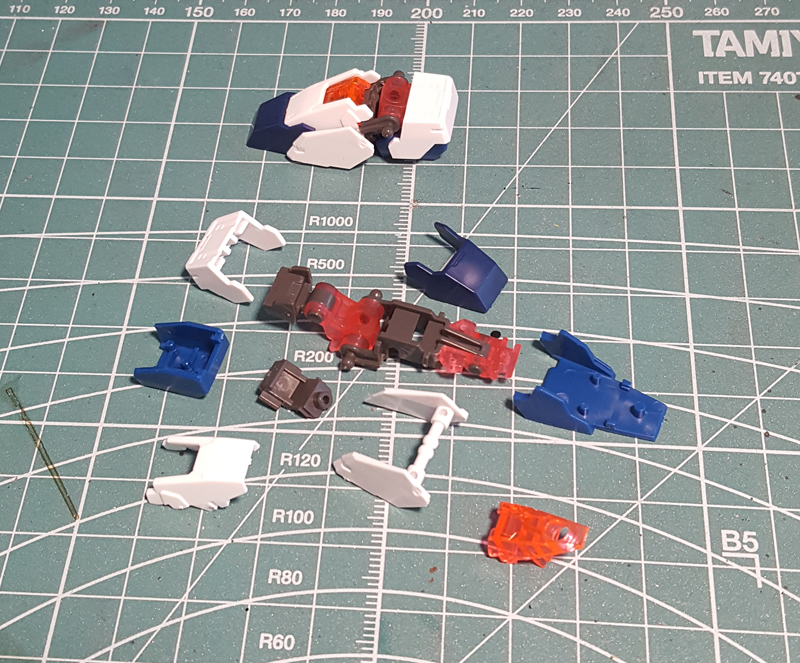
Unsurprisingly, the build starts with the feet and then you work your way up. The feet are only marginally more complex than what you’d expect – there’s your inner frame part from the B sprue plus a bunch of armor, and that’s it. For some reason, the instructions don’t have you attach the two armor plates on the side that rotate for the transformation yet. This is kind of a running theme with this build – everything works fine, but the order you do it in is sometimes a bit odd. Case in point:
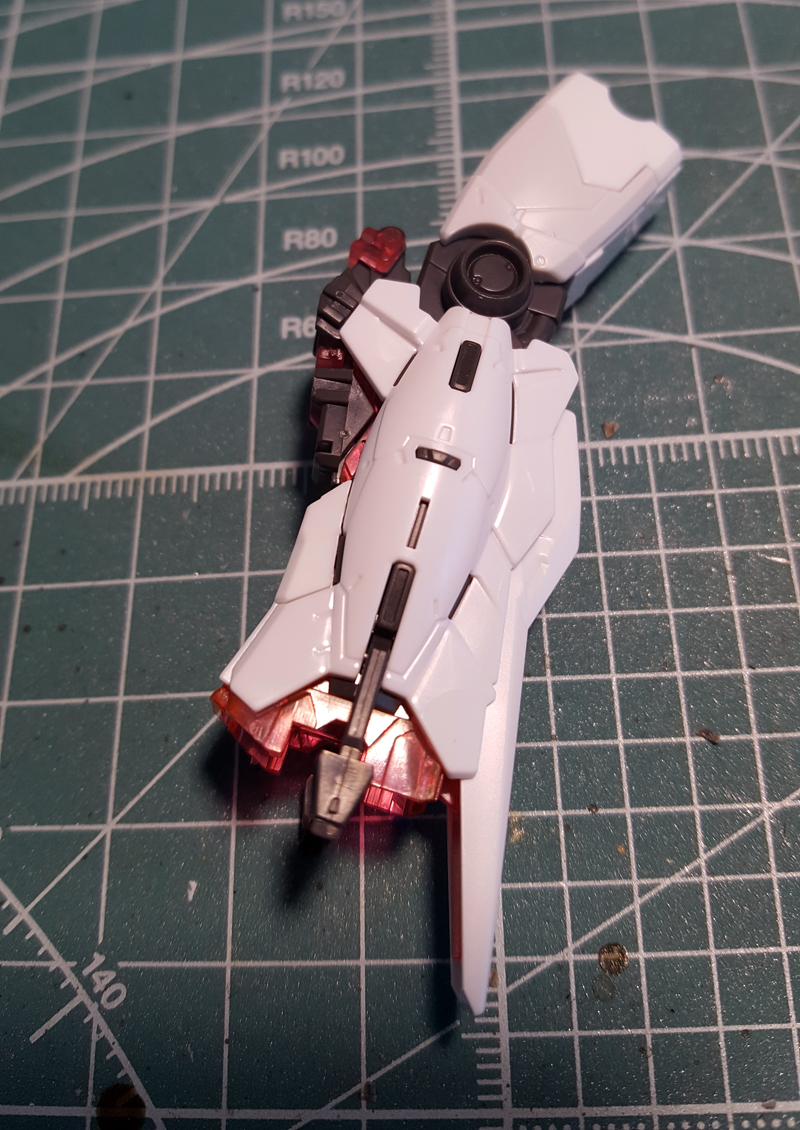
The next thing you build after the feet is one leg, or most of it anyway, and then you build the ankle to go with it.
At this point it really kind of struck me how similar to the MG so much of this kit is. Look at the assembly for that floating armor piece that goes on top of the foot here – it’s almost exactly the same.
Next you put it all together and start on the second leg. Here’s a shot of the completed leg with all the parts for the other one next to it, to give you an idea of just how complex this thing is.
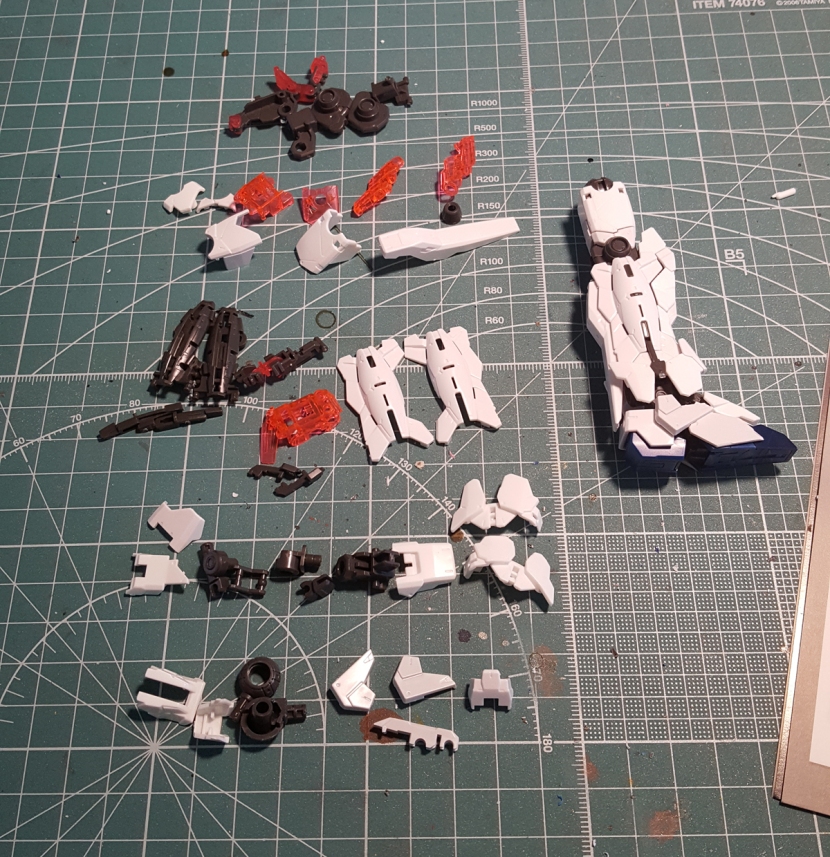
If you’ve built a Unicorn before, it shouldn’t come as a surprise that the legs are by far the most involved part of this kit. I didn’t clock myself, but I think it took me close to an hour to get one leg assembled, and they do literally everything the legs on the MG do, except, well… better.
Note the knee bend of nearly 180 degrees, for example. And speaking of the knees, the way the transformation in this version works is that there’s a mechanism that causes that infamous psychoframe piece to move outward when you pull the flap with the thruster away from the calf. It’s still a bit difficult to do and the knee armor still doesn’t properly attach to it (plus it has a tendency to pop off), but it’s infinitely better than the screaming nightmare of frustration that is the MG’s legs. All that, and they bend farther as well.
Note also the panel lines on the sides of the lower legs mimicking the opening panels for unchained mode on the PG version.
Obviously the waist section is next. Look at all these parts. Since all of the skirts transform individually, you’ll be working on this for a while.
Perhaps my favorite part about this section is the way the front skirts transform. Even on the PG Unicorn these are a problem; the moving panel is on a hinge and keeps popping off. The way it’s done here, it’s nearly impossible for this panel to detach itself. You do have to pry at it a bit to get it out, but it never comes off.
The side skirts, conversely, are a bit of a problem. They’re really tight, and I’ve had them pop off when I tried to transform them.
Far more importantly, though, I finally managed to take a legs and skirts picture where the top isn’t out of focus. Are unicorns supposed to be good luck or something?
Uh, moving along, we’ve got the torso, and here’s where I kind of figured out how this kit is different from previous RGs and what makes it work.
It’s actually more obvious in the legs, but here’s where I noticed it – the Unicorn’s inner frame isn’t so much plugged together out of the parts on the B sprue as a sizeable portion of it is actually built during assembly. They did something similar previously with the Sinanju, but of course on that kit it was a way to recycle the Mk-II frame. Here it’s a necessary part of the design because so many things have to move for the transformation. You’ll also notice the contents of the box are quite heavy when you first pick them up – there’s several sprues of ABS plastic here. Hopefully that means we’ll see the use of that material more frequently again in the future.
Anyway, as you can see, you put together some of the torso first, then you attach the inner frame of the arms, and then the rest of the torso basically in modules. When it’s all done, it transforms with an ease that’s almost irritating if you’ve built previous versions of the Unicorn. The shoulder vulcans pop up like it’s the most natural thing in the world, and you can’t help but wonder why this was ever a problem on other kits.
The arm assembly is similarly modular. First you build the wrist sections and the beam tonfa holders separately. I’m very happy to report that the parts with those triangular flaps on the sides of the beam tonfa holders stay in place very securely. Owners of the MG kit know why I’m pointing this out.
Next you attach a bunch of small armor parts here and there and then the two larger assemblies shown above. And you’re done.
The transformation of the arms isn’t particularly problematic on the MG and PG Unicorns either, but Bandai’s designers still managed to add a small twist here.
The part at the bottom of the beam tonfa actually functions as a locking mechanism that you fold out, then transform everything, then snap back in place. This way, the arms don’t collapse into Unicorn mode every time you pose them. Works beautifully.
Speaking of the arms and everything that’s great about them, here’s a shot of all the hands you get with this kit.

Open, closed and weapon holding for the left and right, all fixed pose. If you’re a fan of the RG articulated hands, you’re probably not happy about this, but me, I think this is what should come with every damn Gunpla kit. The articulated hands are ugly, and they don’t frickin’ work. I really, really hope this is a sign of things to come.
Anyway, up next is the shoulder armor. If you’re like me, you might have noticed in pictures of this kit that the shoulders look a bit too bulky, especially in Unicorn mode. That’s because all of this crap is in there.
Not only is it a lot of parts, it’s also really difficult and fiddly to put together. This was actually the only part of the build that gave me trouble. The tradeoff, though, is yet another section that transforms extremely well. You just open up the top, rotate the vent on the side and move the top back down. Done.
And what does that get us? Yep, another headless Hessian.
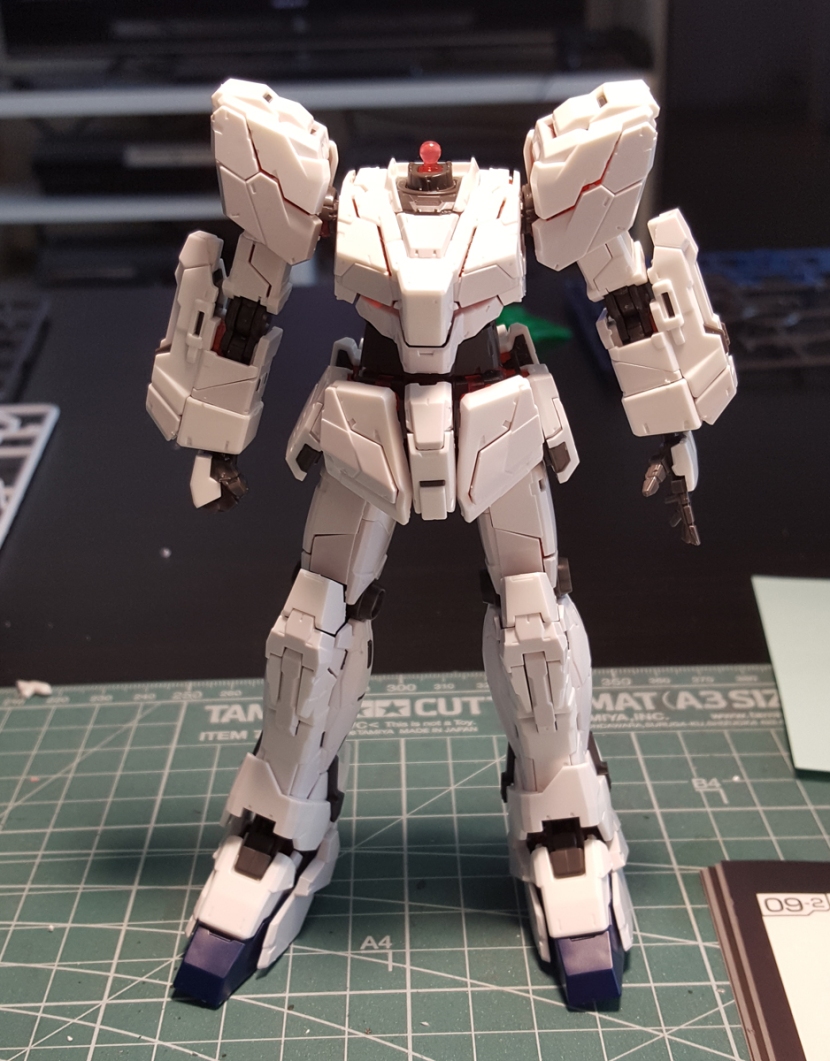
The head isn’t as complicated as you’d think. Clearly they decided it just wasn’t going to be possible to have it “transform” so much as be disassembled and put back together, which is pretty much how the transformation works.
The kit comes with foil stickers for both sets of eyes and the cameras. As you can see, the cameras are molded in clear green, so there really wasn’t any need for those stickers, but I did use the one for the eye slit in Unicorn mode to make it pop more. Plus obviously the one for Destroy mode.
Note also that the transforming horn works quite well in this version. You usually have to wiggle the halves around a bit to get them in place, but there’s hardly any visible gap. Hard to say if that’ll still work with the foil stickers for the gold side on there – I didn’t use them here as I’ll probably paint these parts. I do think I’ll be using the transforming horn, though. It works fine. Which is, of course, pretty amazing.
No proper slits on the face mask in Destroy mode, though. That’s a pretty disappointing omission.
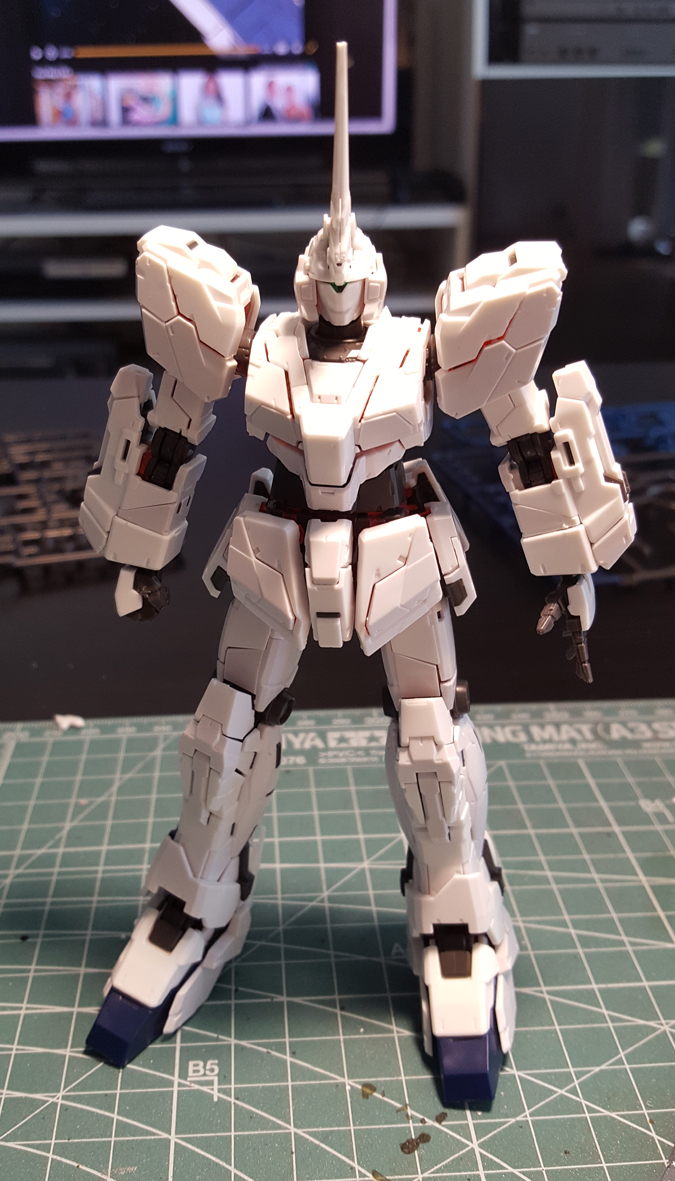
And here’s your Beast of Possibility sans backpack. You see that gap on the horn? Yeah, me neither.
From what I remember, the backpack is basically the same as on the MG. The big difference being that you can actually transform it without the beam saber handles popping off. It should be pretty obvious from these pictures that that comes at a cost, though – the proportions are very different as the handles and the parts they’re mounted on are much, much bigger compared to the backpack than on the larger scale versions of the suit.
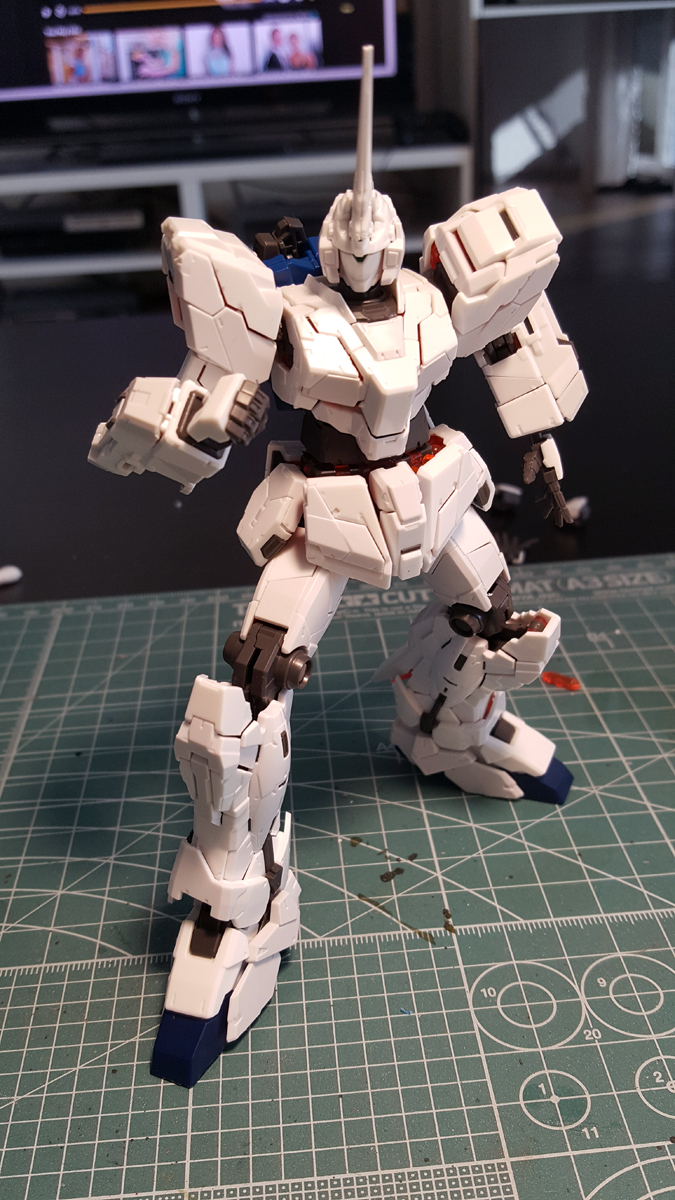
And here we are, about to heave the customary “now for the accessories” sigh.

Here’s what you get, aside from the aforementioned hand options. No surprises, of course – there’s the shield, the magnum, the bazooka and a (very strong) action base adapter. I’m also convinced at this point that the whole thing where the Unicorns almost all come with four sabers and only two effect parts is some sort of in-joke at Bandai because whaddayaknow, they did it again. Also, no spare ammo clips for the weapons, though you can mount the ones they do come with on the rear skirts.
The weapons, as you can see, are basically scaled-down versions of their MG counterparts. There are very few alterations, like the fact that the ammo clip for the magnum isn’t made up of individual shells, but for the most part, they’re the same.
What really frustrates me about this is the fact that for some reason, all these parts come on the same sprue and are molded in the same color. Color separation is a big part of what sets the RG line apart from others, but for some reason, they decided to make these weapons just solid lumps of grey even though they’re made up of enough parts to allow for something more interesting.
Sure, you can paint all that, but this is an RG kit, it’s not supposed to need painting.
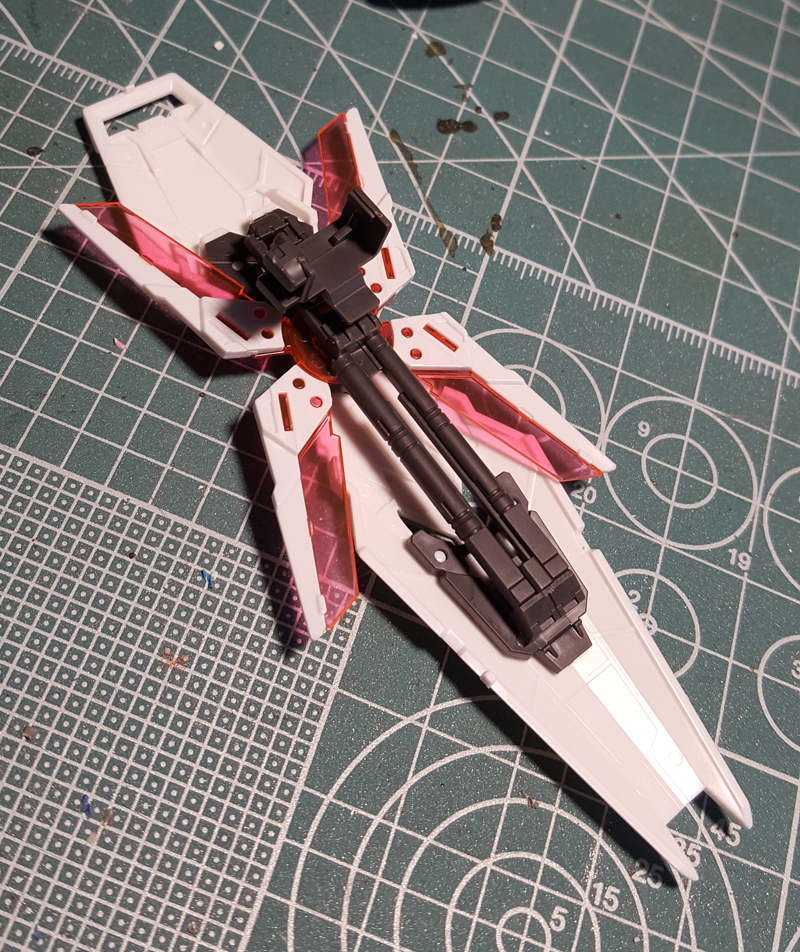
The shield is basically the same as the MG shield. Lots of parts underneath. I’m not a big fan of the way it attaches to the arm, though, it ends up being too far away from it. You also can’t attach it to the back for some unfathomable reason.
Well, and that’s it. I’m not doing a full-blown photoshoot just yet because I still need to sticker this kit and I’m thinking I’ll make an exception and actually panel line it as well – I never do this with RGs because I think they look cluttered as it is, but I think this one could use it. Anyway, as you can see, the kit can actually do a full split and it can almost pull off the Seed pose, though the feet won’t quite move enough.
So does this kit live up to the hype? For the most part. When it was first announced, everyone basically expected it to be the ultimate RealGrenade, and instead it’s now the sturdiest, most poseable and most easily transformable kit of the Unicorn in existence. And it’s a really fun build too, at least if you like ’em complex – it took me something like 7-8 hours to put it together, but just because there’s so many parts. Except for the shoulder armor, it’s not difficult or frustrating at all, just time consuming.
But is it perfect? No. Sorry. No, it’s not. First of all, it still has parts that pop off when you transform it, especially around the knees. Secondly, while poseability is certainly fine, a lot the joints are too tight for their own good. I’m terrified I’ll break something everytime I move the arms, and it makes posing the kit kind of a chore.
And thirdly, I really think the transformation comes at something of a cost to the kit’s appearance. The proportions are clearly off because they had to cram so much into such a small-scale kit – everything feels too bulky, especially the shoulders and the lower halves of the arms. This is especially odd because the legs are actually more or less accurate, and you’d think that would be the hardest part to get right.
The bottom line is, though, that this certainly is a step up in engineering for Gunpla, and I’m as amazed as anyone that Bandai pulled it off. This really wasn’t supposed to work. So if you’re a fan of the Unicorn Gundam, I’m afraid I have to tell you you’ll need this one as well, along with what I have to assume is several others that you already have. It’s a really special kit, and you kind of have to build it to believe it.
Master Grade 3.0 RX 78-2 Gundam
You may or may not remember that after building the RG RX 78-2, I decided more or less immediately that I needed to have its MG counterpart, the 3.0. Like the RG, this version is modeled after the life-size Gundam in Tokyo, and, well, it looks awesome.
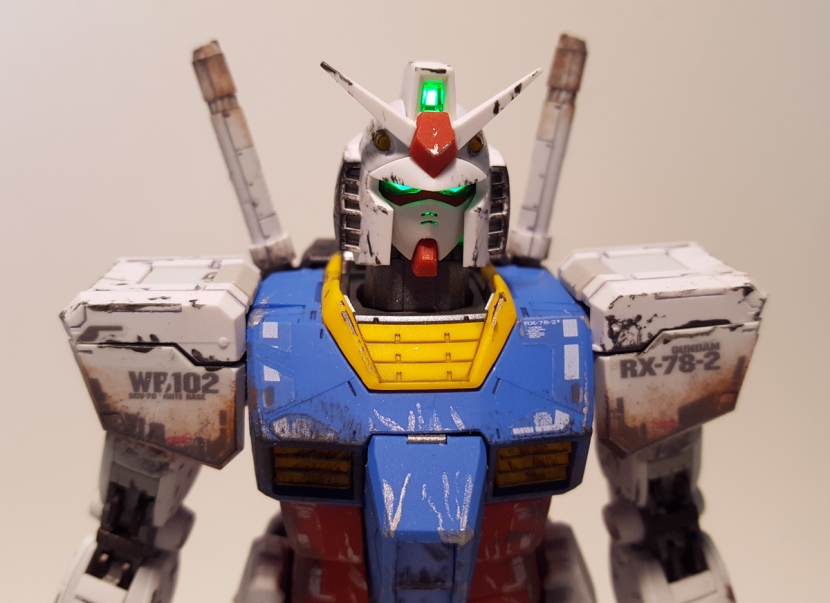
Now since I bought this kit in no small part because of the color scheme that it already comes molded in, doing a full repaint didn’t make a whole lot of sense. Ultimately I settled for painting the inner frame and panel lining plus weathering and a flat topcoat on the armor.
But first I snapped the kit together unpainted – I’d never done this before, but in this case, I was really kind of stumped as to what I wanted to do with the kit, so I needed to see it fully assembled first.
Which means we get to do a full-blown OOB build review, of course. Here’s a shot of the box contents all laid out to get us started.

I was a bit surprised by the low parts count. Of course the RX 78-2 is a relatively small MG by its nature, but this really doesn’t look like much, and snapping it together barely took me longer than the average RG kit. I’m not saying that’s a bad thing – the kit has a full inner frame and articulation is about what you’d expect, so it doesn’t need to be more complex, but I think it’s something worth pointing out. Note also the small PC sprue.
The first thing the instructions tell you to do is build the core fighter. I did this last, but here it is anyway. Evidently this is the exact same core fighter that came with the 2.0 version. It looks okay and the transformation works really well, but I don’t understand why the landing gear comes molded in clear plastic. So that you can make it look like it’s hovering? Obviously painting this is an easy fix, but it’s really weird.
Assembly of the suit itself starts with the torso, which consists of three sections plus a core block that you add later if you want to display the core fighter separately and/or you want to use an LED unit – the LED won’t fit with the core fighter in there. The shoulder joints here are pretty involved – those panels on top actually move up to allow more articulation, so there’s more going on than you’d think at first glance.
Next is the backpack, which of course is pretty simple because, well, it’s the RX 78-2. The color separation with that white stripe is nice, and what you don’t see is that the boosters also come with clear pieces that go inside them. I didn’t insert these for the snap-fit build because I knew I was going to paint them and they would never come back out.
Here’s the neck assembly. The hinge that the head attaches to is clear, obviously, because the LED goes underneath it. Once the whole neck/collar section is attached to the torso, it’s very easy to remove it to access the LED unit.
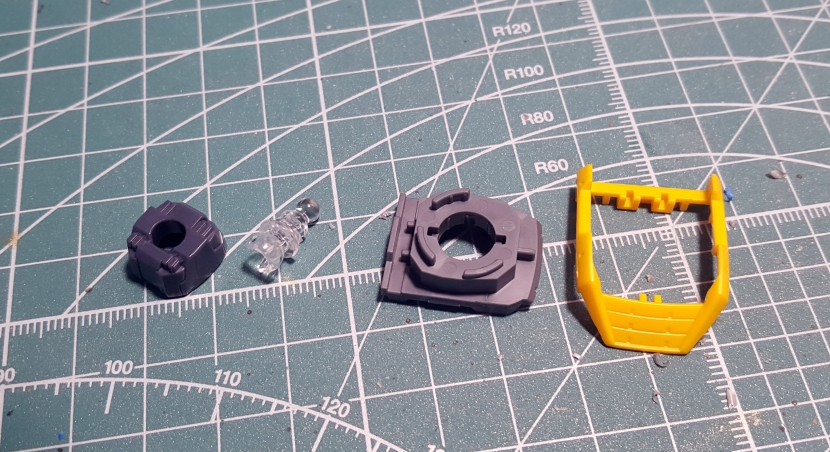
Up next is the head, which is beautifully detailed, as you can see. The vulcans are molded in yellow, the vents on the face mask are actual slits – the works. My one gripe is that the rear camera isn’t inserted in such a way that the LED can light it up – and I didn’t realize it would be impossible to remove until the exact moment I snapped it in. Not a huge deal because I wasn’t going to paint it, but keep this in mind in case you want to do that.
These are basically the halves of the elbow joint, and they’re a massive, massive pain in the ass to assemble. Everything else about this build is fun, but I really hated this part.
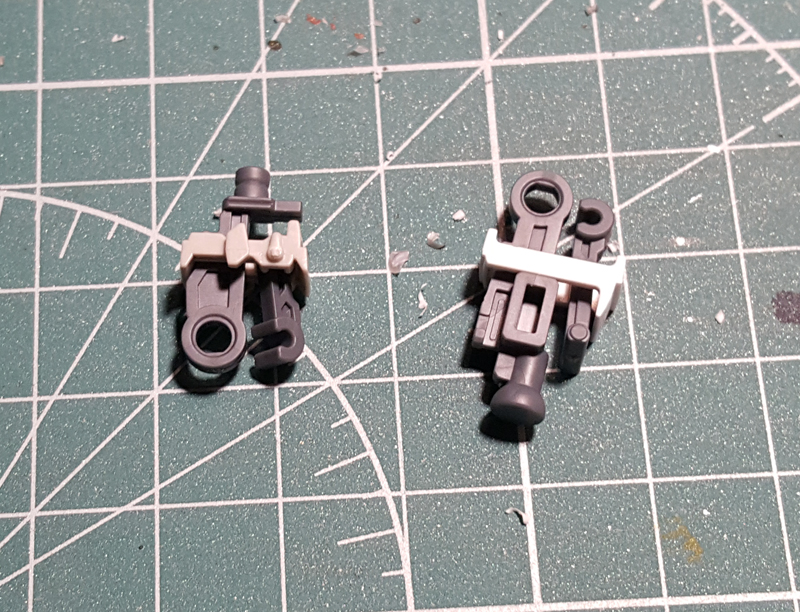
Worse yet, after painting I had to assemble and then take apart one of the elbow joints again, and the plastic had apparently become weakened and one of those O rings just ripped right off. The O rings are what holds the elbow together, so that pretty much destroyed the joint. At this point it still more or less holds up even with the shield attached, but I’m thinking I’ll eventually have to glue it in place or figure out a way to strengthen it with a wire.
Once the arms are assembled, they look as slick as you’d expect and they bend almost 180 degrees.
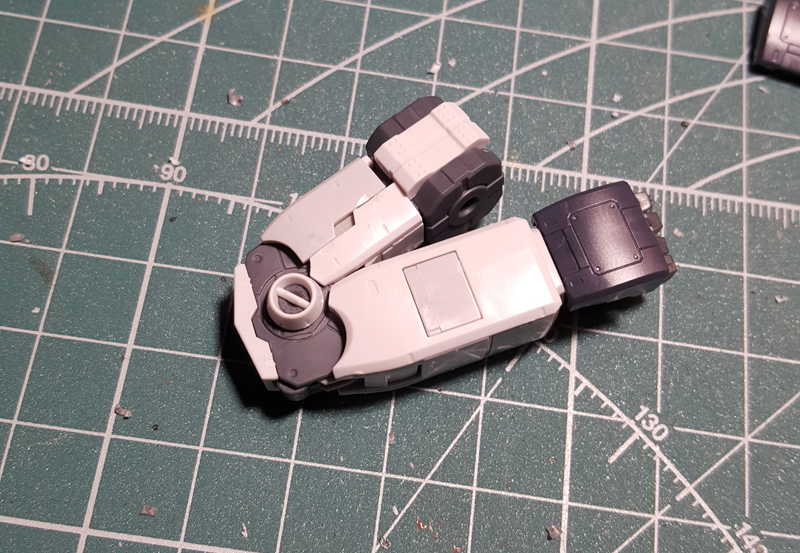
The shoulder armor is one of the reasons why this kit has so few parts. Here’s everything piled up and then assembled – very simple stuff. Surprisingly, though, almost everything moves, giving the arms a lot of room. I was a bit miffed by the simplicity here at first, but it’s actually ingenious – none of Bandai’s occasional over-engineering, it’s just simple and does what it needs to do. There’s almost too much moving stuff on here flopping around, if anything.
And here’s what we’ve got so far. It’s not just the angle, by the way, the hands really are a bit too big.

Unlike the shoulder pads, the feet are insanely involved. What you’re looking at in the first picture is one foot/ankle plus all the parts the second one consists of. As you can see in the second picture, though, articulation is really good. These feet do what they’re always trying and failing to do with the RG feet, basically.
Other than the hip joint and exactly one armor piece, the legs are 100% identical. One of my favorite things about them is that the knees don’t seem to completely explode when you bend them 180 degrees. I know people like these shifting armor plates, but on some newer kits it’s really kind of crazy.
Next you build the waist, and then you put it all together. Nothing terribly interesting here, the RX 78-2’s skirts are their usual blocky selves. Note, if it amuses you, that yet again my camera thought the feet had to be in focus. I swear I actually tried to avoid it this time.
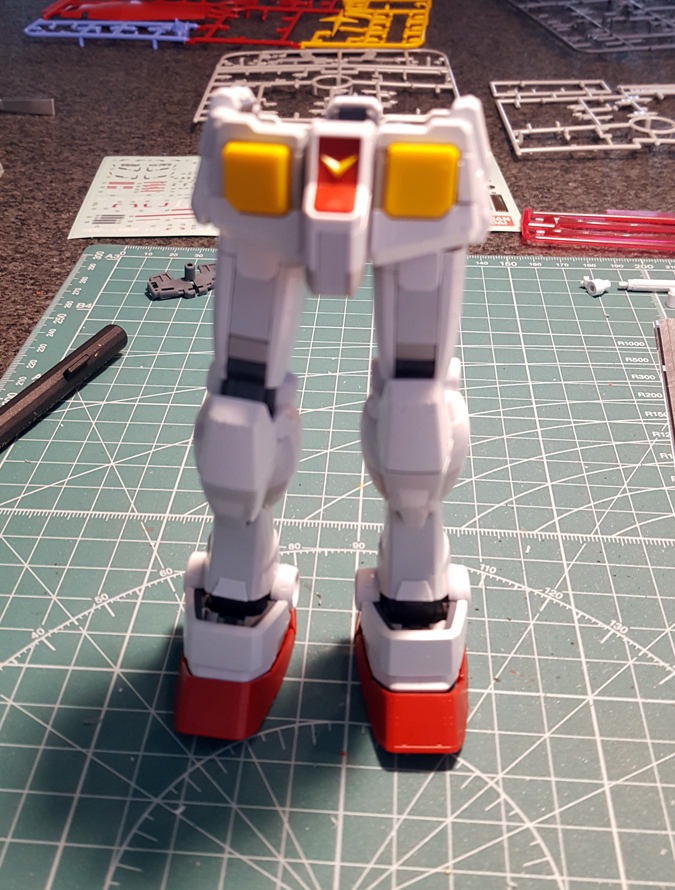
And here are two shots of the suit all put together, with and without the accessories. I was having an oddly difficult time getting it to look good in these pictures and I couldn’t figure out why.
The accessories are probably this kit’s biggest weakness. Apparently they’re completely unchanged from the 2.0, and without even having that kit, I just get the feeling that it shows. The beam rifle especially just looks big, blocky and monochromatic, the attachment clip for the shield is silly, and the bazooka… I guess the bazooka’s okay. Honestly, posing up the suit OOB with the beam rifle in its hand, it really looks like the rifle belongs to another kit. It’s just weird. Obviously I decided to remedy this with the ol’ airbrush the second I had snapped it together, but if you’re just going to snapfit and panel line this kit, you’ll be pretty disappointed in the weapons.
Here’s a shot of all the accessories once I got them painted. More on this further down, I just don’t have a picture of them before painting because, uh, I forgot to take one.

I also couldn’t test the LED before painting because I didn’t have the batteries. Here’s what the finished build looks like with it installed.
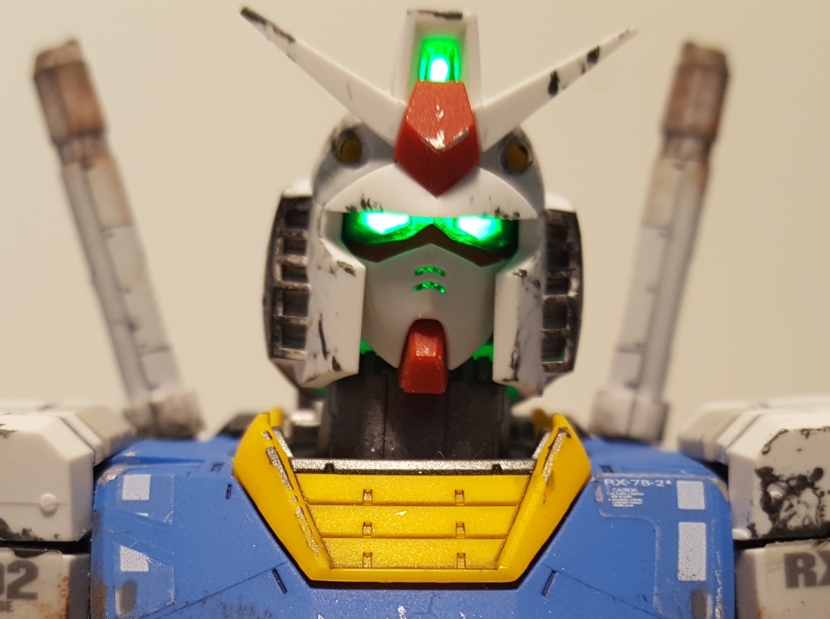
It works extremely well no matter how you move the head around, I just think it’s really lame that the only LED unit that’s available as a regular, non-P Bandai release is the green one. The eyes are supposed to be yellow and the camera red, so we’d either need an LED in at least one of these colors, or, obviously, a clear one and clear yellow and red pieces for the eyes and camera. It still looks good this way, it’s just not accurate and it bothers me. I’m sure you could mod the LED, but, uh, not me.
After building the kit and giving it some thought, I decided I would actually do the weathering with it mostly assembled. One problem I’ve had with weathering in the past is that because I always paint basically every part separately, I sometimes ended up with things that didn’t make sense or didn’t line up correctly. So this time I went to the other extreme and did it all on the complete kit.
The obvious key advantage of working this way was that I could actually see where the dirt and the scratches were going on the suit, and especially with the numerous small parts, it would have been impossible to do a lot of this convincingly otherwise because there’s streaks and other things going across several parts. The less obvious advantage is that it’s just more fun to work this way because you’re not staring at small pieces of plastic for 20 hours.
The first thing I did was the panel lines, for which I just used a grey Gundam marker. You can pretty much just do a pin wash with these, which works really well on this kit at least when it’s not painted – a lot of the panel lines are really thin and shallow, so I kind of wonder what would happen if you painted the parts first. You might have to scribe them before painting.
Up next were the stickers; I normally wouldn’t use these on something I paint, but I was really curious to see what it would look like to use the stickers here and then do weathering and a topcoat over them. In some places, like the shield and the shoulders, I also damaged them slightly to suggest scratching. As you’d expect, the stickers look totally fine on the white parts, but even with the flat topcoat, there’s visible silvering elsewhere. I promised myself a while ago to experiment more and try more stuff, so I don’t regret doing this, but I’m tracking down waterslide decals from now on, 3rd party if necessary.
Another thing that doesn’t work too well with stickers is drybrushing. I don’t know why I didn’t notice this as it was happening, but as you can see here, when I drybrushed the heat streaking from the chest vent, it ended up highlighting the outline of the sticker. From a distance, it basically reads as heat damage and looks fine, but up close you can tell what happened.
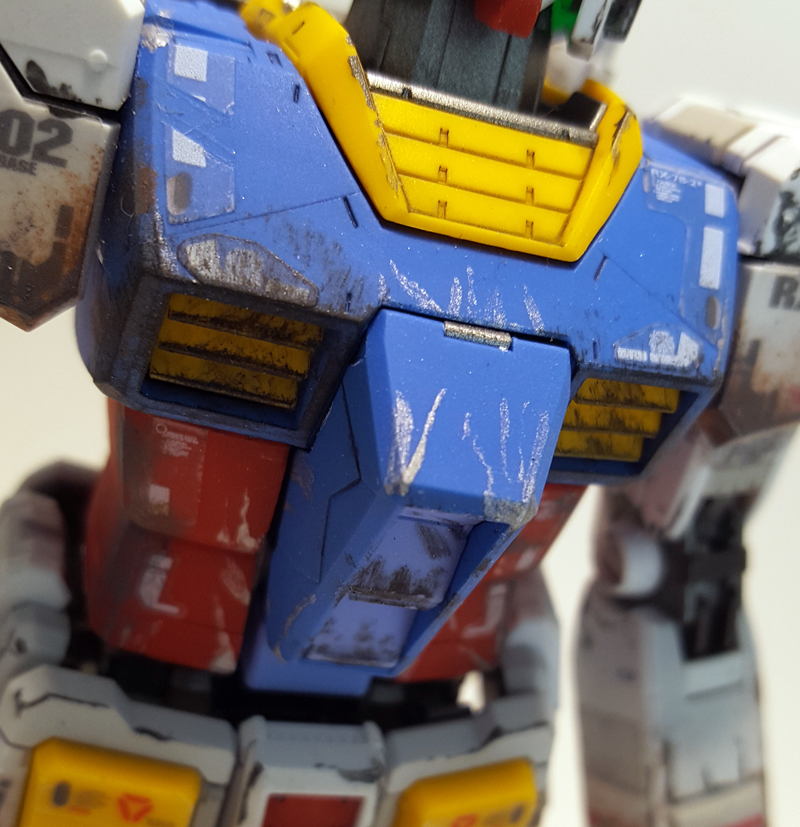
Then I did paint chipping. As usual, I used Tamiya’s chrome silver on the darker parts and gun metal on the lighter ones.
Up close, I really hate these long scratches I tried to do on the chest. They look fine in real life, but magnified like this… not so much. I really need to learn not to go overboard with the paint chipping. And weathering in general, but that’s a whole other problem, ahem.
The foot here looks much more convincing.
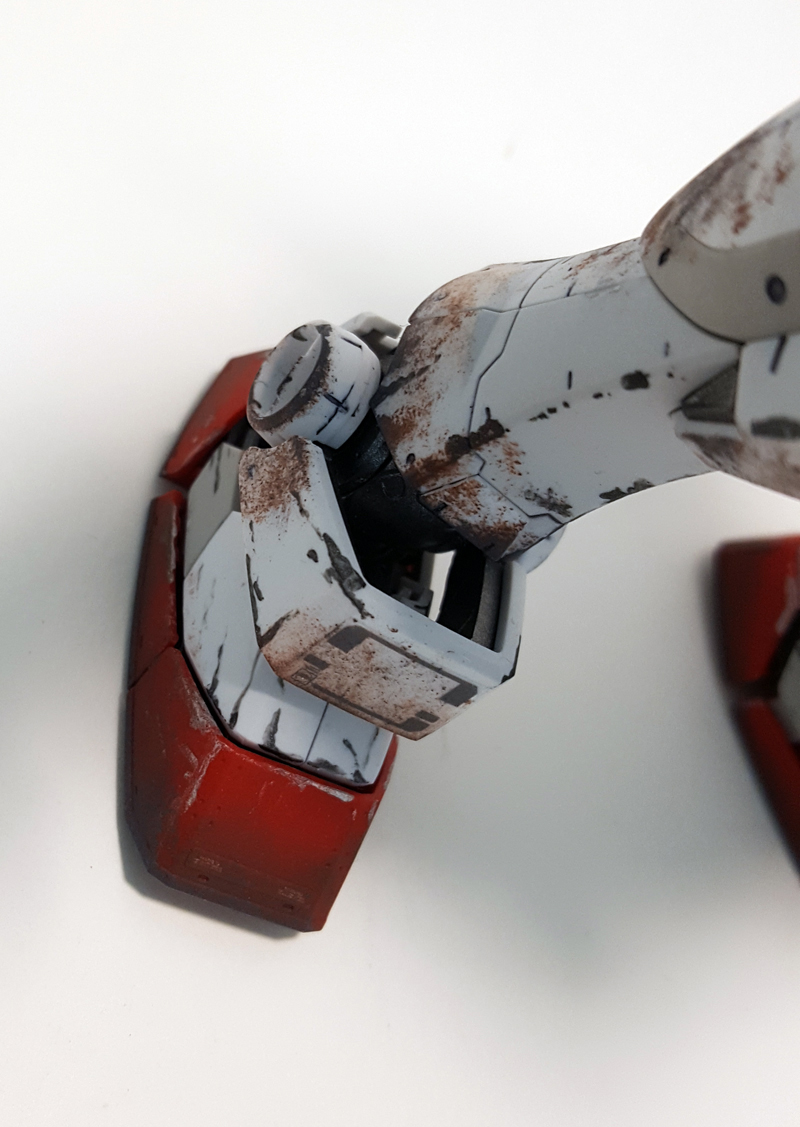
The final step was the dirt. I sponged on Tamiya’s brown first, followed by dark grey to knock it back a little and suggest dried dirt in some places. This second step made all the difference in the world to make the dirt look more convincing, and I’m really happy with how it came out.
Finally, I drybrushed some black on the chest, shoulder and head vents and around the vulcans on the head. And then I used the same technique to add these black marks where projectiles would have bounced off or exploded on the shield, which worked out very nicely.
And then I had to pry it all apart again to topcoat it and paint the inner frame. This ended up taking way longer than I expected, and I spent most of the process terrified that I’d break something. Which of course I did, but luckily the damage turned out to be completely invisible on the final product.
I also painted all of the inner frame for the first time. I really couldn’t cut any corners on this one – there’s so many moving armor parts that reveal inner frame underneath that it was easier to just paint everything than spend two hours trying to figure out which parts would be visible and which not. It’s basically all of them anyway. So I painted everything gun metal over Vallejo’s black surface primer, except for the parts that have bronze detail stickers, which obviously I painted with Tamiya’s bronze, but I can’t say I like how that turned out.
The bronze’s a nice color in and of itself and I’m sure I’ll end up using it again on something or other, but against the gun metal of the rest of the inner frame, it’s just too dark and doesn’t pop at all. With hindsight, I should’ve used gold on these parts, but there’s no way I’m ever taking the elbows apart again, so it won’t get fixed.
The gun metal looks good, although I’m always a bit disappointed by what the topcoat does to the metallic sheen. I used semi-gloss as usual (which is why I can never topcoat my kits after final assembly, I just like the effect of shiny and dull parts next to each other too much) and the effect’s still there, but it just never looks as good as before topcoating, and I really can’t imagine leaving these moving parts without a topcoat is a good idea.
I really can’t quite recall why, but at some point I decided that the dark grey of the backpack and the weapons needed to be black with silver drybrushing. In all honesty, I’d forgotten how good this simple combo looks and I’m very happy with how it turned out.
The weapons, of course, also have paint chipping, soot and dirt on them, and I did a wash on the internal mechanical parts of the beam rifle, but I don’t particularly like how that turned out. Because it’s metallic, I didn’t want to use a gloss coat under the wash, and of course that made a mess. It still looks better than without the wash, but not that great.
The sabers also have heat streaks where the beam blades come out because beam sabers generate heat – true science fact. And I did a yellow candy finish on the camera to make it look more like a lens.

One thing I’m definitely doing again is painting the hands. I just painted them gun metal with the fingers straight so that the internal parts of the joints would retain their original color, and it looks really good – certainly much better than the unpainted hands I have on the Sinanju.
Probably the weirdest feature of this kit, to me, is the clear parts that go in the thrusters. I have no idea what these are supposed to represent, so I painted them clear red with silver on the inside, which looks nice and shiny, but now it kinda looks like there’s pieces of candy in the thrusters. I dunno, guys, I tried?
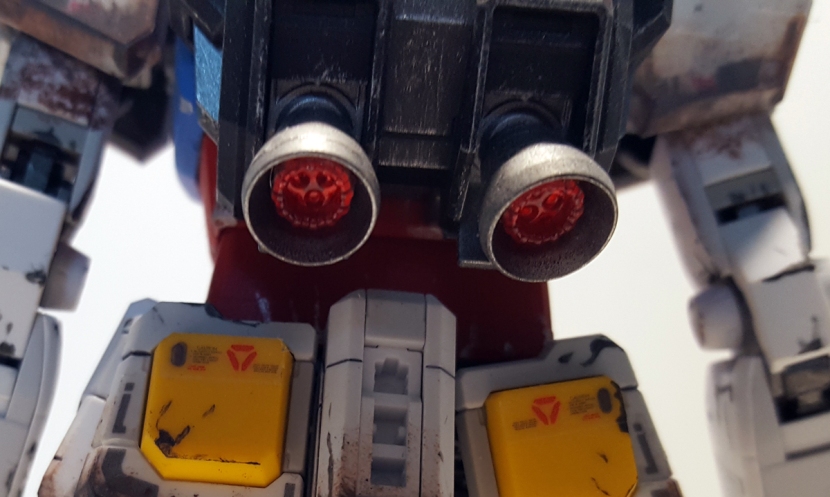
Poseability is very good, although due to the small size of the kit, there’s quite a number of parts that attach with ball joints, most notably the feet. Because I wasn’t being careful enough when I painted these parts, many of them now don’t fit well anymore. The feet in particular keep popping out. Lesson learned for next time – don’t get paint on polycaps, and always mask balljoints and moving pegs.
As you can see, I had a lot of fun playing with this kit for the photoshoot. Other than the problems caused by my painting and general mishandling of the kit, it’s very easy to work with and has basically no parts that fall off when you’re moving things around. The hands hold the weapons perfectly (although getting the kit to hold the bazooka is a bit difficult), and you can pull off all kinds of cool action poses with it.
My only real complaint, if I have one, is that I don’t see what’s “3.0” about this kit. That’s not really a knock on the kit as it is – it’s a good, solid MG that holds together really well. But I just don’t think there’s anything here that’s a significant step up from other MGs I’ve built, it’s just a good kit and that’s that. Seems to me like they just made a new RX 78-2 and decided to call it the 3.0 version because they didn’t know what else to call it – the engineering certainly doesn’t warrant the label.
And because I have to close every build review with a recommendation, I’d say get this if you like the look of it, simple as that. I know some people don’t like this particular interpretation of the RX 78-2 because other versions are more anime accurate, and I don’t think building it yourself will change your mind about that. But if you’re like me and you like the detailed and more realistic look, there certainly isn’t anything wrong with the kit that should make you think twice about buying it.
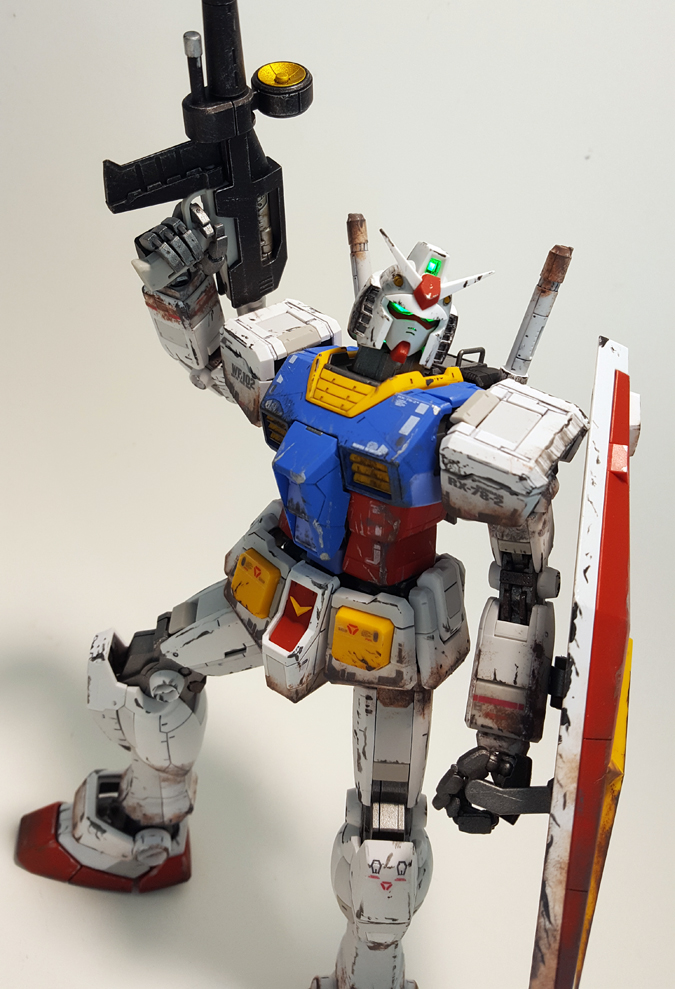
As for my paintjob, I’m glad I tried a lot of new things here and overall I’m very happy with the result. I originally wanted the weathering to be a bit more subtle, but looking at it now, I actually like it more than I thought I would when I started the build. But exactly because I’m far more enamored with this thing now than I expected to be, the broken elbow joint and the two big errors on the chest piece really bother me, and I’m seriously considering buying another kit just to replace those parts.
Then again, maybe I’ll just leave well enough alone and move on to the next kit. There’s no such thing as a perfect build anyway.


