
Tagged: seed

Real Grade Force Impulse Gundam
Full disclosure – the Force Impulse Gundam is a suit that I really don’t know the first thing about. Both of my regular readers will know that I generally don’t watch much Gundam anime and so I say this about a lot of kits, but with this one, I didn’t even know it existed until the RG came out, and I just bought it because I like Real Grades and I thought it looked cool.
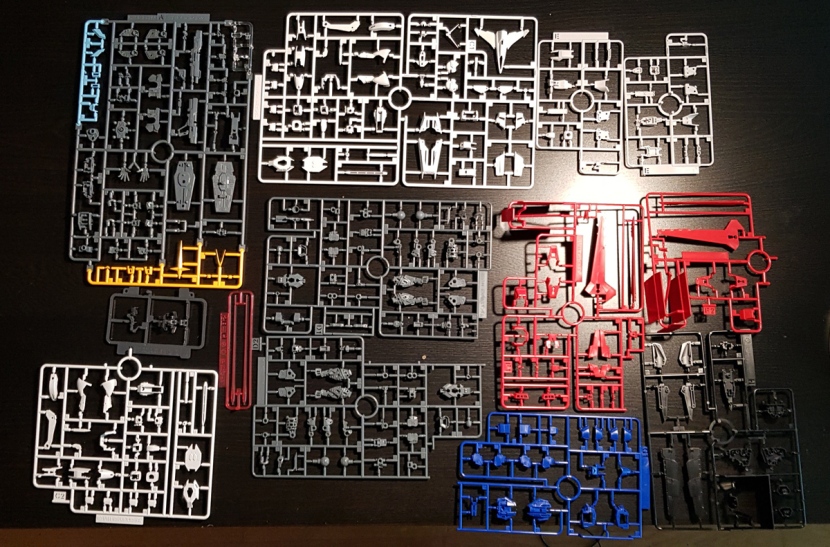
I also reviewed this kit on Youtube, you can scroll to the bottom to check that out. Anyway, as usual, let’s start with a look at what’s in the box.
 Notice, of course, the B sprue center left. There are exactly two parts here – one goes inside the Core Splendor and the other one inside the chest. Honestly, I’m not sure these are even necessary, at this point it feels like they’re just including them because it’s a Real Grade and it has to have them.
The build starts with the Core Splendor, which is what the core fighter’s called on this suit for some reason.


It does look rather splendid, though. Probably my favorite core fighter that I’ve built thus far. Too bad you’ll never get to see it again. More on that later.
The build continues with the chest, which is assembled in two main steps. first is this section, which is basically a few armor bits mounted on top of the aforementioned B part.
")

Then you continue with the shoulder joints, which are fairly complex because they’re needed for a transformation, as well as the bottom half of the armor, basically.
")


You then assemble the arms. Pretty standard stuff, but I will say it’s nice that the shoulder armor attaches directly to the top of the arms. This has been the case in the RG line for a while now, but the way the shoulder armor mounts on top of the arm attachment peg on the older kits is a pet peeve of mine that I’m going to need another few years of therapy to get over.


Next is the head. As you can see, I needed to paint the cameras because they’re clear plastic and the kit comes with stickers for them. I really don’t understand why they keep doing this. Other than that, though, I will say that it’s a very nice looking head and assembly is mostly painless. You know how that can be an issue on these RGs where the parts are half the size of a grain of sand.


With the head assembled, you’ve got an upper torso ready for transformification, but you need some accessories first.
Namely the rifle…


…and the shield. This is a particularly nice shield, and it may or may not have been one of the reasons I bought this kit in the first place. What can I say, I’m a sucker for a good Gundam shield.


Now for that transformation. You basically dislocate the suit’s shoulders and twist the arms into position to turn it into what is apparently called the Chest Flyer. The only other step this involves is folding up an armor piece that covers up the face and ends up being basically invisible.

On the right here is an action base adapter in case you want to display it like this. I… do not. Let’s take a look at the legs.


Nothing terribly out of the ordinary here. The knees are actually needed for an even more ridiculous transformation than the Chest Flyer, but they look pretty much like the same double-jointed knees every RG has. I love the shapes and proportions of these legs, but it’s a bit of a shame that the upper thigh armor doesn’t move.
Assembly continues with the feet and the hip joints. Yes, you build the feet after the legs. What’s this world coming to? Before you know it, we’ll have dogs and cats living together.


")


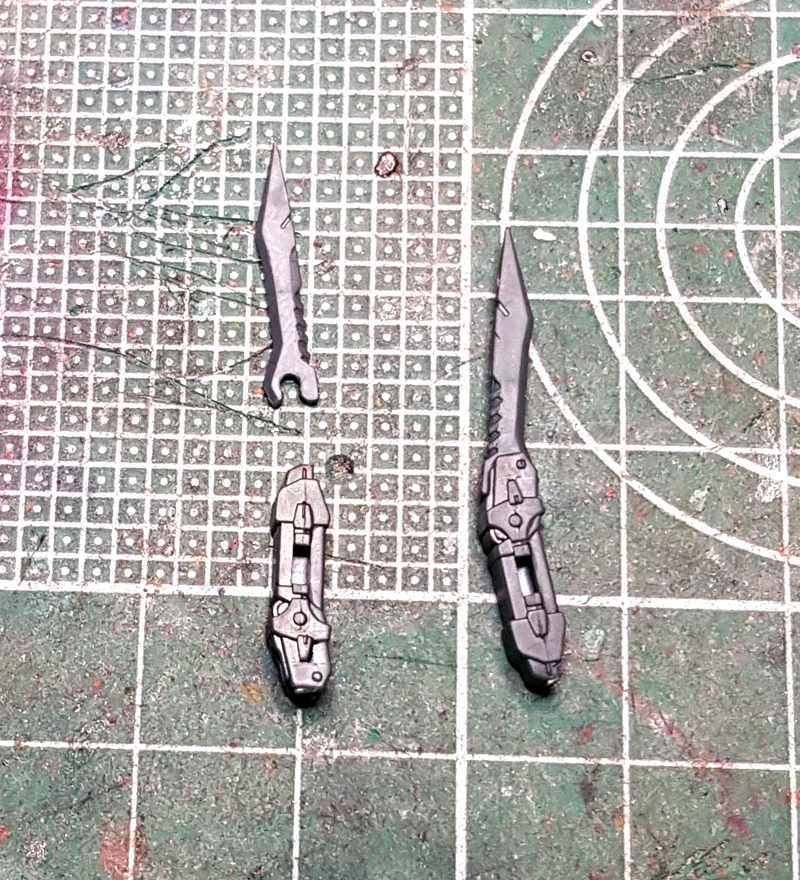
We then proceed with the waist unit. Very standard stuff, as you can see. The side skirts open to store the Folding Razor knives. No silly German name for those, unfortunately.


")


Notice also the usual hinge part allowing you to lower the hip joints for extra mobility (not separately like on the Nu Gundam, unfortunately) and the bottom part of the upper torso that’s actually attached to the waist unit here because it’s where you insert the Core Splendor.
Once you’ve attached the legs to the waist unit, the whole thing transforms into this preposterous contraption called the Leg Flyer. This also comes with a fug-buttly action base adapter that you’ll see again when I complain about it below.

I didn’t transform that one knee properly, by the way. I don’t know how this happened, the knees are supposed to look like on the suit’s left leg.
The better news is how you attach the Core Splendor to all this. You open this little hatch…


…and then you insert the plane and fold it over to form the suit’s backpack. This is simple, it works well, and it actually looks good. It’s also kind of unfortunate, though, because it means the Core Splendor can’t be displayed separately unless you leave the main suit in its two “flyer” sections, which, um, you don’t want to do.


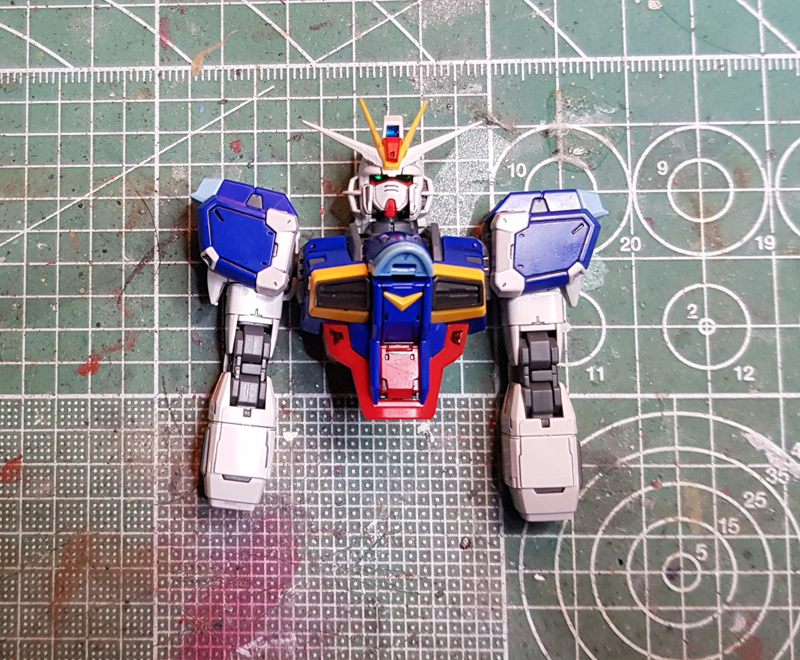
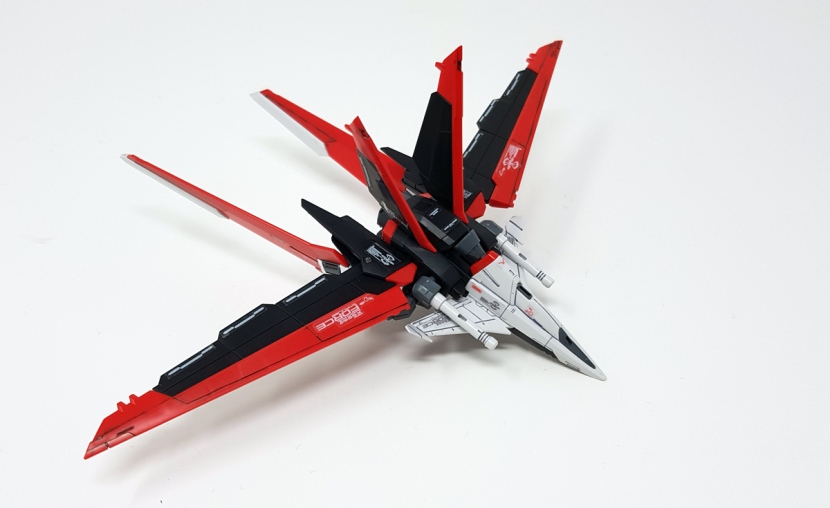
And that’s the Impulse Gundam complete.
We’re not done yet, though. First we put together the Silhouette Flyer, which is really simple.


Next is the, ahem, Force Silhouette, which distinguishes itself from the Aile Striker by having an even more nonsensical name, and… not much else. But it looks cool. You start by assembling the main fuselage.


This is followed by the wings and the beam saber handles.


And finally these stabilizers that also have little thrusters on the side that fold out.
The not-Aile Striker can be combined with the not-Skygrasper to form this plane, and that’s the one “transformation” aspect of this kit that I will say looks really kickass.
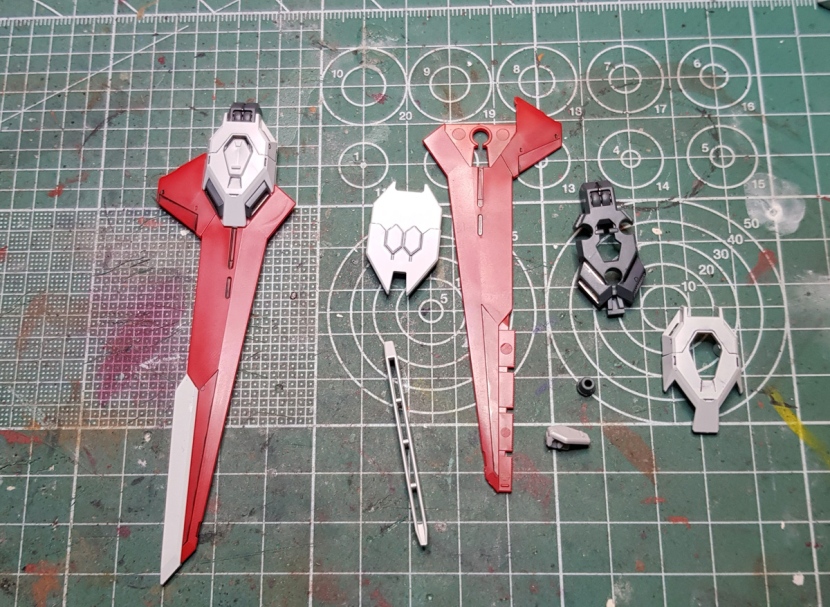
Oh yeah, and for some reason the very last thing the instructions have you assemble is the knives, so here’s an unnecessarily large picture of those.
And that’s it. To be honest, I’m really not sure why, but this build felt a lot more involved than you’d think based on the pretty standard number of parts. Maybe it’s because there’s so much different stuff or maybe because it’s just… not terribly unusual or interesting, despite the transformation gimmicks.
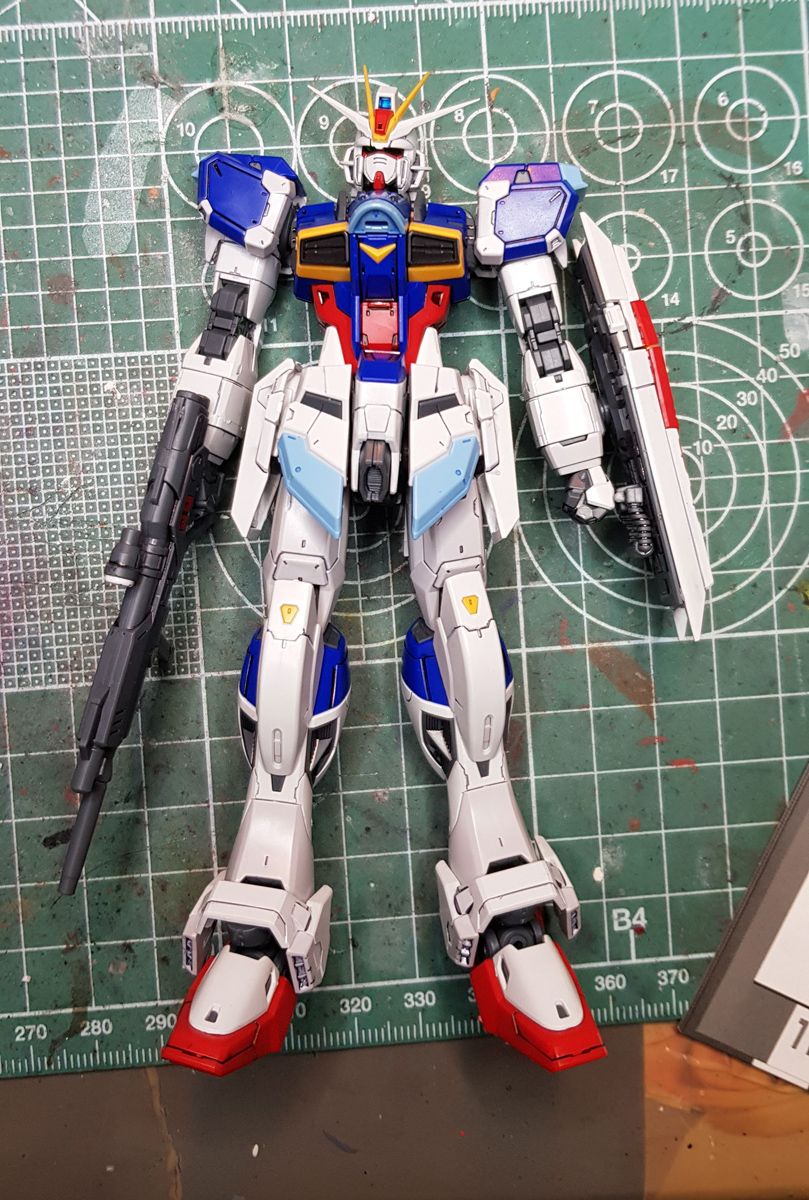
Anyway, we’re done with the build, and you know what that means – here’s a look at the accessories.
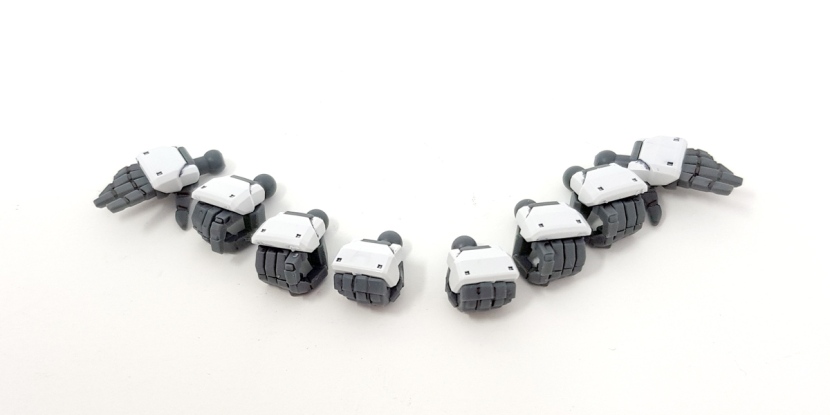
The hands are everything you need – two closed fists, two holding hands for the beam sabers, one trigger finger hand for the right and a holding hand for the shield on the left, and two open hands.
Here’s the rest of the accessories.
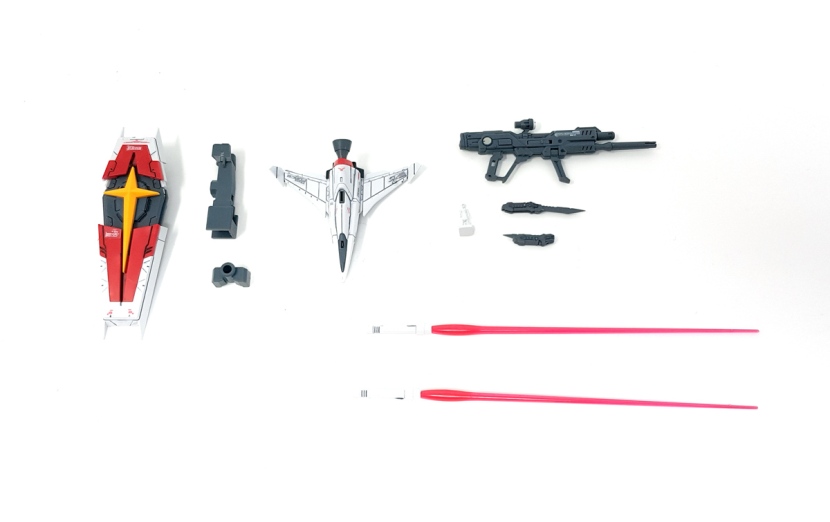
From left to right, we’ve got the shield, the two action base adapters, the Silhouette Flyer, the rifle, the knives, the pilot figure and two beam sabers.
Note the size of that action base adapter. This is the one I mentioned above – it has to be this big basically so that you can use it to mount the Leg Flyer on an action base, but the kit otherwise doesn’t come with a different one for mounting it in standard mode, which means you’ve always got this ugly contraption attached to the suit’s taint, like so.


I just really feel like if this was made from clear plastic or they had made a smaller alternate adapter, all of these pictures would look significantly better. The good news is that contrary to what you might think, you don’t actually need an action base.
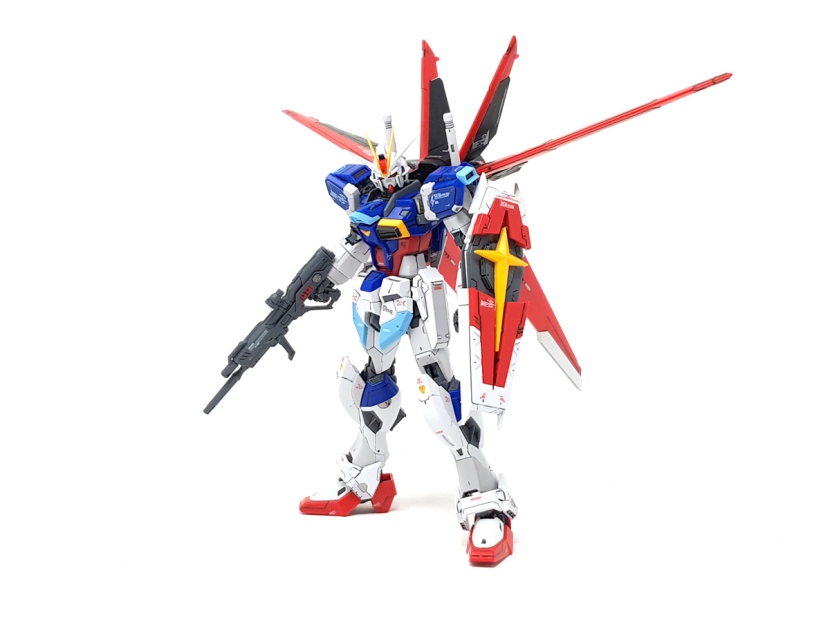
Yep, it actually stands up on its own, with the Force Silhouette attached, and without having to lean forward 45 degrees. I’m really not sure how that’s physically possible, but it’s true.


I’ve always thought these Rambo knives were silly, but I will grant that you can get some neat posing out of them.


I had by far the most fun with this, though, and looking at these pics again, I’m tempted to take the kit off the shelf and pose it this way instead of with the Force Silhouette attached.
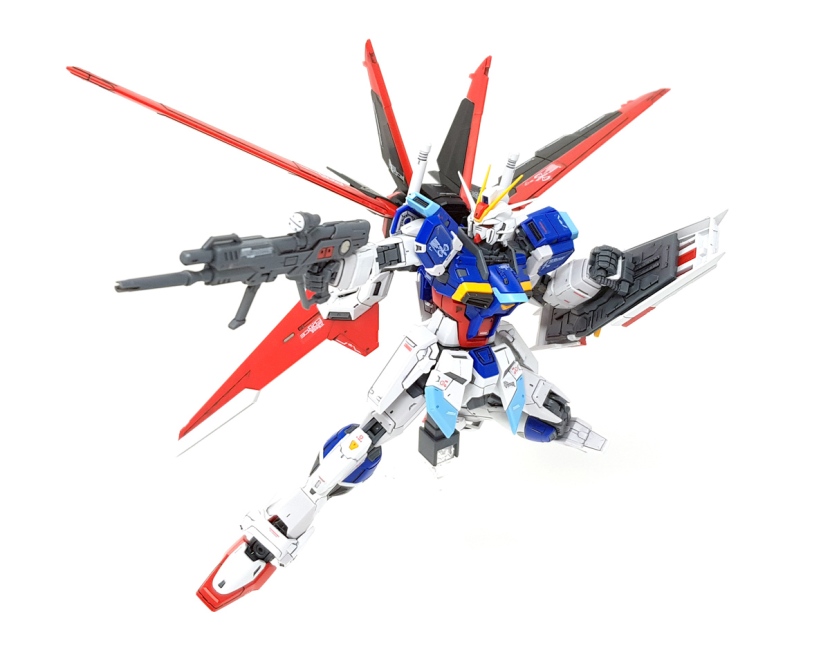
Although of course that looks good too.
Now do I recommend this kit? I’m gonna say if you’re a big fan of the Force Impulse Gundam, then yes, you should absolutely get this. Like all recent Real Grades, it’s incredibly well engineered, posable and stable. It’s really basically flawless – the only issue I had during the photoshoot was the upper torso occasionally popping off, otherwise it was really fun to work with.
At the same time, though, it just doesn’t do anything special. I’m guessing the idea was that it would be the first of the newer breed of RGs with a full-blown transformation and that’s what’s supposed to make it stand out, but frankly, the transformations are all kind of dumb, and while they don’t detract from the kit, they also don’t really add anything to it. It’s just another Real Grade, and unless you’re a fan of the design, you don’t really need this one.
Personally, I’m coming away from this build feeling a bit ambivalent about the whole thing. I certainly like the end result, but building this was kind of a chore. I used to build Real Grades because it was a throwback to years ago when I just enjoyed the simple fun of snapping together a complex kit without thinking about doing more than panel lines on it, but… I dunno, I think I may just not like that as much anymore as I thought. And I still don’t want to paint one of these because the tiny parts give me the willies.
So I don’t know what that means for the future. I still have quite a few unbuilt RGs lying around and that new Evangelion kit in the mail, so I’ll definitely have to do something with those, but I’m just not sure this thing is my thing anymore. Or maybe it’s just a phase, we’ll see. No doubt Bandai will release another engineering miracle next and I’ll have to get it.
