
Tagged: gundam

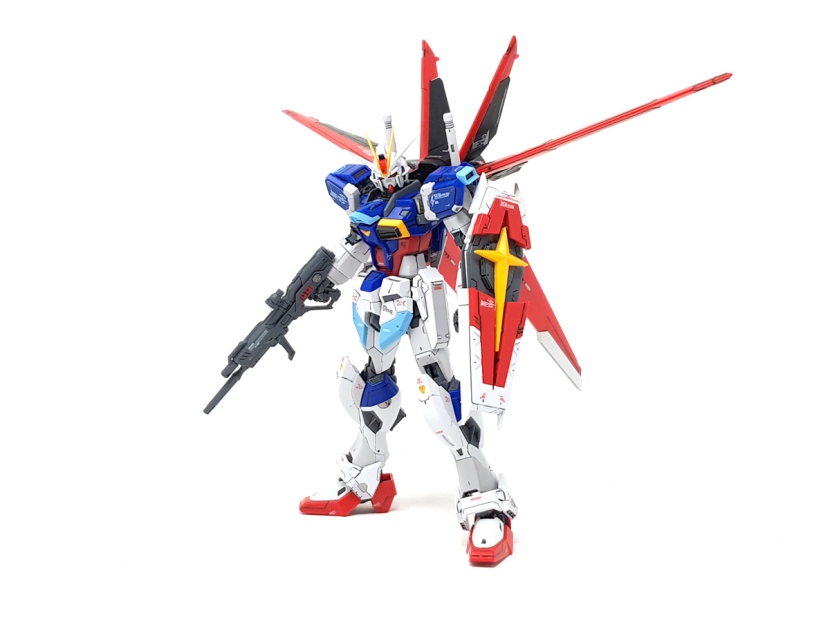
Real Grade Force Impulse Gundam
Full disclosure – the Force Impulse Gundam is a suit that I really don’t know the first thing about. Both of my regular readers will know that I generally don’t watch much Gundam anime and so I say this about a lot of kits, but with this one, I didn’t even know it existed until the RG came out, and I just bought it because I like Real Grades and I thought it looked cool.
I also reviewed this kit on Youtube, you can scroll to the bottom to check that out. Anyway, as usual, let’s start with a look at what’s in the box.
 Notice, of course, the B sprue center left. There are exactly two parts here – one goes inside the Core Splendor and the other one inside the chest. Honestly, I’m not sure these are even necessary, at this point it feels like they’re just including them because it’s a Real Grade and it has to have them.
The build starts with the Core Splendor, which is what the core fighter’s called on this suit for some reason.


It does look rather splendid, though. Probably my favorite core fighter that I’ve built thus far. Too bad you’ll never get to see it again. More on that later.
The build continues with the chest, which is assembled in two main steps. first is this section, which is basically a few armor bits mounted on top of the aforementioned B part.
")

Then you continue with the shoulder joints, which are fairly complex because they’re needed for a transformation, as well as the bottom half of the armor, basically.
")


You then assemble the arms. Pretty standard stuff, but I will say it’s nice that the shoulder armor attaches directly to the top of the arms. This has been the case in the RG line for a while now, but the way the shoulder armor mounts on top of the arm attachment peg on the older kits is a pet peeve of mine that I’m going to need another few years of therapy to get over.


Next is the head. As you can see, I needed to paint the cameras because they’re clear plastic and the kit comes with stickers for them. I really don’t understand why they keep doing this. Other than that, though, I will say that it’s a very nice looking head and assembly is mostly painless. You know how that can be an issue on these RGs where the parts are half the size of a grain of sand.


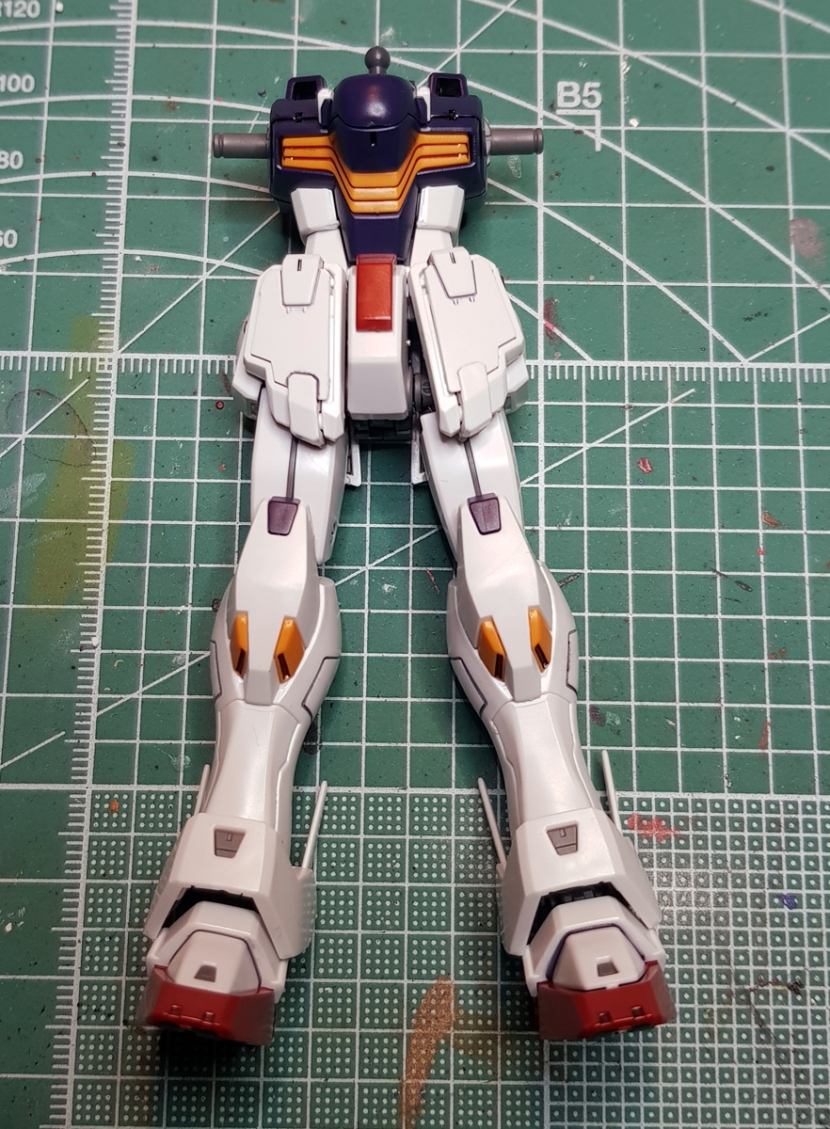
With the head assembled, you’ve got an upper torso ready for transformification, but you need some accessories first.
Namely the rifle…


…and the shield. This is a particularly nice shield, and it may or may not have been one of the reasons I bought this kit in the first place. What can I say, I’m a sucker for a good Gundam shield.


Now for that transformation. You basically dislocate the suit’s shoulders and twist the arms into position to turn it into what is apparently called the Chest Flyer. The only other step this involves is folding up an armor piece that covers up the face and ends up being basically invisible.

On the right here is an action base adapter in case you want to display it like this. I… do not. Let’s take a look at the legs.


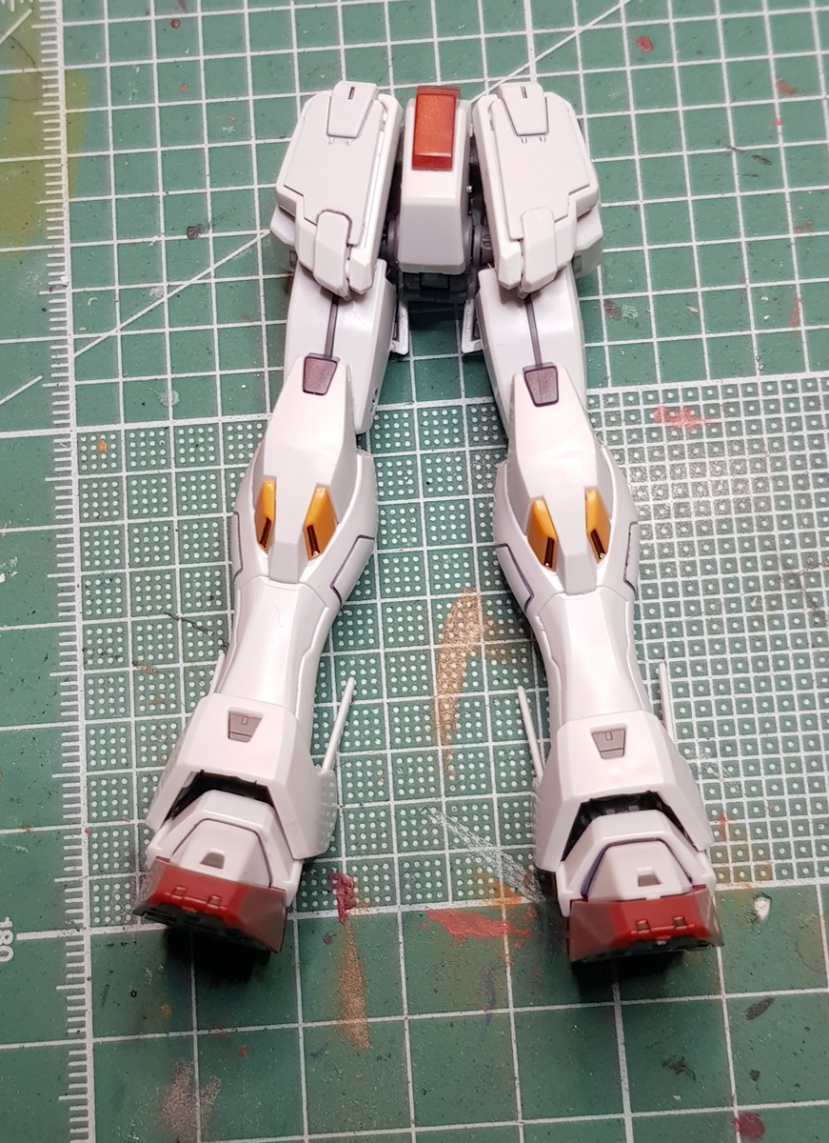
Nothing terribly out of the ordinary here. The knees are actually needed for an even more ridiculous transformation than the Chest Flyer, but they look pretty much like the same double-jointed knees every RG has. I love the shapes and proportions of these legs, but it’s a bit of a shame that the upper thigh armor doesn’t move.
Assembly continues with the feet and the hip joints. Yes, you build the feet after the legs. What’s this world coming to? Before you know it, we’ll have dogs and cats living together.


")


We then proceed with the waist unit. Very standard stuff, as you can see. The side skirts open to store the Folding Razor knives. No silly German name for those, unfortunately.


")


Notice also the usual hinge part allowing you to lower the hip joints for extra mobility (not separately like on the Nu Gundam, unfortunately) and the bottom part of the upper torso that’s actually attached to the waist unit here because it’s where you insert the Core Splendor.
Once you’ve attached the legs to the waist unit, the whole thing transforms into this preposterous contraption called the Leg Flyer. This also comes with a fug-buttly action base adapter that you’ll see again when I complain about it below.

I didn’t transform that one knee properly, by the way. I don’t know how this happened, the knees are supposed to look like on the suit’s left leg.
The better news is how you attach the Core Splendor to all this. You open this little hatch…


…and then you insert the plane and fold it over to form the suit’s backpack. This is simple, it works well, and it actually looks good. It’s also kind of unfortunate, though, because it means the Core Splendor can’t be displayed separately unless you leave the main suit in its two “flyer” sections, which, um, you don’t want to do.


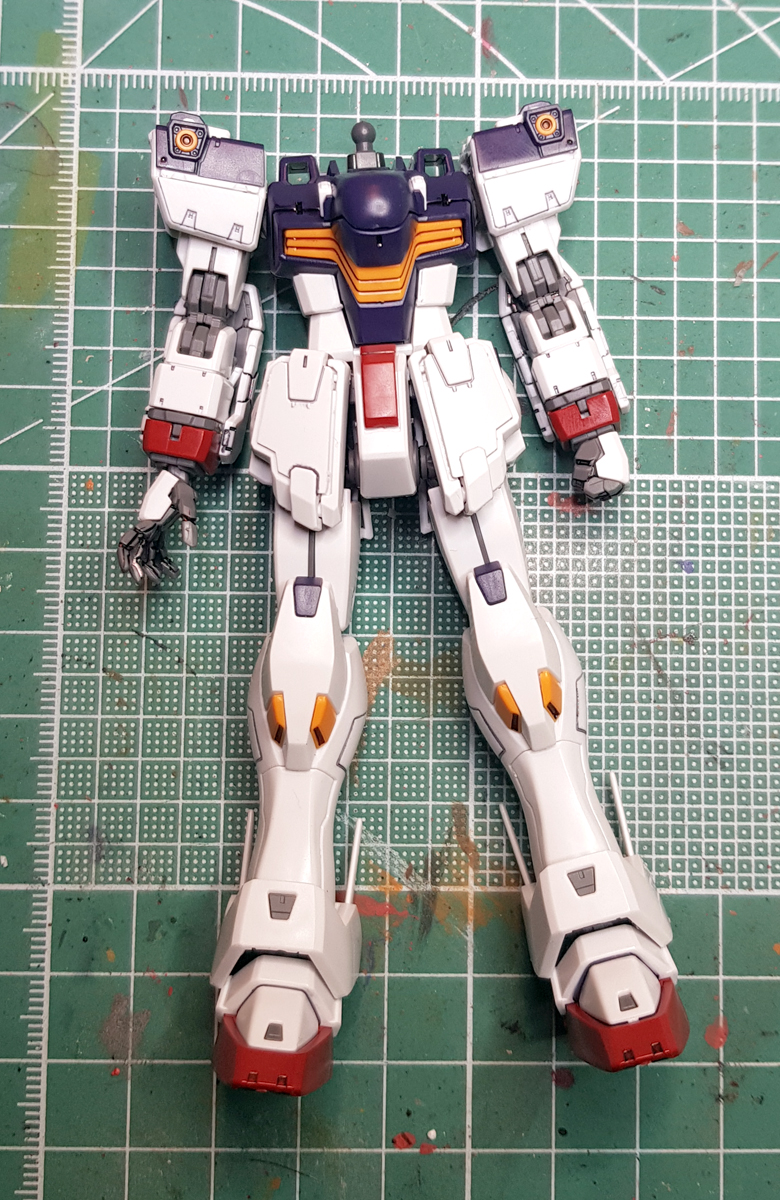
And that’s the Impulse Gundam complete.
We’re not done yet, though. First we put together the Silhouette Flyer, which is really simple.


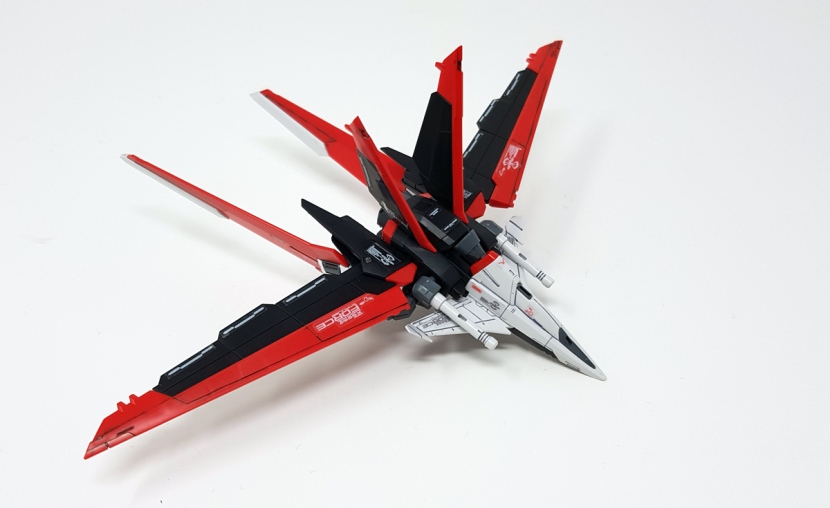
Next is the, ahem, Force Silhouette, which distinguishes itself from the Aile Striker by having an even more nonsensical name, and… not much else. But it looks cool. You start by assembling the main fuselage.


This is followed by the wings and the beam saber handles.


And finally these stabilizers that also have little thrusters on the side that fold out.
The not-Aile Striker can be combined with the not-Skygrasper to form this plane, and that’s the one “transformation” aspect of this kit that I will say looks really kickass.
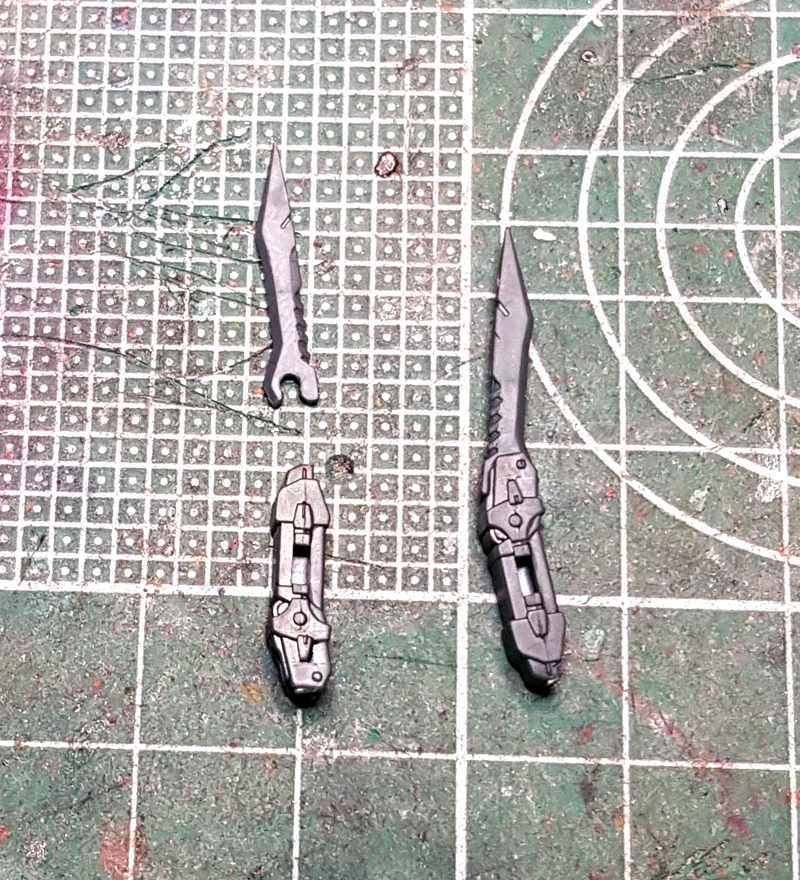
Oh yeah, and for some reason the very last thing the instructions have you assemble is the knives, so here’s an unnecessarily large picture of those.
And that’s it. To be honest, I’m really not sure why, but this build felt a lot more involved than you’d think based on the pretty standard number of parts. Maybe it’s because there’s so much different stuff or maybe because it’s just… not terribly unusual or interesting, despite the transformation gimmicks.
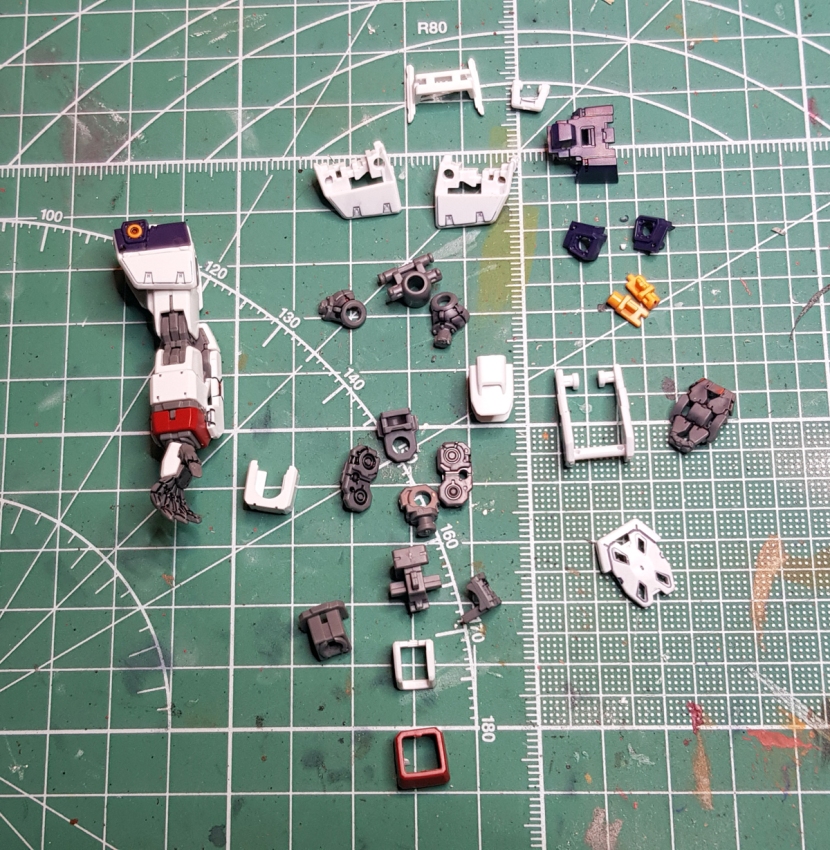
Anyway, we’re done with the build, and you know what that means – here’s a look at the accessories.
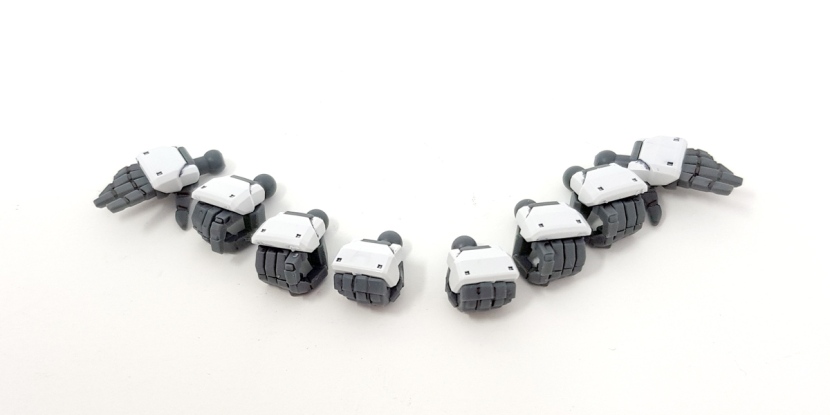
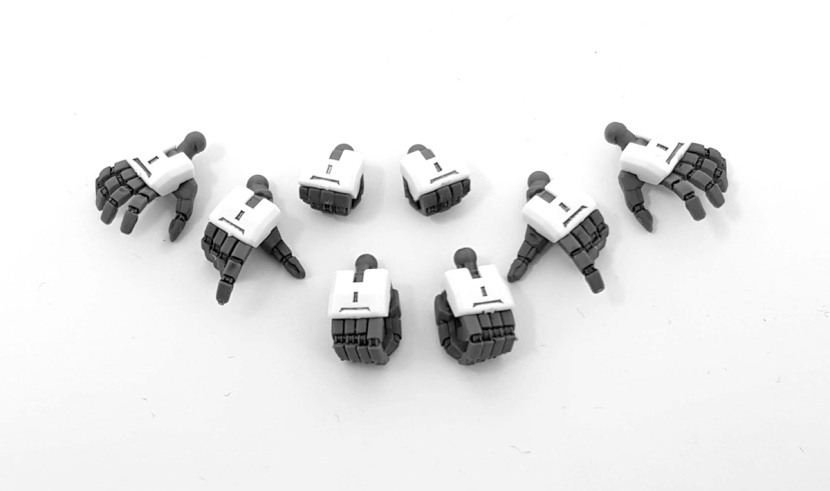
The hands are everything you need – two closed fists, two holding hands for the beam sabers, one trigger finger hand for the right and a holding hand for the shield on the left, and two open hands.
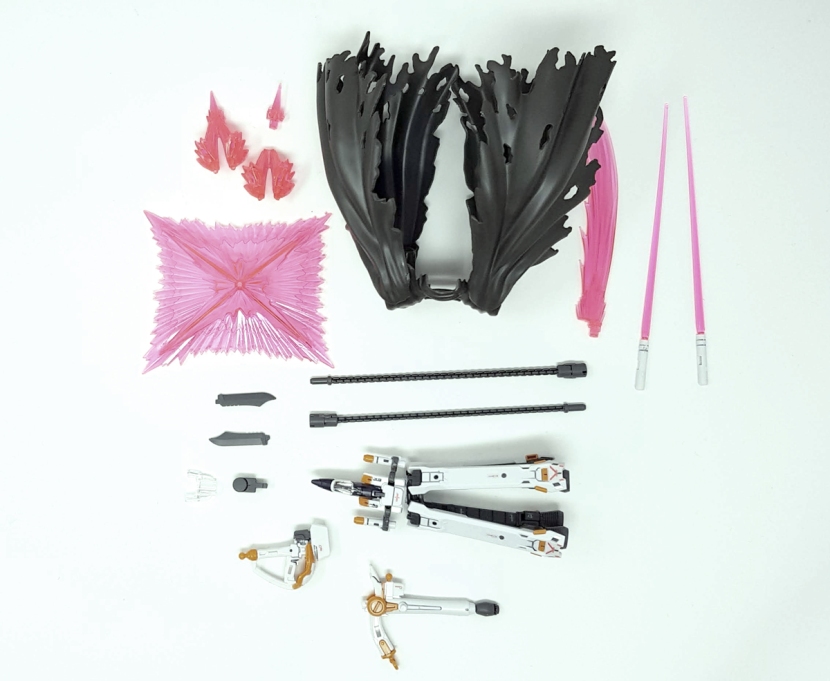
Here’s the rest of the accessories.
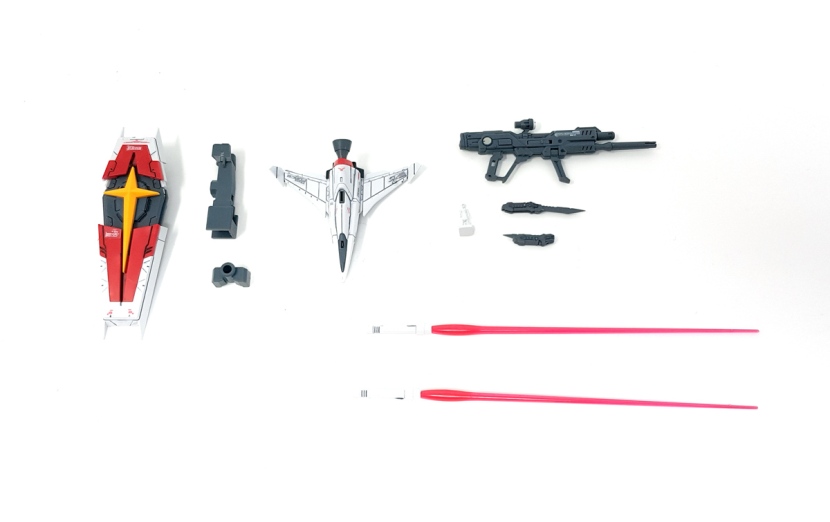
From left to right, we’ve got the shield, the two action base adapters, the Silhouette Flyer, the rifle, the knives, the pilot figure and two beam sabers.
Note the size of that action base adapter. This is the one I mentioned above – it has to be this big basically so that you can use it to mount the Leg Flyer on an action base, but the kit otherwise doesn’t come with a different one for mounting it in standard mode, which means you’ve always got this ugly contraption attached to the suit’s taint, like so.


I just really feel like if this was made from clear plastic or they had made a smaller alternate adapter, all of these pictures would look significantly better. The good news is that contrary to what you might think, you don’t actually need an action base.
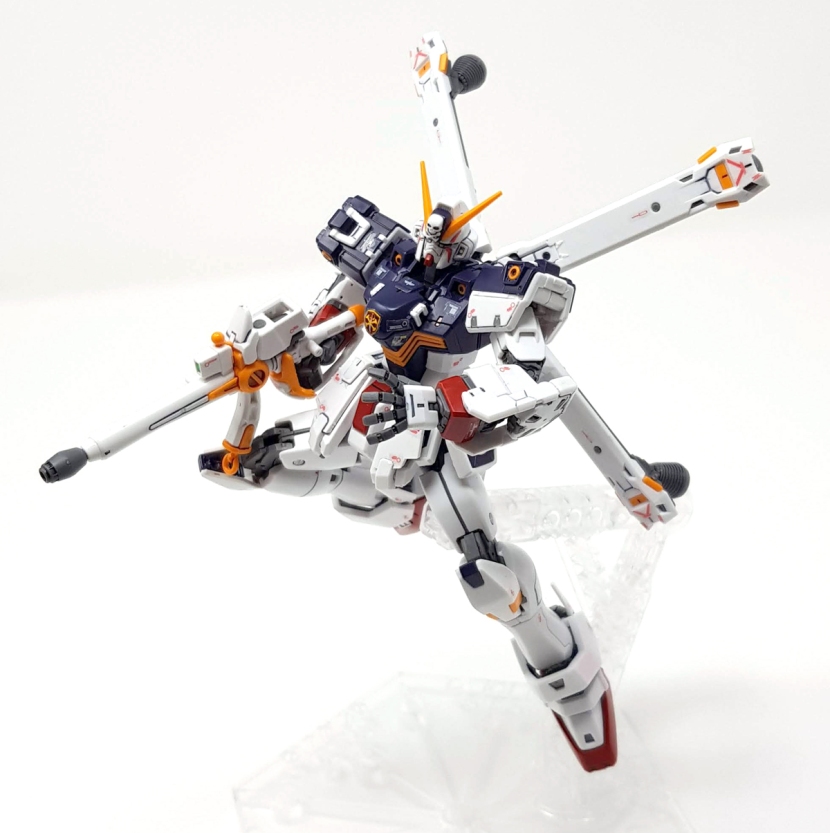
Yep, it actually stands up on its own, with the Force Silhouette attached, and without having to lean forward 45 degrees. I’m really not sure how that’s physically possible, but it’s true.


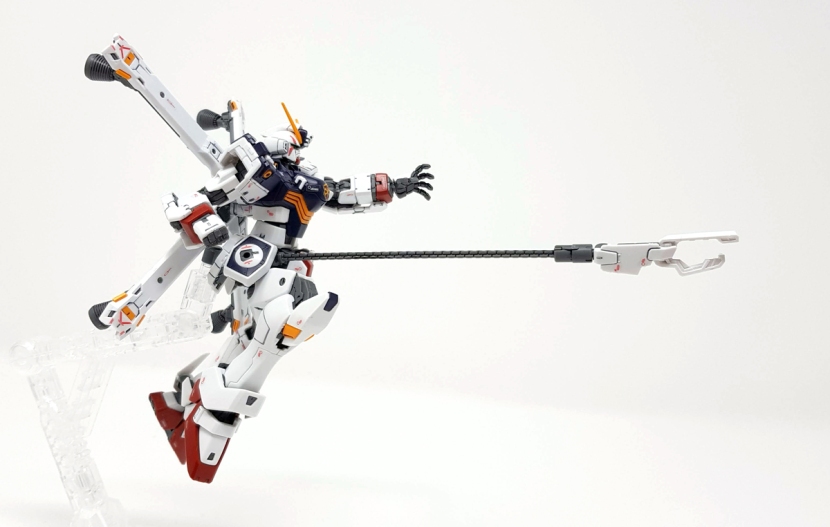
I’ve always thought these Rambo knives were silly, but I will grant that you can get some neat posing out of them.


I had by far the most fun with this, though, and looking at these pics again, I’m tempted to take the kit off the shelf and pose it this way instead of with the Force Silhouette attached.
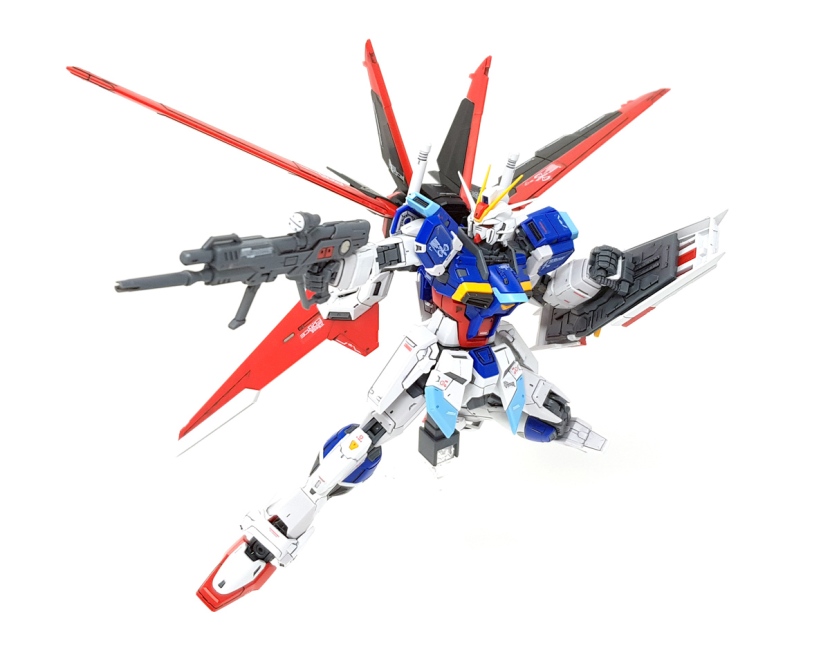
Although of course that looks good too.
Now do I recommend this kit? I’m gonna say if you’re a big fan of the Force Impulse Gundam, then yes, you should absolutely get this. Like all recent Real Grades, it’s incredibly well engineered, posable and stable. It’s really basically flawless – the only issue I had during the photoshoot was the upper torso occasionally popping off, otherwise it was really fun to work with.
At the same time, though, it just doesn’t do anything special. I’m guessing the idea was that it would be the first of the newer breed of RGs with a full-blown transformation and that’s what’s supposed to make it stand out, but frankly, the transformations are all kind of dumb, and while they don’t detract from the kit, they also don’t really add anything to it. It’s just another Real Grade, and unless you’re a fan of the design, you don’t really need this one.
Personally, I’m coming away from this build feeling a bit ambivalent about the whole thing. I certainly like the end result, but building this was kind of a chore. I used to build Real Grades because it was a throwback to years ago when I just enjoyed the simple fun of snapping together a complex kit without thinking about doing more than panel lines on it, but… I dunno, I think I may just not like that as much anymore as I thought. And I still don’t want to paint one of these because the tiny parts give me the willies.
So I don’t know what that means for the future. I still have quite a few unbuilt RGs lying around and that new Evangelion kit in the mail, so I’ll definitely have to do something with those, but I’m just not sure this thing is my thing anymore. Or maybe it’s just a phase, we’ll see. No doubt Bandai will release another engineering miracle next and I’ll have to get it.

HGUC Geara Zulu
Somehow it’s been over a year since I did my last proper painted Gunpla build, and to be honest, I was feeling the ol’ Gunpla fatigue more than a little. I actually snapped this kit together a long time ago and originally had some plans to either modify it into a space Nazi robot or something Warhammer related, but then I badly needed to do a simple and straightforward project to get myself out of the usual spring funk, so I decided to just paint it up more or less straight.

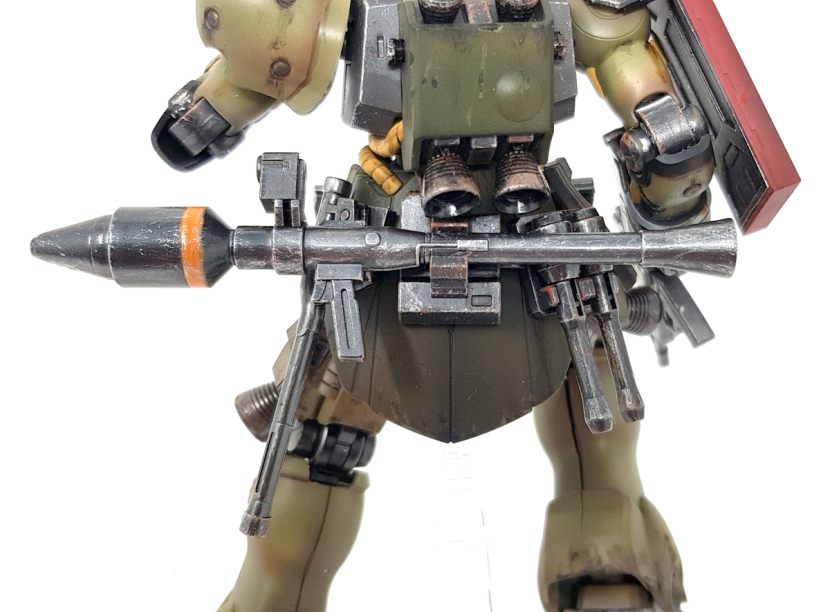
The base color scheme isn’t much different from the kit’s original colors – the dark green is Tamiya Olive Drab, the lighter green the same paint with white mixed in, and the mechanical parts and weapons are Vallejo Metal Color Gunmetal. What’s new here is that I did the preshading on the light green parts with Vallejo’s Burnt Umber, which I’ve used as a shadow color with green on miniatures before, and it worked really well here too. I also added some black trim, which mostly just reminded me that I hate masking.
The sleeves markings also didn’t work out as well as I had hoped. I’ve done this sort of thing simply by hand brushing on so many Warhammer minis at this point that I didn’t think it’d be a problem to just paint Mechanicus Standard Grey over the Nato black I’d used as a base, but Bandai’s trim is decidedly more shallow and it turned out to be a massive pain. A wash of Nuln Oil and some weathering hides most of the problems I had, but I’m not entirely satisfied.
For the shield, I couldn’t resist my usual impulse to paint it a different color to make it look like it had been replaced, so I used the same red/red brown combo I’d used on the Red Horn before and slapped a decal from the generic Unicorn waterslide sheet on it.
And finally, the tubes were painted Desert Yellow with a bit of Lemon Yellow mixed in to brighten up the color a bit.
After the gloss coat came the pin wash, and partly because Bandai plastic and white spirits don’t get along, I settled for water-based acrylic washes this time – Citadel Nuln Oil for the dark green and the gunmetal, and Agrax Earthshade for the green. This worked just fine and dandy. Purely for pin washes, I always find that water-based paints actually work quite well because the surface tension tends to make them pull into the recesses.
The first weathering step was chipping, which I did in two stages as before on the HMM Zillon. I used two different shades of green from Citadel for the first step, but truth be told, I really should have used something even lighter on the light green parts – the green chips are barely showing up. The problem here was that the gloss coat was almost too overpowering and I could barely see what I was doing. Stage two, as usual, was Tamiya Gunmetal on the lighter stuff and Chrome Silver on the darker parts, in this case just the black.
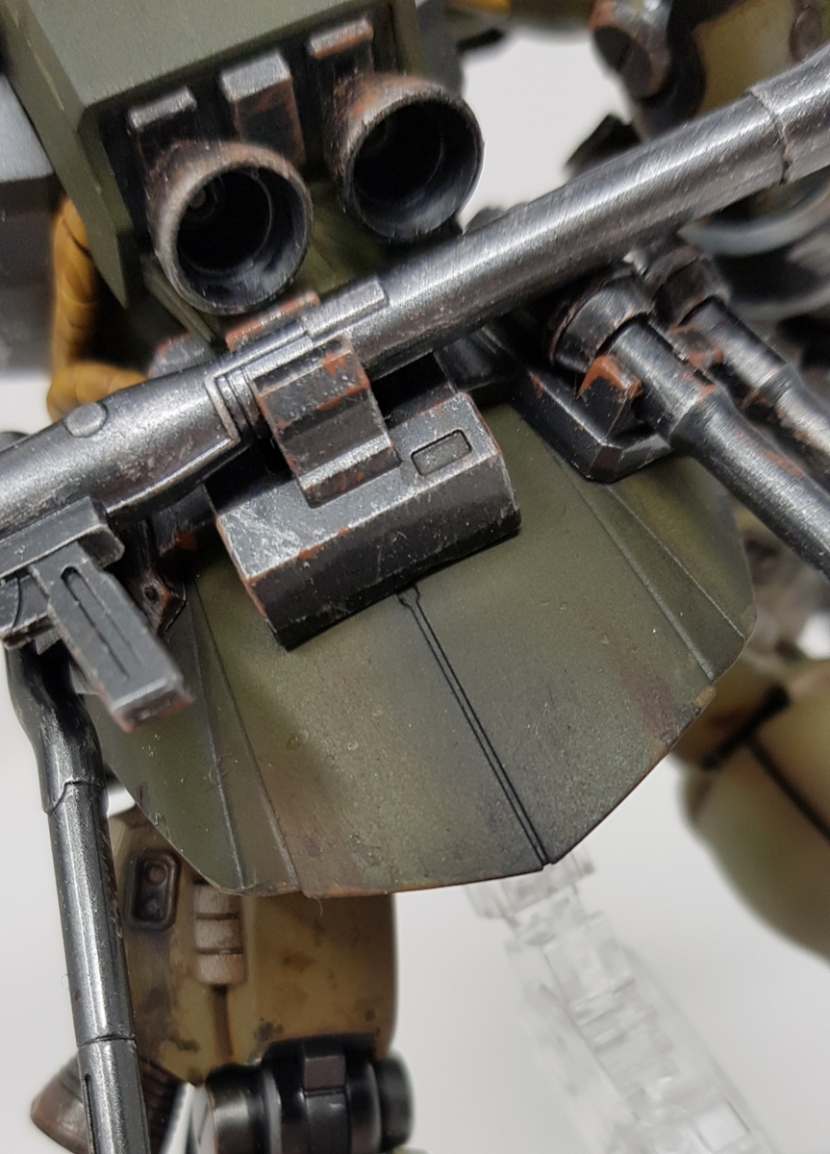
Next was streaking with Abteilung 502 Starship Filth and Dark Rust. I applied a tiny bit to the spots I wanted to have streaks running from with a toothpick, then basically drybrushed downward from there. This worked so well that I decided not to add further streaking on top with thinned-down paint, as I did on the S.A.F.S. before.


The weapons and all the other gunmetal parts got the usual treatment of a drybrush with Tamiya Chrome Silver and Gunze Rust, plus some added detail here and there with Leadbelcher. Decidedly nothing fancy, but this is honestly one of those things that work so well that I’d rather take the “don’t fix what ain’t broke” approach and just keep doing it. I also added that orange stripe to the bazooka because I have to have an orange stripe on everything. This was hand brushed on with Citadel Fire Dragon Bright, which was kind of a pain over the slick surface of the Vallejo metallic paint, but I figured the drybrushing and the topcoat would make it blend in, and… they did.
As usual, the final step was to paint the cameras with Vallejo Duraluminium, Tamiya Clear Red and my latest trick of dabbing some Citadel ‘Ardcoat on them for extra gloss. This mimicks the look of actual clear parts really well, and I’m particularly happy with how reflective the monoeye came out.


Well, and that was pretty much it, plus of course a Tamiya matt topcoat. I really didn’t do much of anything fancy with this one, but it was really fun to do, and I will say that closing up the seamlines on the legs and the round shoulder armor at least was not entirely new, but the first time I felt kind of comfortable doing that, and I think I can tackle models now that need seamline filling more badly.
I also came away from this one feeling like I need to do more HG kits – with a little love, they can look nearly as good as MGs, and they’re a lot of fun to work on because of the significantly lower parts count. There’s never a stage with these where it feels like you’re spending an entire week just basecoating inner frame parts.


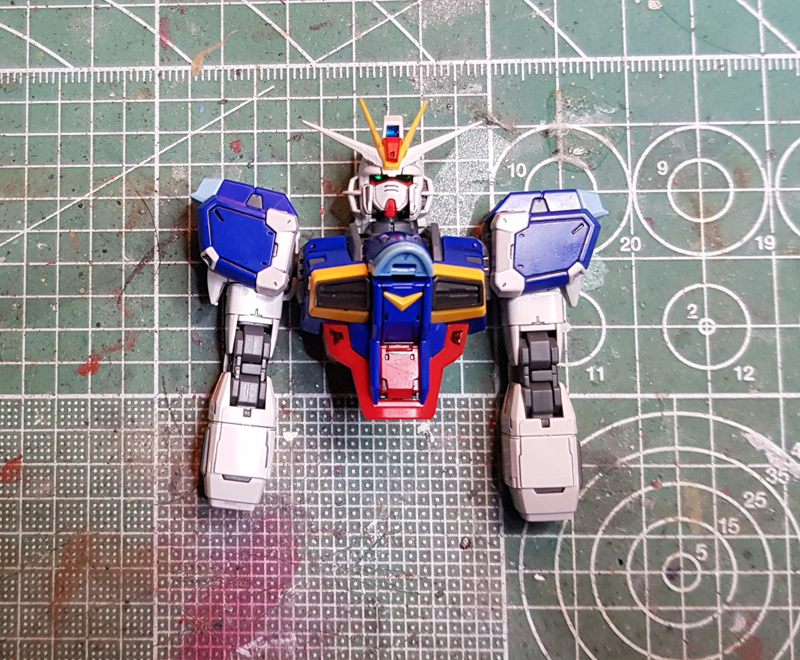
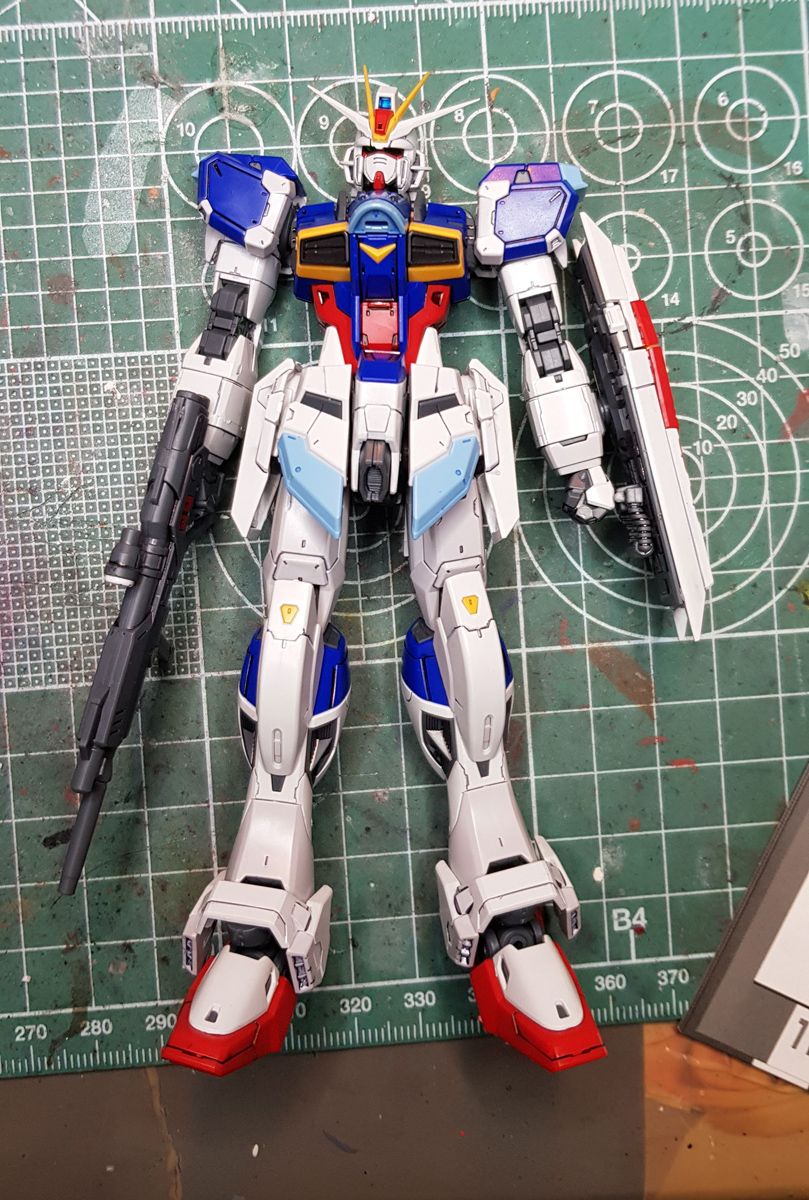
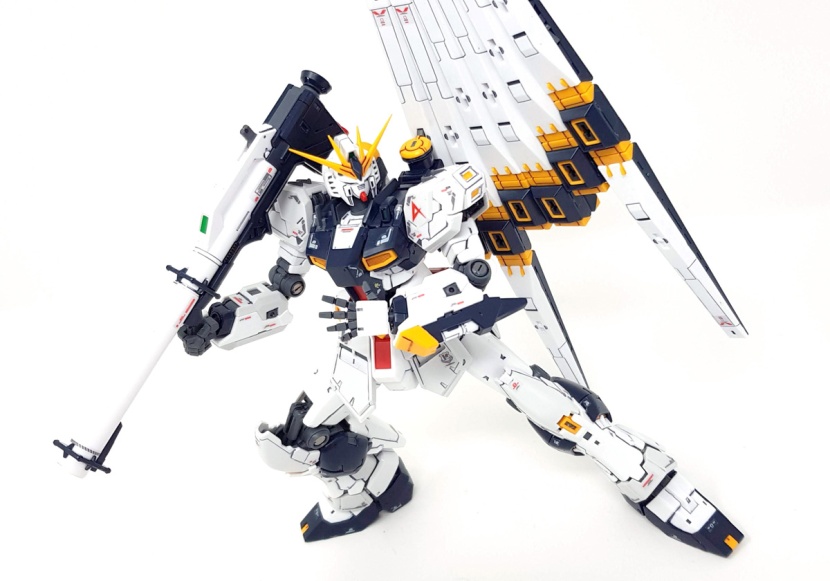
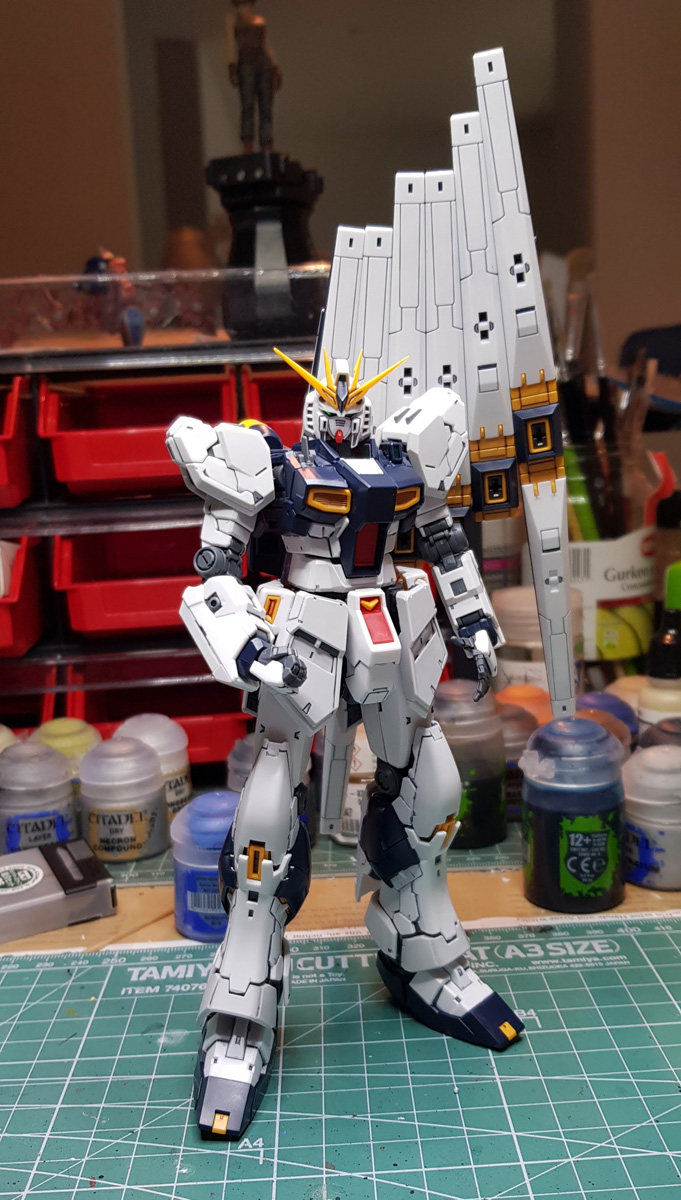
Real Grade Nu Gundam
Welp, it’s pretty much a given at this point that if there’s a new Real Grade, I’m going to do a snap build and review it. But honestly, I’m still only buying the ones I like. It’s just that I’ve liked all the ones that have been coming out lately.
Now I’m afraid we’re going to have to start this review with a confession that I somehow forgot to take the usual “here’s what’s in the box” pic. I don’t know what happened, but you can check out my Youtube review if unboxings are what your plants crave. The short version is, it’s a big box, and there’s a lot of stuff in it, so we’re going to be here a while.
Stop me if you’ve heard this one before, but the build starts with the feet.


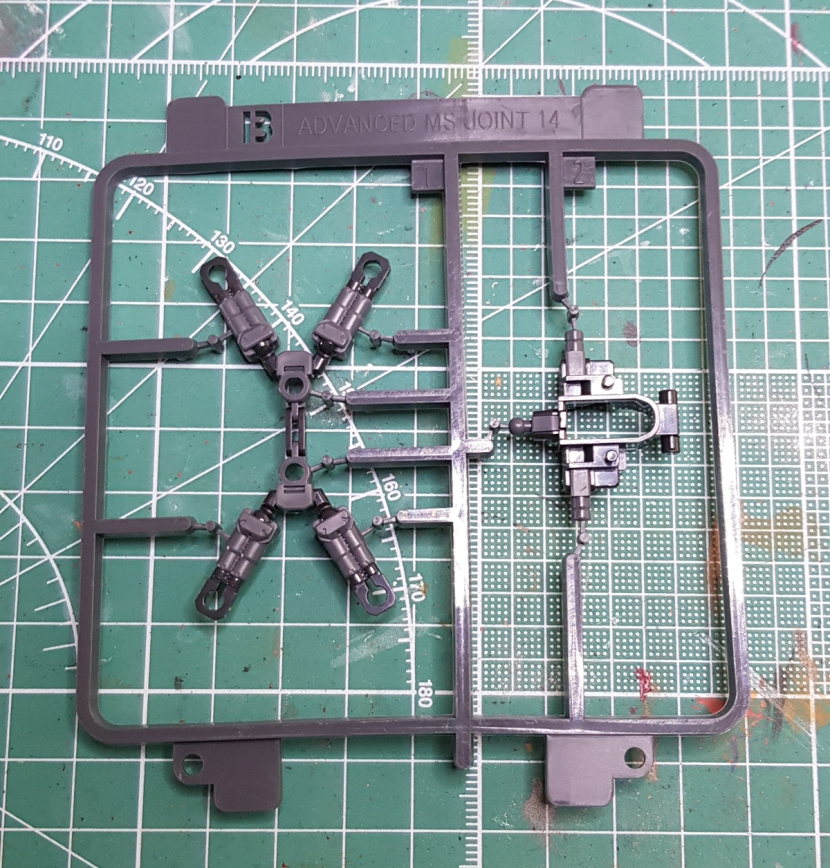
The assembly is a bit unusual because of that big spherical joint that you’d expect to see in the hips. Also, you may have noticed right here that there are no MS joint parts – taking a picture of the B sprue is another thing I forgot to do, but as you’ll see further down, the only MS joint parts on the entire kit go into the funnels, the suit itself has none of them at all.
Anyway, we continue the assembly with the legs. Here’s one of them and all the parts needed to construct the other.
 Yeah. That’s a lot of parts. Between that and the total absence of an MS frame, I think it’s fair to say we’ve officially crossed over into “Master Grade at 1/144th scale” territory now.


Assembly of the legs starts with the knee and then continues with the upper thigh. Notice the internal mechanism here. This is the sliding armor plates gimmick that’s been absent from RG kits since the Tallgeese because they apparently couldn’t make it happen without an MS joint frame. Well, it’s back.


The rest of the leg then goes together about as you’d expect, although there’s still quite a bit of moving stuff inside the inner frame because the ankle armor moves.


And then you add the armor. As you can see in the final pic, the upper thigh armor moves as you bend the knee, and the ankle armor can also move a bit.


Next is the waist unit. The interesting part here is that the hinged hip joints are separate, which means that you can actually unlock the legs separately, meaning you no longer have to dislocate both legs if you just need a bit more motion in one of them. Pretty nifty.


Otherwise the waist unit goes together, well, like a waist unit. It’s worth pointing out, though, that the way the skirts attach to the main unit is very simple, straightforward and therefore stable.
We continue with the torso which, as you can see here, is very flexible.


")
It loses some of that articulation once it’s all put together, but it’s still pretty impressive.


And of course the kit also has expanding shoulder joints for extra poseability.
The rest of the torso assembly is just adding the remaining armor pieces, which isn’t anything complicated or unusual.


The arms, as you can see below, are not identical. The left arm has this contraption that allows you to store a beam saber handle in it. This is actually a pretty nifty gimmick as the beam saber pops out when you slide the blue armor piece up.


Next is the shoulder armor, and we have a Headless Hessian.


The head is also not terribly complicated, but that’s ok. I’m still getting shivers everytime I think about what it was like to put the Crossbone Gundam‘s head together, so the simplicity and the reasonable parts size here were very welcome, and it still looks fantastic.


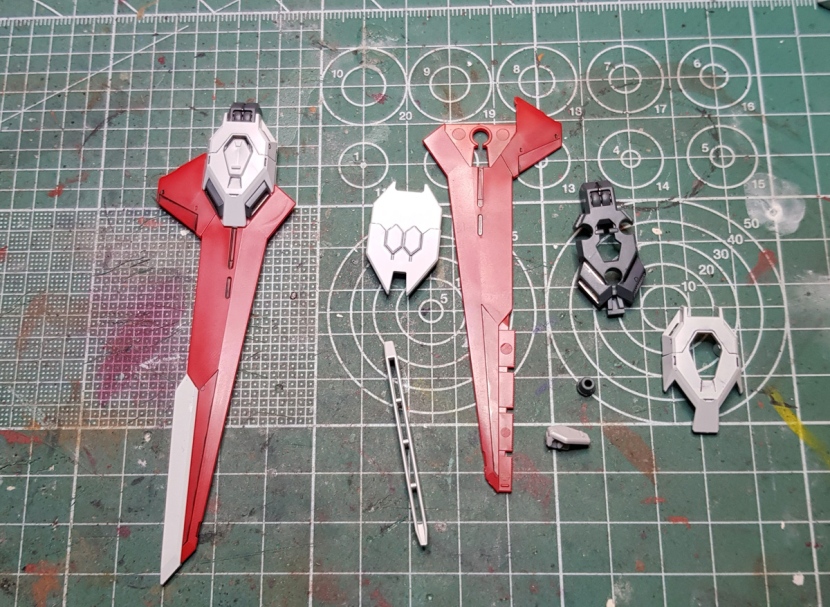
Assembly of the backpack starts, as is often the case, with the boosters.


Next you build the attachment point for the funnels. Or actually, you build two of these. The kit includes the second one that you attach the P-Bandai set with the other six funnels to.


And then we add the attachment point for the large beam saber, which can actually rotate to hide the hole the saber plugs into.


And finally, the funnels. These consist of quite a few parts because there’s a lot of nice color separation. Unfortunately, though, not all of them really fold all the way. That doesn’t get into the way of mounting them on the backpack at all, which works well – you can pick the kit up and shake it, and the funnels won’t come loose. But it’s still a bit OCD-inducing, if I’m honest.


Well, and that’s the Nu Gundam all put together sans stickers and weapons.
 But hark, quoth I, what’s this you say? Accessories?

There actually aren’t that many, but what’s here is really solid. You get the beam rifle, the bazooka, the shield, a regular and the large beam saber, an array of open, closed and holding hands, a tiny Amuro and a really good action base adapter that plugs into the backpack. Also pictured is the extra attachment part for the funnels.
My only gripe with the accessories is that the shield doesn’t really clip onto the arm that well. It’s serviceable, but it also likes to fall off, and it ends up in a position where it’s hard to get any cool looking poses. I usually like to display my Gunpla with their shields, but with this one, it went back in the ziploc bag.
And speaking of posing and displaying and action base adapters, here’s the glamor shoot.


Also, to cap things off, I’ve got two size comparisons.


I think the pictures speak for themselves. The Nu is so big that it makes the Mk-II look like they’re not even the same scale. Like the Sazabi, it’s almost the size of a regular Master Grade.
If you can’t tell from the pictures, this is one of those kits that are just fun to play with because it’s so solid. Like all the more recent RG kits, the Nu marries excellent poseability with sturdiness and beautiful looks. I really feel like Bandai has found the sweet spot now where these kits are exactly as complex as they need to be, without any over-engineered or flimsy parts, and so they’re not only just as beautiful as the Real Grades have always been, but also rock-solid and really fun to build because everything goes together easily. The Sazabi is still my favorite Real Grade, but it’s really close. And I can’t wait to see what’s next for this crazy line of little engineering marvels.

Real Grade Crossbone Gundam
Seems like it’s been a weirdly long time since I’ve reviewed a RG kit. Or written anything of substance on here other than brief commentary for Youtube links to Zoids Wild kits. But the thing is, these don’t exactly come out every week, and there are only maybe one or two older ones left that I even want, so I’ll just be doing these as they come out from now on.
 I really don’t know anything about the Crossbone Gundam other than that it has a skull on it. I actually thought it was a Wing kit before I got it. Turns out it only appeared in a manga, apparently, but it’s been hugely popular ever since. I dunno, I like skulls, so… yeah.
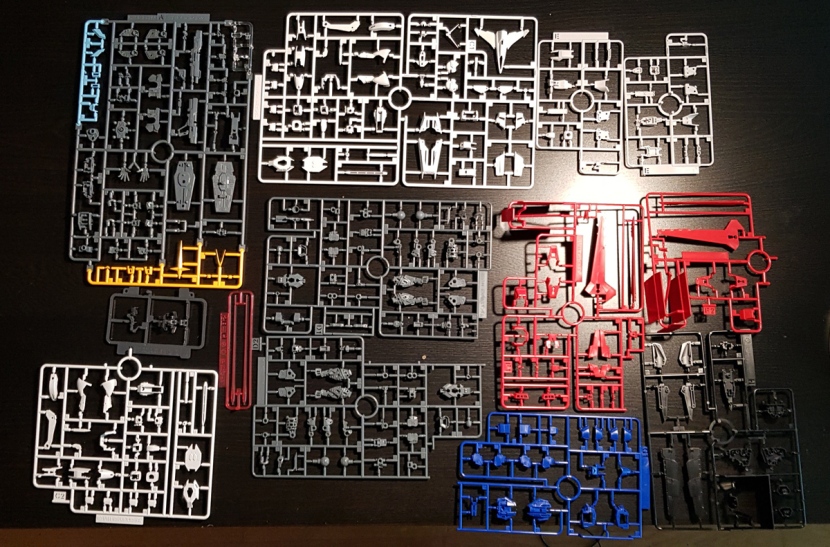
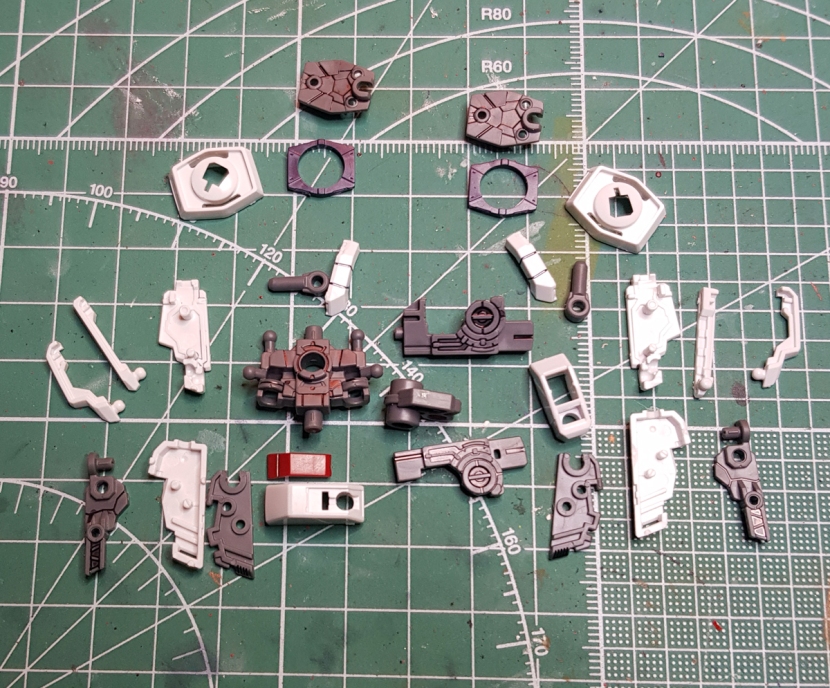
Here’s a look at the sprues.
 Nothing too out of the ordinary here in terms of the number of parts and sprues, but when you take it all out of the box, you get the first impression that there are fewer parts because there’s much less plastic. It’s not the number of parts, though, it’s their size. This kit is tiny.
 The other thing that stands out is the B sprue. Yep, this is it. Two parts. Number 1 on the left is the internal structure of the core fighter, number 2 is the inside of the torso, and that’s it. Everything else is just regular plastic parts. It’s pretty clear at this point that it’s only a matter of time until these are going to disappear from the RG line completely – I’m not even sure these two parts are necessary here anymore. Maybe the one for the core fighter because it has to hold up relatively big parts with very small joints, but the torso could’ve just as well been a few separate parts.
Anyway, the instructions have you start by assembling the core fighter.


It starts by folding up part B1 into this contraption, then building the four thruster arms.


Then you put together the main fusealge and the cockpit and you’re done. Note the small hinge that allows the nose to be folded down for insertion into the mobile suit’s back. As you can see, the hinge that holds it together is maybe 5 millimeters long. This stuff is all incredibly tiny, but it fits together perfectly, and I also found this to be far less difficult to put together than the Skygrasper, which is a plane of about the same size.
After the core fighter, assembly of the suit starts, shockingly and out of nowhere, with the feet. Nothing too out of the ordinary here, except of course there’s no MS joint inner frame.


Next are the legs which, as usual, are the most complex part of the suit. For some reason I didn’t take a whole lot of pictures during their assembly, but here are all the parts that go into one.
 Here’s a look at how the knee works. The yellow piece slots into both the knee joint and the shin. This allows the knee armor to shift slightly as the knee bends. It’s a small touch, but it’s pretty neat, especially since the new inner frames so far have generally meant no more shifting armor plates.


Here’s how the ankle armor attaches to the leg. I just thought this was worth showing because I don’t remember any ankle armor on a RG I’ve built so far attaching this way, and it works very well.
 The “waist unit” is, uh, yeah. Lots of parts here.
 The hip joints are on a hinge so that they can be shifted for extra poseability. As usual, I think this is kind of pointless. On this particular kit, you move the legs so far away from the torso that it just looks ridiculous.


Here’s the assembly of the skirts. The front ones are particularly involved because of the, um, “scissor anchor”.


And now we have something to attach the legs to.
The torso is a fairly straightforward affair. The cockpit hatch opens, otherwise there’s nothing unusual going on here. The shoulder joints are just pegs on hinges to keep it simple and stable, no doubt because of the kit’s size.


And here’s how everything goes together so far.
The arms have a lot of parts, but it’s a bit deceptive because three of them come from the swinging mechanism that the beam shield will attach to, and everything you see at the top is actually the shoulder armor.
Here’s how it all goes together. Notice that the shoulder armor attaches directly to the arm and not to the peg the arm sits on. this does restrict poseability a bit better, but it’s also way, way more solid.


And you know what that means – headless hessian time.
Well, and then we assemble the head. I think this probably took up 30% of my assembly time and most of it was spent trying to get the eye sticker on.


Notice that the red “scar” markings are a groove on the head armor. I panel lined these here and later covered them up with stickers, but it’s worth noting because it probably wouldn’t be too hard to paint these red if you’re so inclined.
The head also comes with extra parts to give it an eyepatch, by the way, but handling the clear piece for both eyes was maddening enough, so you’ll excuse me if I’m leaving the two parts that are half its size on the sprue.
That completes the assembly, so here are the customary workbench pictures.


And now, you guessed it… accessories.
Needless to say, you get a ton of stuff with this kit. There are two beam sabers, the beam zanber, a pistol, two knife blades, two scissor anchor chains, two fist effect parts, a beam shield, two action base adapters and the cloak. Also pictured is the core fighter, if we want to consider that an accessory.
You also get a whopping eight hands.
There are two closed fists, two regular holding hands, two trigger finger hands and two open hands. As usual with the recent RGs, no articulated hands anymore, and thank Lemmy for that. What’s new about the holding hands is that the pegs are molded into the armor parts, and they’re pretty thick. This results in some big peg holes in all of the weapons (there also aren’t any folding pegs on anything), but the tradeoff is that the suit can actually hold its damned weapons without you having to glue them in place, and frankly, I’ll take it.
The beam zanber and the pistol can be combined into this larger weapon.


Unfortunately, while it looks pretty cool, the guard rail from the zanber gets into the way of the arm, so the suit can’t hold it straight. You can still get some decent poses out of it, but it doesn’t seem too well thought out.
It looks ok like this, but if you look closely, you can see the gun is actually pointed way outward.


The knife blades can either be combined with handles stored in the legs into these Rambo knives, or they can be attached to the bottom of the feet for some James Bond type hidden-blade-in-my-shoe thing.
Here’s the scissor anchor. You transform the front skirt into this thing and then unplug it and attach it to the chain. Not my favorite gimmick and since I haven’t read the manga, it’s kind of lost on me.


My overall verdict is that the engineering on these RG kits is really getting nuts lately. This kit is tiny, and not only does it pose nearly as well as any other RG, it’s also at least as sturdy. The head was a nightmare to assemble and the knee pads have a tendency to pop off (they’re very easy to glue in place, though), and that’s about it. Everything else works perfectly.
Conversely, I also think that’s kind of the only thing I’m really all that impressed with – that this does what it does at about 70% of the size of a regular RG. If it was the size of the other kits, it would really just be another Real Grade – a nice looking and very solid one, but nothing particularly out of the ordinary.
So I guess the bottom line is, if you’re a fan of the Crossbone, you absolutely should get this kit because it’s definitely a damn fine piece of engineering, it looks good, and it comes with a ton of accessories. But if you’re looking for something a bit special and you don’t already have, say, the Sazabi or the Unicorn, I’d get those first.
Finally, here’s my Youtube review with a more in-depth look at the articulation. Everything else is more or less the same info (and pictures) as in this review.

Perfect Grade Aile Strike Gundam WIP 3: All Done!
Welp, I finally finished this build today, almost a year after I’d originally snap built it. I have a long writeup in the works about all the details and I’ll also still do a proper photoshoot, but for now, here’s another long, rambling Youtube video:
And here’s what little I managed to snap in the way of pictures today. It’s gonna be hard getting some good pictures taken of this kit with my crappy equipment, we’ll see what I end up doing about that. One thing these pics have going for them, though, is that this is the first time I managed to capture the sheen of the eyes. I don’t know why that worked here, but I’ll have to try to reproduce it when I do the proper photoshoot.


Anyway, the short version is that this is far and away my best build ever and I’m really happy with it, but I’m also kind of glad it’s over. I’m really sick of working on this thing at this point, to be honest, and I need to… move on with my life.
As for the kit itself, I really can’t recommend it enough. The PG Strike is absolutely fantastic in every possible way, and while the Aile Striker is a bit lacking in detail out of the box (I did a lot of masking and took some liberties with the decals to remedy this), the proportions are just about perfect. Great kit, and lots of fun to work with.
