
Tagged: real grade
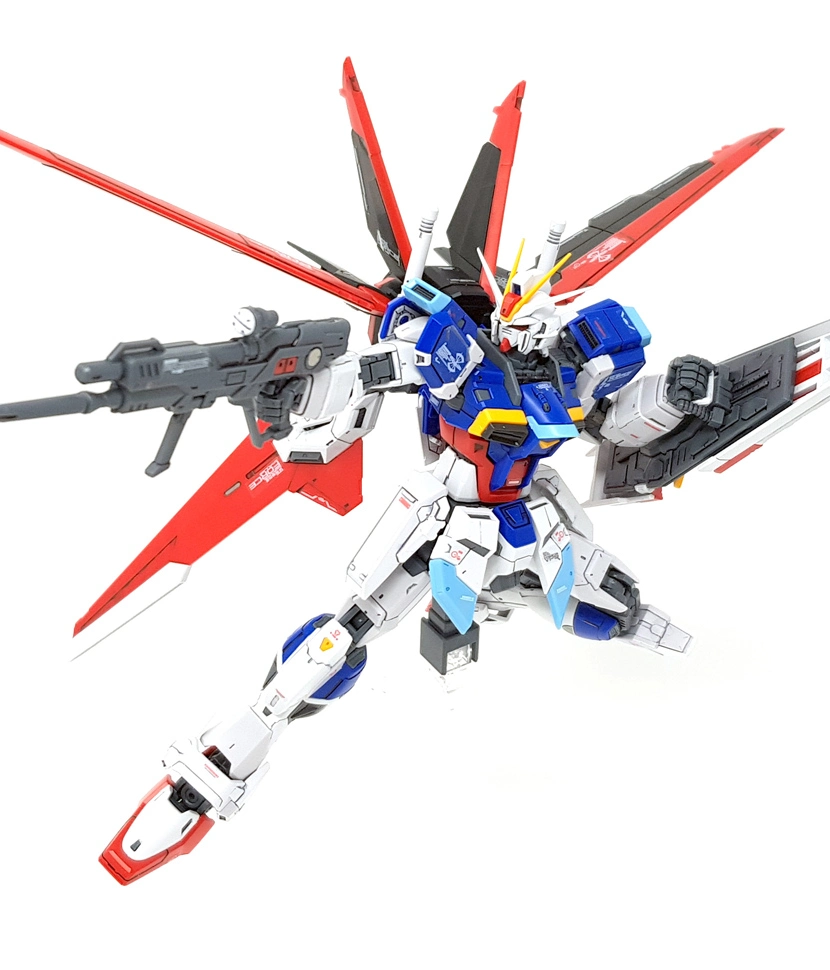
Real Grade Force Impulse Gundam
Full disclosure – the Force Impulse Gundam is a suit that I really don’t know the first thing about. Both of my regular readers will know that I generally don’t watch much Gundam anime and so I say this about a lot of kits, but with this one, I didn’t even know it existed until the RG came out, and I just bought it because I like Real Grades and I thought it looked cool.
I also reviewed this kit on Youtube, you can scroll to the bottom to check that out. Anyway, as usual, let’s start with a look at what’s in the box.
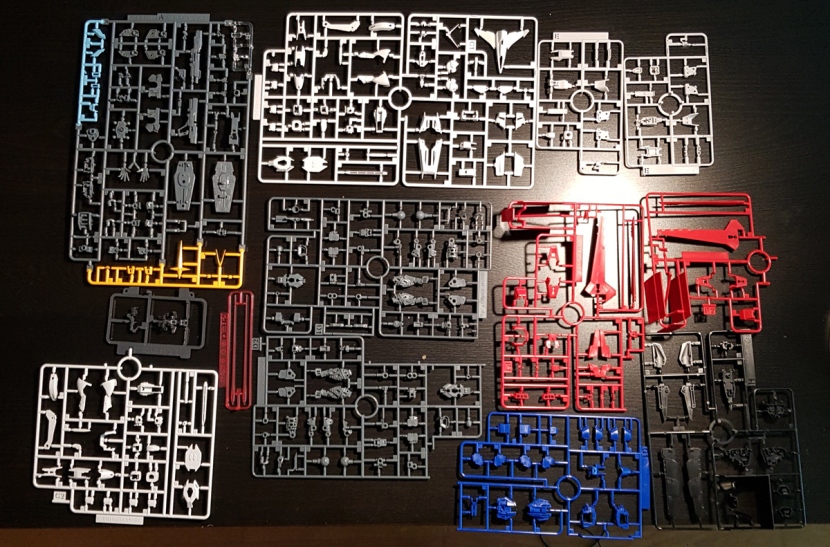 Notice, of course, the B sprue center left. There are exactly two parts here – one goes inside the Core Splendor and the other one inside the chest. Honestly, I’m not sure these are even necessary, at this point it feels like they’re just including them because it’s a Real Grade and it has to have them.
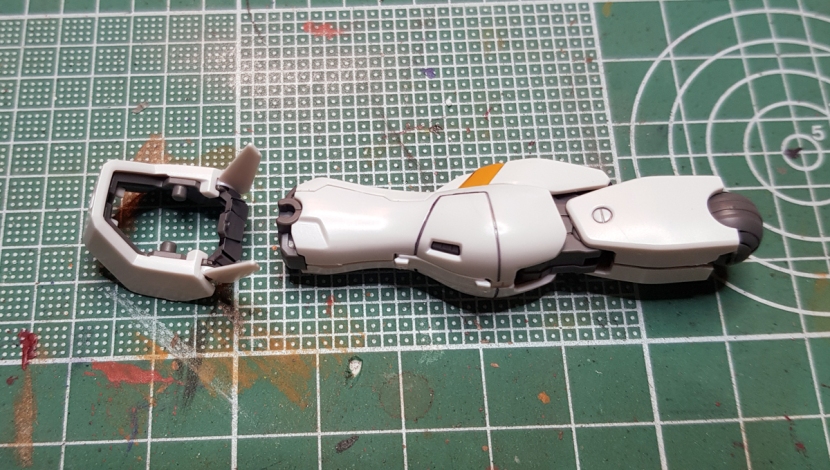
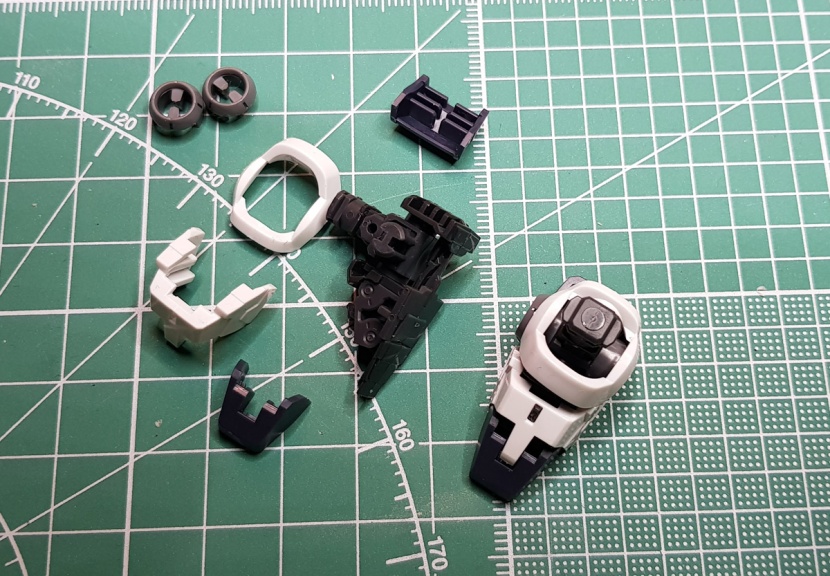
The build starts with the Core Splendor, which is what the core fighter’s called on this suit for some reason.


It does look rather splendid, though. Probably my favorite core fighter that I’ve built thus far. Too bad you’ll never get to see it again. More on that later.
The build continues with the chest, which is assembled in two main steps. first is this section, which is basically a few armor bits mounted on top of the aforementioned B part.
")

Then you continue with the shoulder joints, which are fairly complex because they’re needed for a transformation, as well as the bottom half of the armor, basically.
")


You then assemble the arms. Pretty standard stuff, but I will say it’s nice that the shoulder armor attaches directly to the top of the arms. This has been the case in the RG line for a while now, but the way the shoulder armor mounts on top of the arm attachment peg on the older kits is a pet peeve of mine that I’m going to need another few years of therapy to get over.


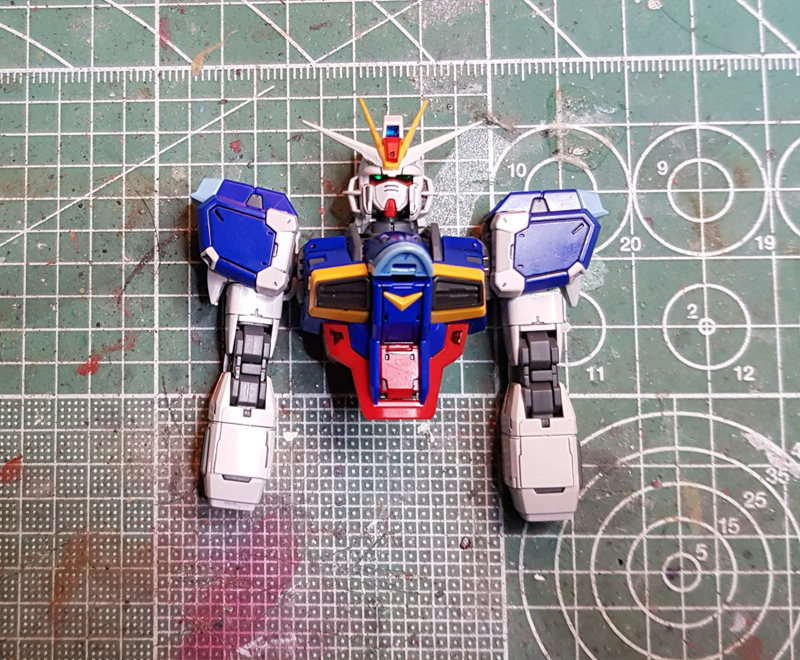
Next is the head. As you can see, I needed to paint the cameras because they’re clear plastic and the kit comes with stickers for them. I really don’t understand why they keep doing this. Other than that, though, I will say that it’s a very nice looking head and assembly is mostly painless. You know how that can be an issue on these RGs where the parts are half the size of a grain of sand.


With the head assembled, you’ve got an upper torso ready for transformification, but you need some accessories first.
Namely the rifle…


…and the shield. This is a particularly nice shield, and it may or may not have been one of the reasons I bought this kit in the first place. What can I say, I’m a sucker for a good Gundam shield.


Now for that transformation. You basically dislocate the suit’s shoulders and twist the arms into position to turn it into what is apparently called the Chest Flyer. The only other step this involves is folding up an armor piece that covers up the face and ends up being basically invisible.
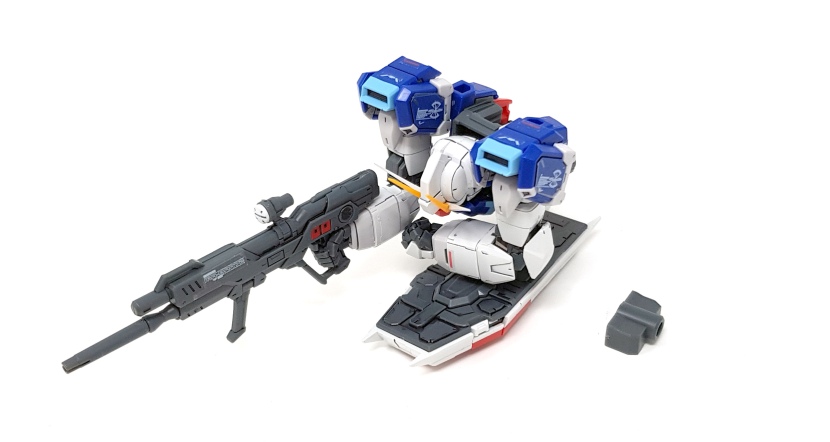
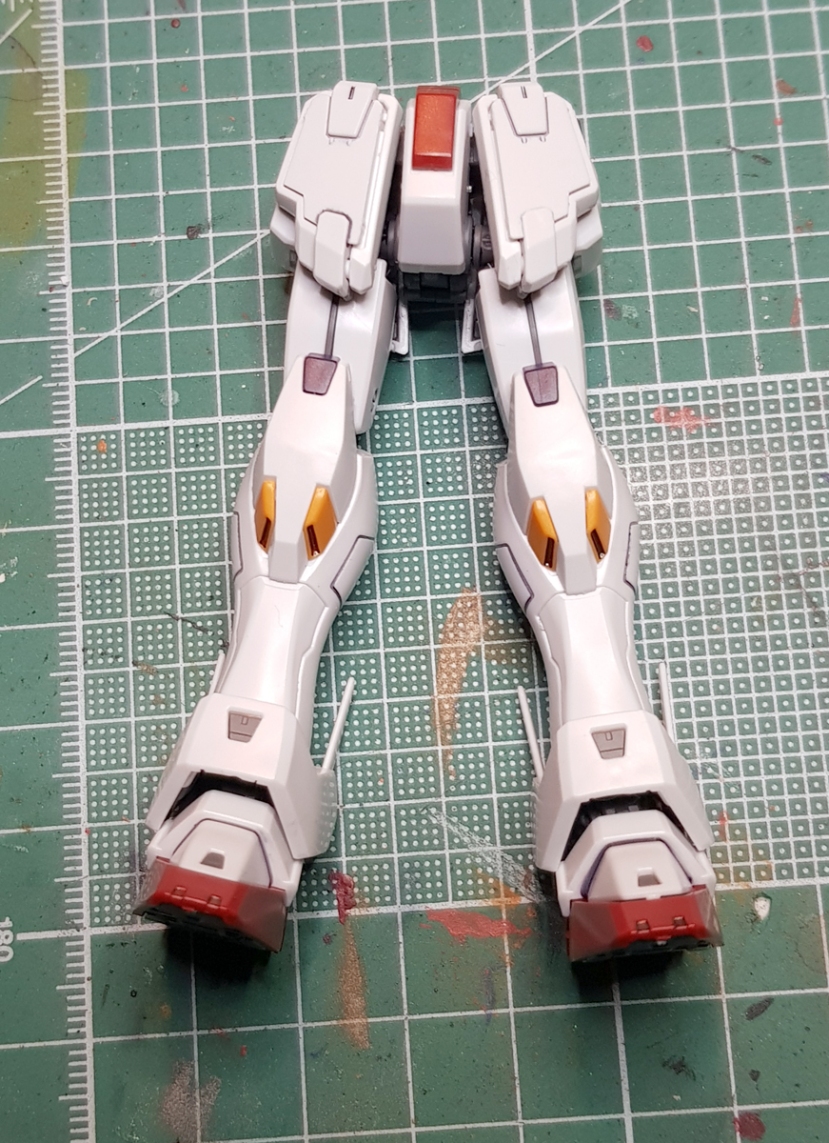
On the right here is an action base adapter in case you want to display it like this. I… do not. Let’s take a look at the legs.


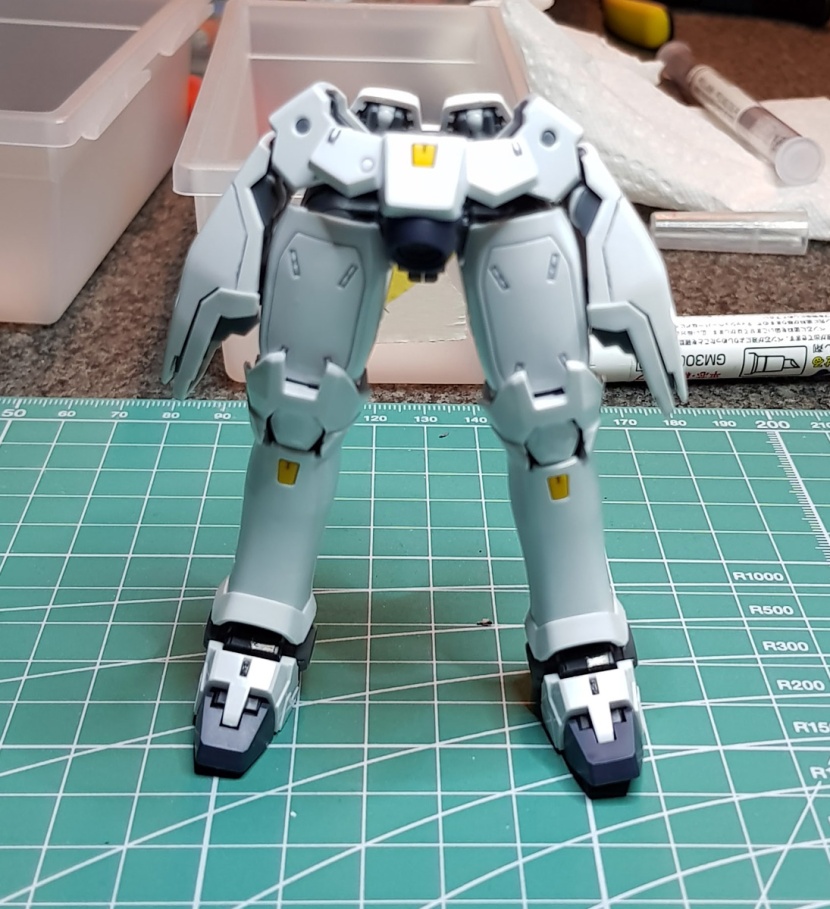
Nothing terribly out of the ordinary here. The knees are actually needed for an even more ridiculous transformation than the Chest Flyer, but they look pretty much like the same double-jointed knees every RG has. I love the shapes and proportions of these legs, but it’s a bit of a shame that the upper thigh armor doesn’t move.
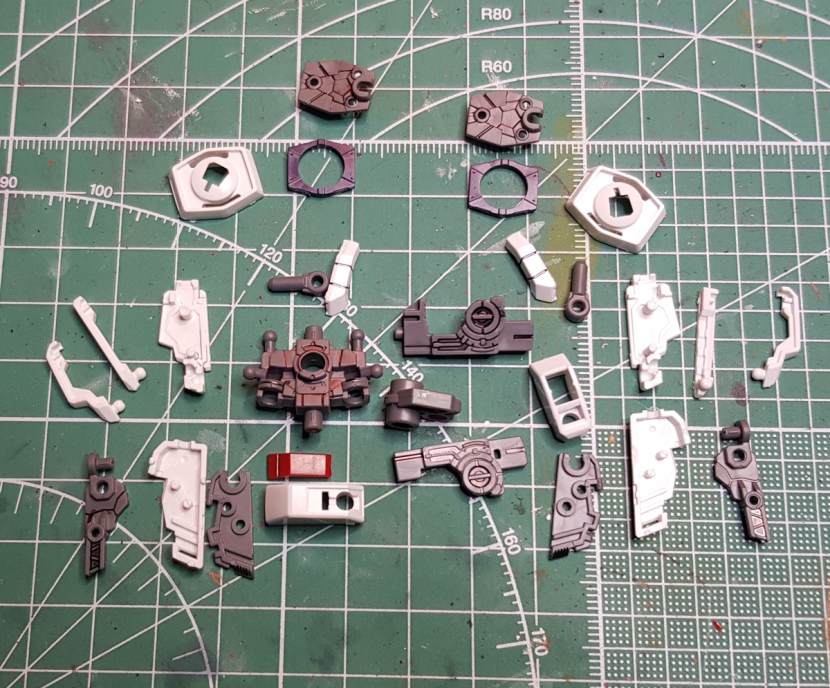
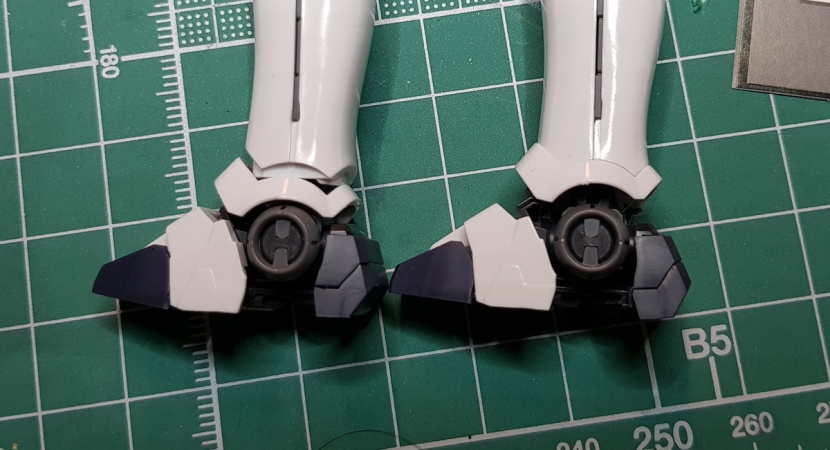
Assembly continues with the feet and the hip joints. Yes, you build the feet after the legs. What’s this world coming to? Before you know it, we’ll have dogs and cats living together.


")


We then proceed with the waist unit. Very standard stuff, as you can see. The side skirts open to store the Folding Razor knives. No silly German name for those, unfortunately.


")


Notice also the usual hinge part allowing you to lower the hip joints for extra mobility (not separately like on the Nu Gundam, unfortunately) and the bottom part of the upper torso that’s actually attached to the waist unit here because it’s where you insert the Core Splendor.
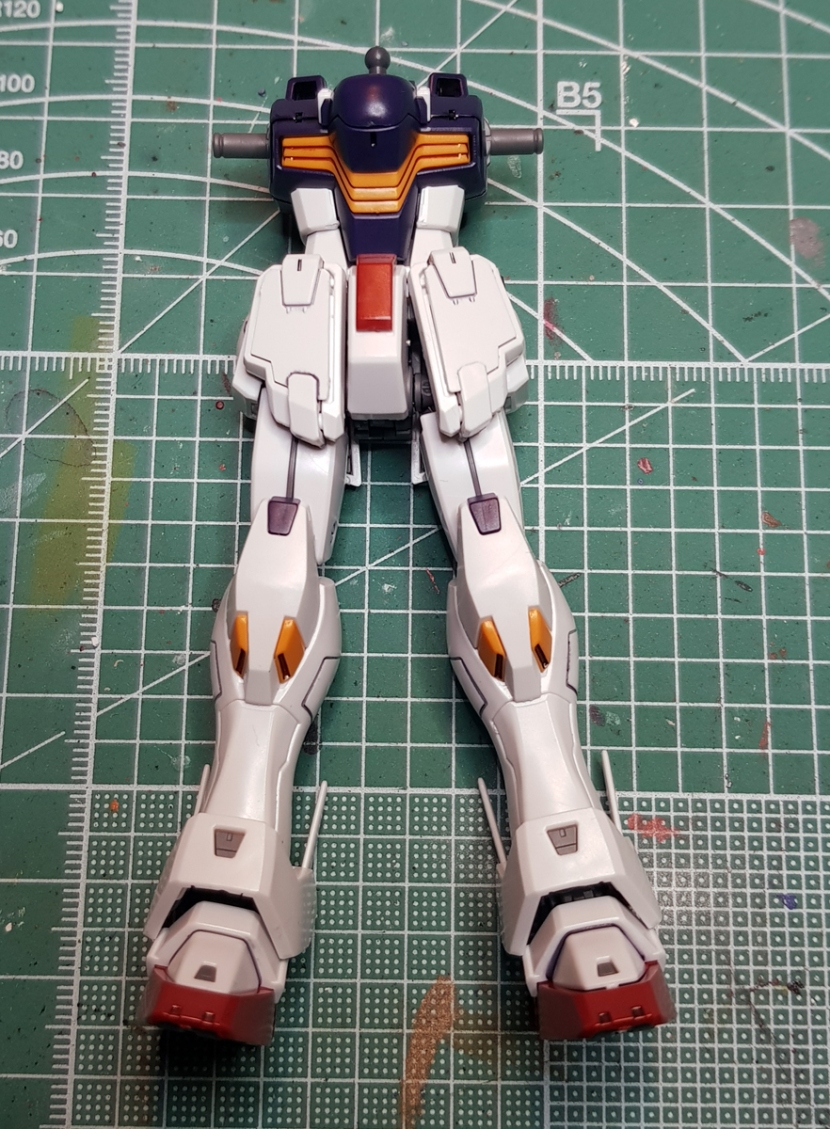
Once you’ve attached the legs to the waist unit, the whole thing transforms into this preposterous contraption called the Leg Flyer. This also comes with a fug-buttly action base adapter that you’ll see again when I complain about it below.

I didn’t transform that one knee properly, by the way. I don’t know how this happened, the knees are supposed to look like on the suit’s left leg.
The better news is how you attach the Core Splendor to all this. You open this little hatch…


…and then you insert the plane and fold it over to form the suit’s backpack. This is simple, it works well, and it actually looks good. It’s also kind of unfortunate, though, because it means the Core Splendor can’t be displayed separately unless you leave the main suit in its two “flyer” sections, which, um, you don’t want to do.


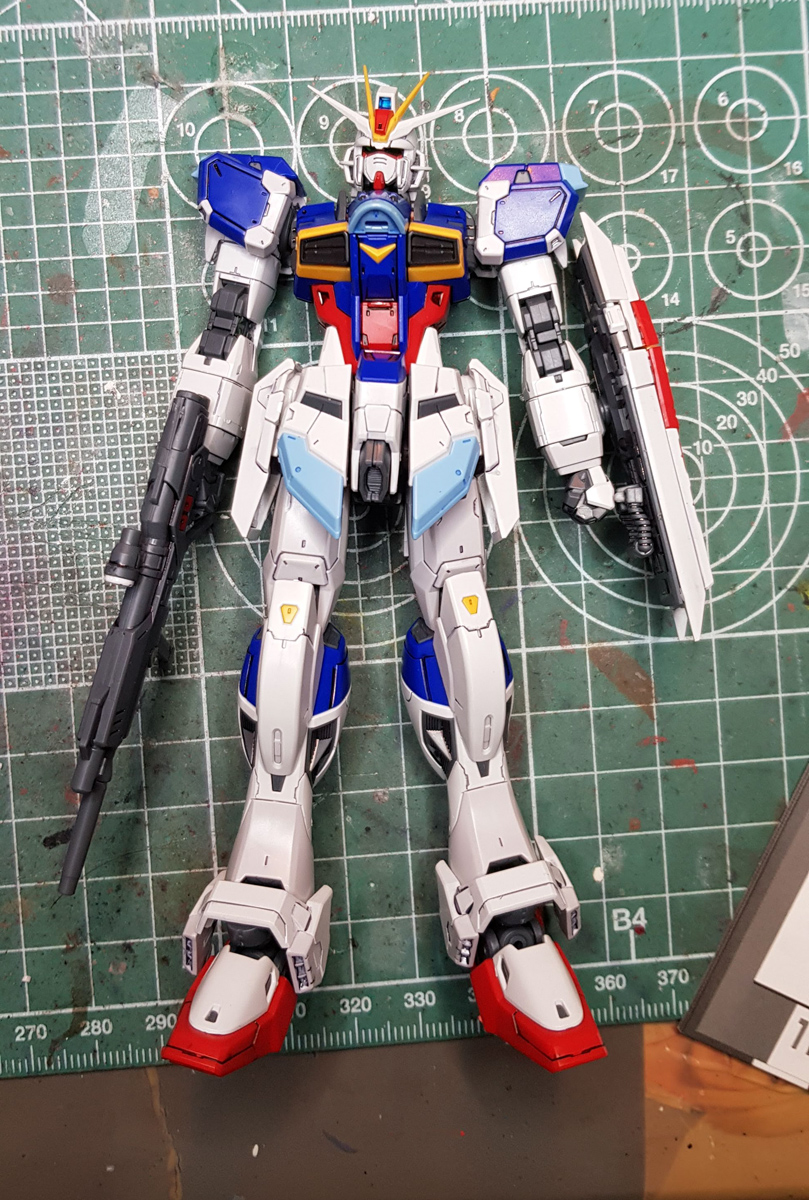
And that’s the Impulse Gundam complete.
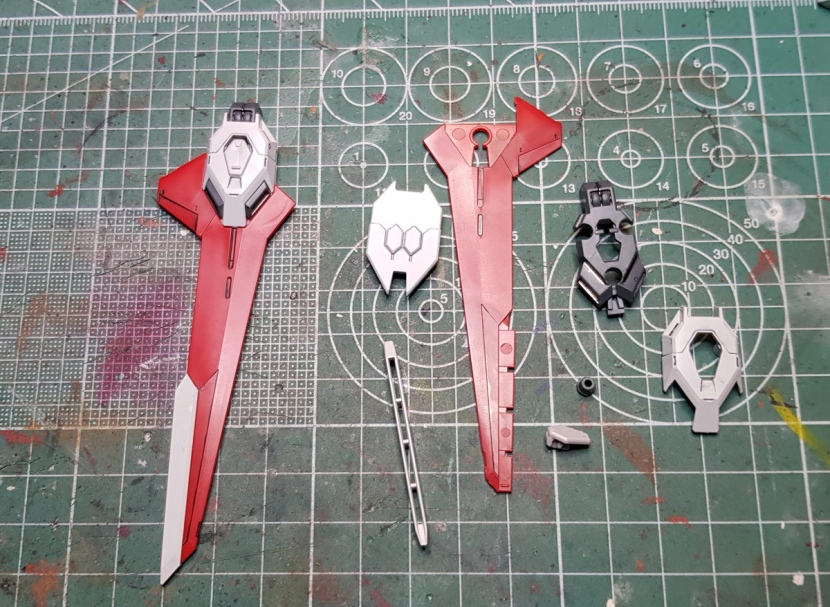
We’re not done yet, though. First we put together the Silhouette Flyer, which is really simple.


Next is the, ahem, Force Silhouette, which distinguishes itself from the Aile Striker by having an even more nonsensical name, and… not much else. But it looks cool. You start by assembling the main fuselage.


This is followed by the wings and the beam saber handles.


And finally these stabilizers that also have little thrusters on the side that fold out.
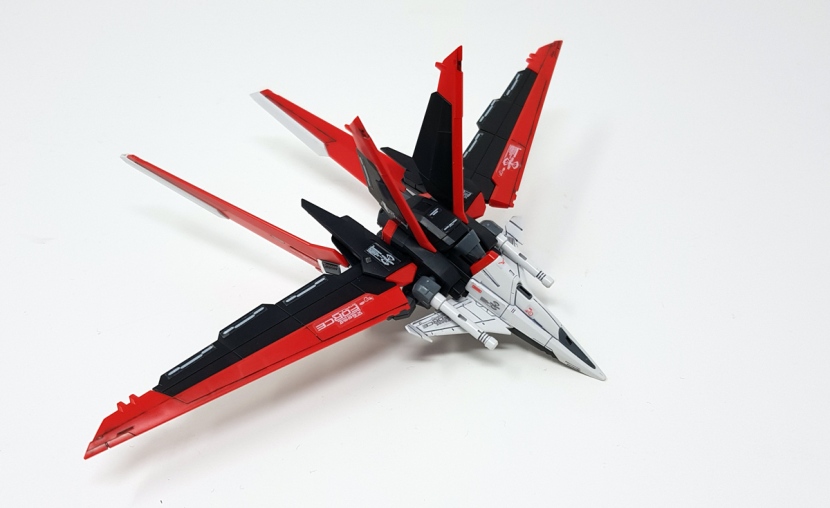
The not-Aile Striker can be combined with the not-Skygrasper to form this plane, and that’s the one “transformation” aspect of this kit that I will say looks really kickass.
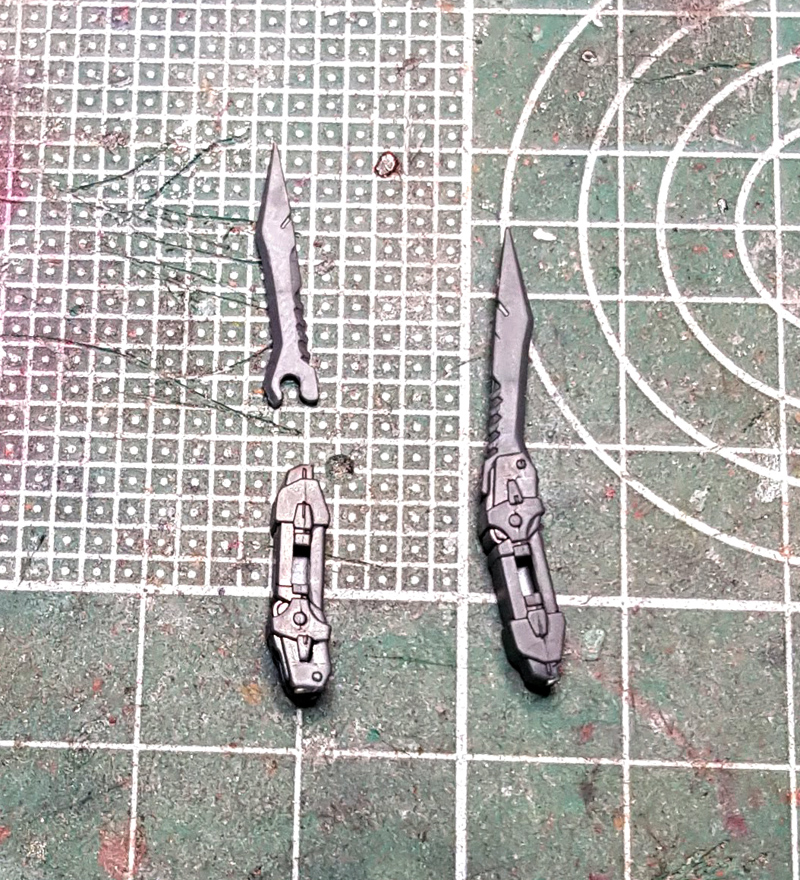
Oh yeah, and for some reason the very last thing the instructions have you assemble is the knives, so here’s an unnecessarily large picture of those.
And that’s it. To be honest, I’m really not sure why, but this build felt a lot more involved than you’d think based on the pretty standard number of parts. Maybe it’s because there’s so much different stuff or maybe because it’s just… not terribly unusual or interesting, despite the transformation gimmicks.
Anyway, we’re done with the build, and you know what that means – here’s a look at the accessories.
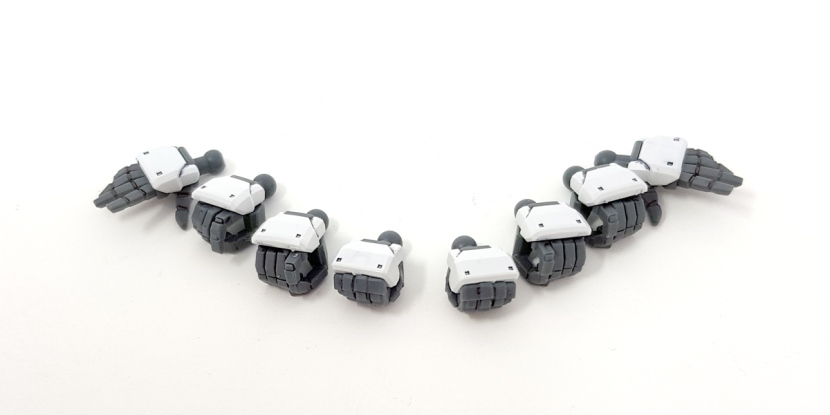
The hands are everything you need – two closed fists, two holding hands for the beam sabers, one trigger finger hand for the right and a holding hand for the shield on the left, and two open hands.
Here’s the rest of the accessories.
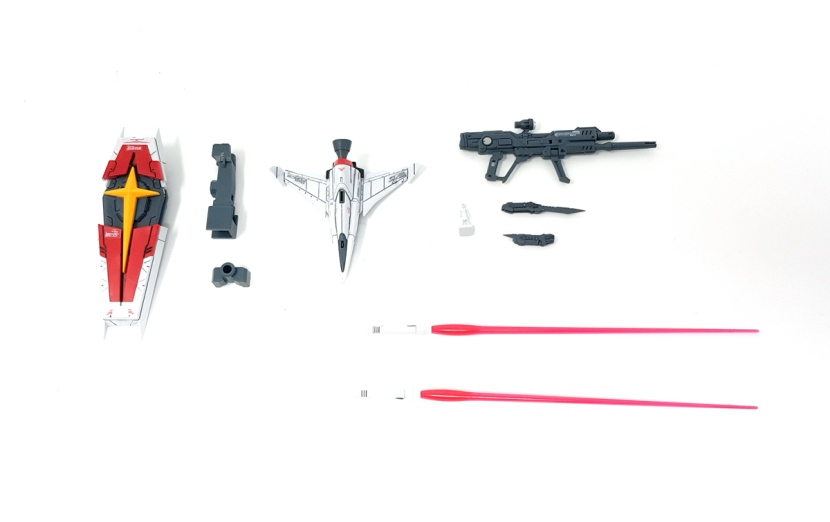
From left to right, we’ve got the shield, the two action base adapters, the Silhouette Flyer, the rifle, the knives, the pilot figure and two beam sabers.
Note the size of that action base adapter. This is the one I mentioned above – it has to be this big basically so that you can use it to mount the Leg Flyer on an action base, but the kit otherwise doesn’t come with a different one for mounting it in standard mode, which means you’ve always got this ugly contraption attached to the suit’s taint, like so.


I just really feel like if this was made from clear plastic or they had made a smaller alternate adapter, all of these pictures would look significantly better. The good news is that contrary to what you might think, you don’t actually need an action base.
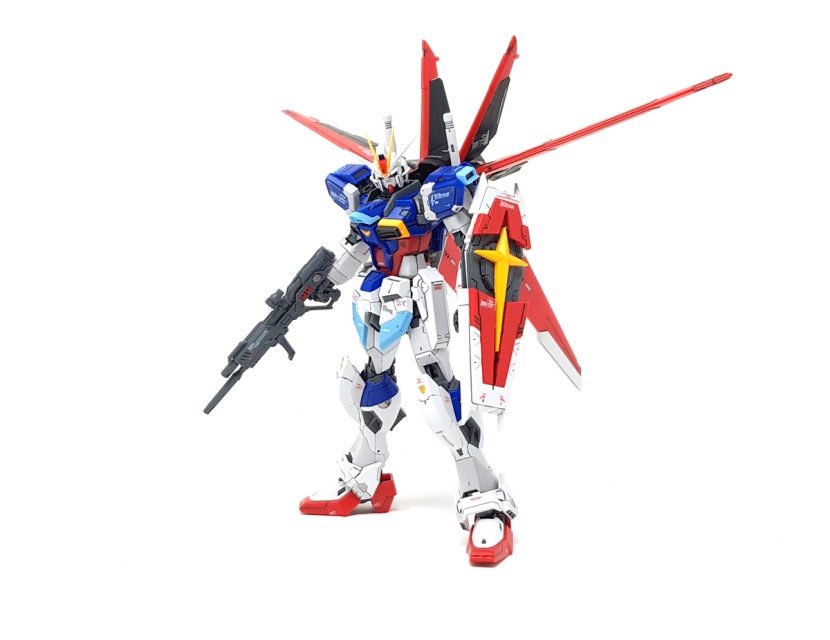
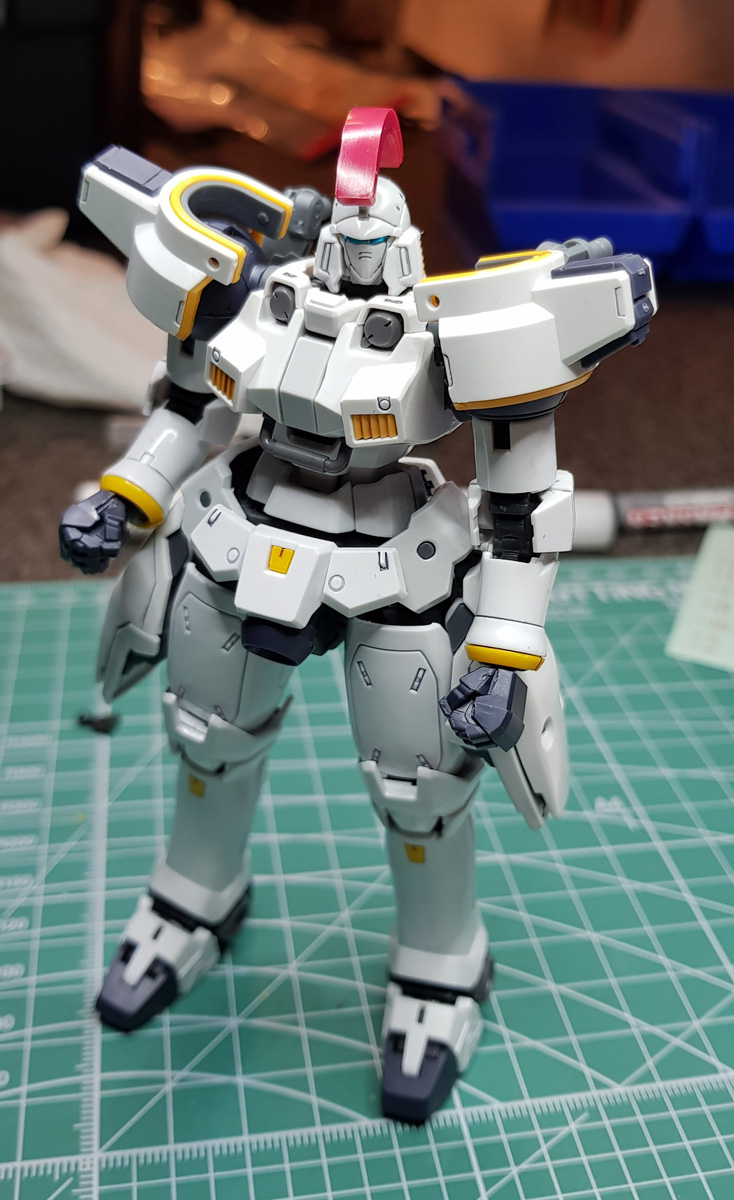
Yep, it actually stands up on its own, with the Force Silhouette attached, and without having to lean forward 45 degrees. I’m really not sure how that’s physically possible, but it’s true.


I’ve always thought these Rambo knives were silly, but I will grant that you can get some neat posing out of them.


I had by far the most fun with this, though, and looking at these pics again, I’m tempted to take the kit off the shelf and pose it this way instead of with the Force Silhouette attached.
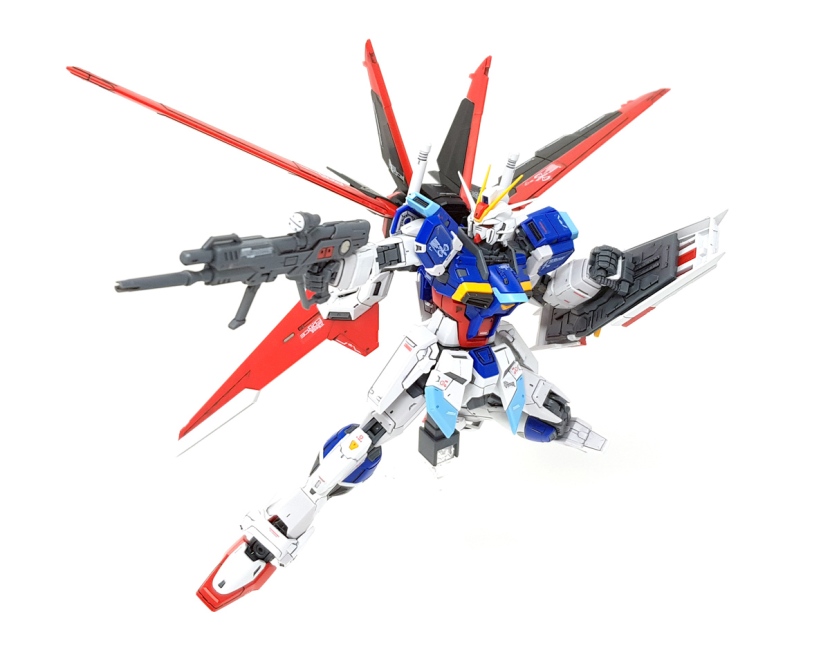
Although of course that looks good too.
Now do I recommend this kit? I’m gonna say if you’re a big fan of the Force Impulse Gundam, then yes, you should absolutely get this. Like all recent Real Grades, it’s incredibly well engineered, posable and stable. It’s really basically flawless – the only issue I had during the photoshoot was the upper torso occasionally popping off, otherwise it was really fun to work with.
At the same time, though, it just doesn’t do anything special. I’m guessing the idea was that it would be the first of the newer breed of RGs with a full-blown transformation and that’s what’s supposed to make it stand out, but frankly, the transformations are all kind of dumb, and while they don’t detract from the kit, they also don’t really add anything to it. It’s just another Real Grade, and unless you’re a fan of the design, you don’t really need this one.
Personally, I’m coming away from this build feeling a bit ambivalent about the whole thing. I certainly like the end result, but building this was kind of a chore. I used to build Real Grades because it was a throwback to years ago when I just enjoyed the simple fun of snapping together a complex kit without thinking about doing more than panel lines on it, but… I dunno, I think I may just not like that as much anymore as I thought. And I still don’t want to paint one of these because the tiny parts give me the willies.
So I don’t know what that means for the future. I still have quite a few unbuilt RGs lying around and that new Evangelion kit in the mail, so I’ll definitely have to do something with those, but I’m just not sure this thing is my thing anymore. Or maybe it’s just a phase, we’ll see. No doubt Bandai will release another engineering miracle next and I’ll have to get it.
Real Grade Nu Gundam
Welp, it’s pretty much a given at this point that if there’s a new Real Grade, I’m going to do a snap build and review it. But honestly, I’m still only buying the ones I like. It’s just that I’ve liked all the ones that have been coming out lately.
Now I’m afraid we’re going to have to start this review with a confession that I somehow forgot to take the usual “here’s what’s in the box” pic. I don’t know what happened, but you can check out my Youtube review if unboxings are what your plants crave. The short version is, it’s a big box, and there’s a lot of stuff in it, so we’re going to be here a while.
Stop me if you’ve heard this one before, but the build starts with the feet.


The assembly is a bit unusual because of that big spherical joint that you’d expect to see in the hips. Also, you may have noticed right here that there are no MS joint parts – taking a picture of the B sprue is another thing I forgot to do, but as you’ll see further down, the only MS joint parts on the entire kit go into the funnels, the suit itself has none of them at all.
Anyway, we continue the assembly with the legs. Here’s one of them and all the parts needed to construct the other.
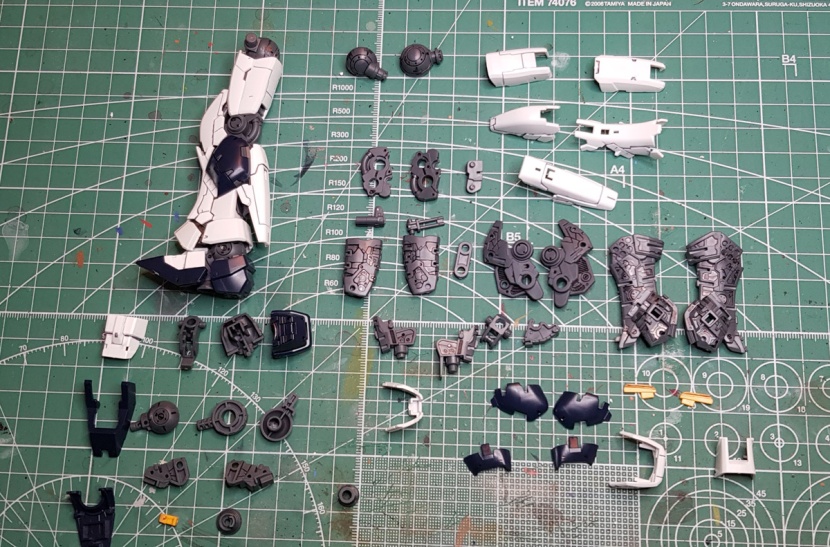 Yeah. That’s a lot of parts. Between that and the total absence of an MS frame, I think it’s fair to say we’ve officially crossed over into “Master Grade at 1/144th scale” territory now.


Assembly of the legs starts with the knee and then continues with the upper thigh. Notice the internal mechanism here. This is the sliding armor plates gimmick that’s been absent from RG kits since the Tallgeese because they apparently couldn’t make it happen without an MS joint frame. Well, it’s back.


The rest of the leg then goes together about as you’d expect, although there’s still quite a bit of moving stuff inside the inner frame because the ankle armor moves.


And then you add the armor. As you can see in the final pic, the upper thigh armor moves as you bend the knee, and the ankle armor can also move a bit.


Next is the waist unit. The interesting part here is that the hinged hip joints are separate, which means that you can actually unlock the legs separately, meaning you no longer have to dislocate both legs if you just need a bit more motion in one of them. Pretty nifty.


Otherwise the waist unit goes together, well, like a waist unit. It’s worth pointing out, though, that the way the skirts attach to the main unit is very simple, straightforward and therefore stable.
We continue with the torso which, as you can see here, is very flexible.


")
It loses some of that articulation once it’s all put together, but it’s still pretty impressive.


And of course the kit also has expanding shoulder joints for extra poseability.
The rest of the torso assembly is just adding the remaining armor pieces, which isn’t anything complicated or unusual.


The arms, as you can see below, are not identical. The left arm has this contraption that allows you to store a beam saber handle in it. This is actually a pretty nifty gimmick as the beam saber pops out when you slide the blue armor piece up.


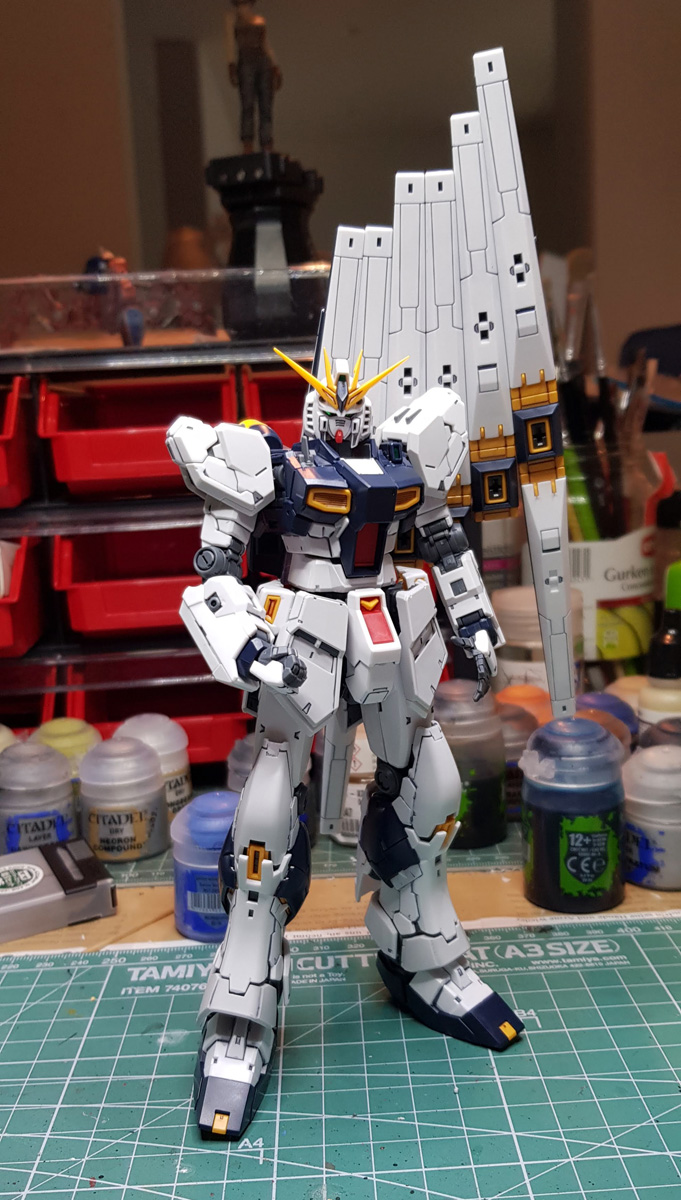
Next is the shoulder armor, and we have a Headless Hessian.


The head is also not terribly complicated, but that’s ok. I’m still getting shivers everytime I think about what it was like to put the Crossbone Gundam‘s head together, so the simplicity and the reasonable parts size here were very welcome, and it still looks fantastic.


Assembly of the backpack starts, as is often the case, with the boosters.


Next you build the attachment point for the funnels. Or actually, you build two of these. The kit includes the second one that you attach the P-Bandai set with the other six funnels to.


And then we add the attachment point for the large beam saber, which can actually rotate to hide the hole the saber plugs into.


And finally, the funnels. These consist of quite a few parts because there’s a lot of nice color separation. Unfortunately, though, not all of them really fold all the way. That doesn’t get into the way of mounting them on the backpack at all, which works well – you can pick the kit up and shake it, and the funnels won’t come loose. But it’s still a bit OCD-inducing, if I’m honest.


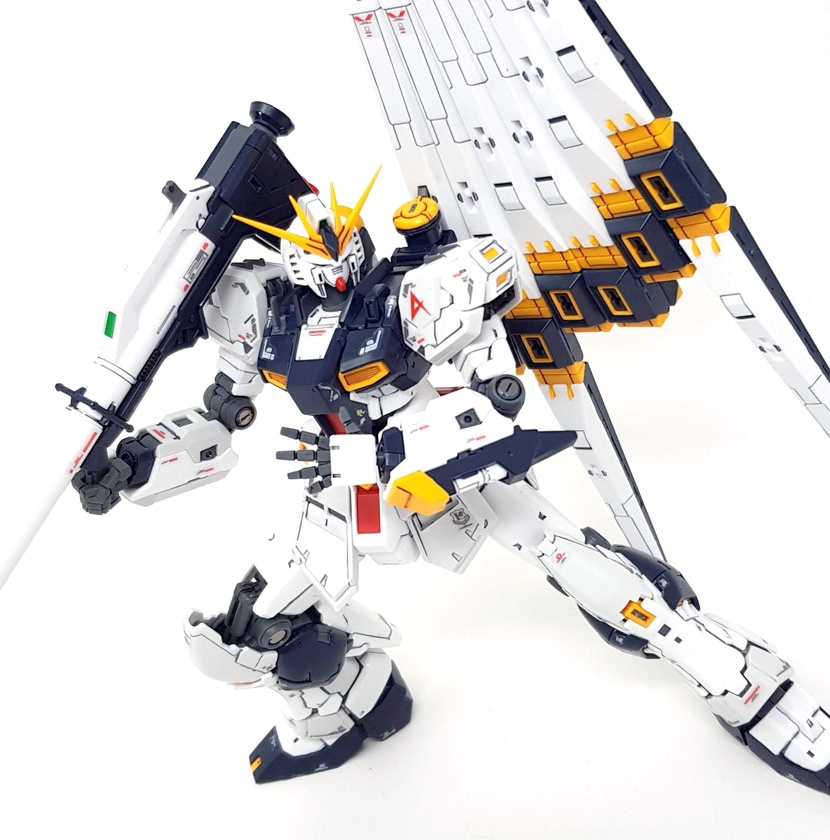
Well, and that’s the Nu Gundam all put together sans stickers and weapons.
 But hark, quoth I, what’s this you say? Accessories?
There actually aren’t that many, but what’s here is really solid. You get the beam rifle, the bazooka, the shield, a regular and the large beam saber, an array of open, closed and holding hands, a tiny Amuro and a really good action base adapter that plugs into the backpack. Also pictured is the extra attachment part for the funnels.
My only gripe with the accessories is that the shield doesn’t really clip onto the arm that well. It’s serviceable, but it also likes to fall off, and it ends up in a position where it’s hard to get any cool looking poses. I usually like to display my Gunpla with their shields, but with this one, it went back in the ziploc bag.
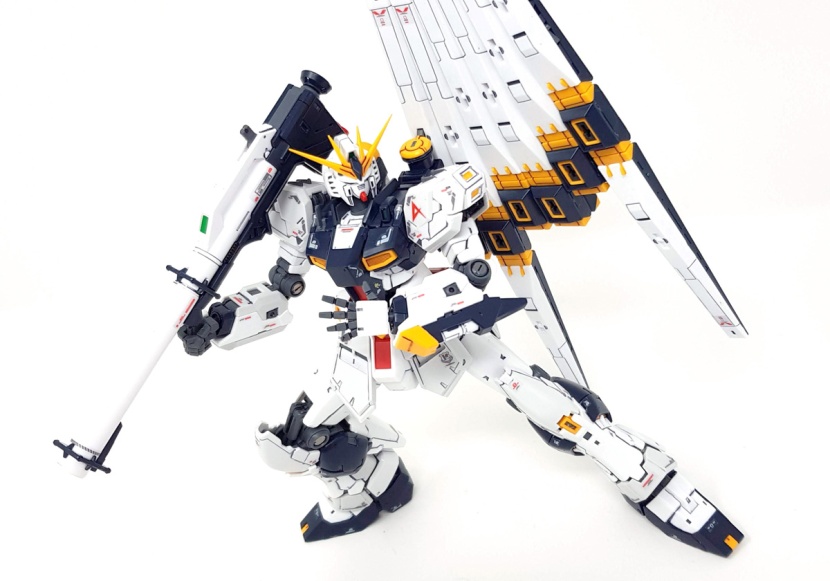
And speaking of posing and displaying and action base adapters, here’s the glamor shoot.


Also, to cap things off, I’ve got two size comparisons.


I think the pictures speak for themselves. The Nu is so big that it makes the Mk-II look like they’re not even the same scale. Like the Sazabi, it’s almost the size of a regular Master Grade.
If you can’t tell from the pictures, this is one of those kits that are just fun to play with because it’s so solid. Like all the more recent RG kits, the Nu marries excellent poseability with sturdiness and beautiful looks. I really feel like Bandai has found the sweet spot now where these kits are exactly as complex as they need to be, without any over-engineered or flimsy parts, and so they’re not only just as beautiful as the Real Grades have always been, but also rock-solid and really fun to build because everything goes together easily. The Sazabi is still my favorite Real Grade, but it’s really close. And I can’t wait to see what’s next for this crazy line of little engineering marvels.
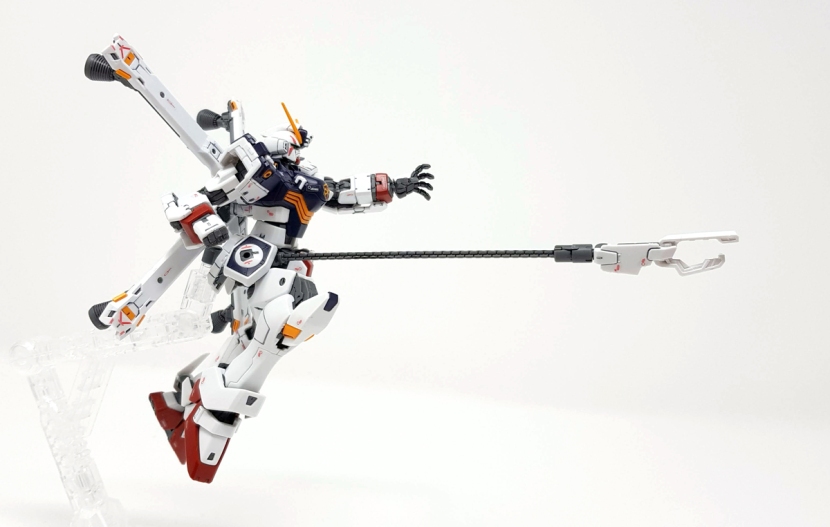
Real Grade Crossbone Gundam
Seems like it’s been a weirdly long time since I’ve reviewed a RG kit. Or written anything of substance on here other than brief commentary for Youtube links to Zoids Wild kits. But the thing is, these don’t exactly come out every week, and there are only maybe one or two older ones left that I even want, so I’ll just be doing these as they come out from now on.
 I really don’t know anything about the Crossbone Gundam other than that it has a skull on it. I actually thought it was a Wing kit before I got it. Turns out it only appeared in a manga, apparently, but it’s been hugely popular ever since. I dunno, I like skulls, so… yeah.
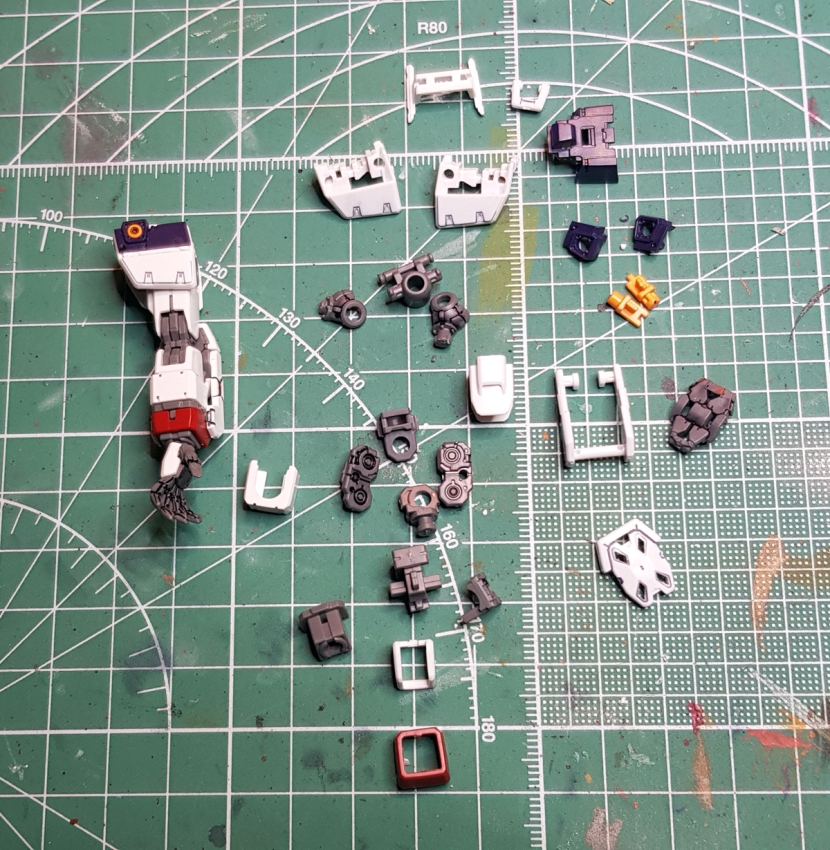
Here’s a look at the sprues.
 Nothing too out of the ordinary here in terms of the number of parts and sprues, but when you take it all out of the box, you get the first impression that there are fewer parts because there’s much less plastic. It’s not the number of parts, though, it’s their size. This kit is tiny.
 The other thing that stands out is the B sprue. Yep, this is it. Two parts. Number 1 on the left is the internal structure of the core fighter, number 2 is the inside of the torso, and that’s it. Everything else is just regular plastic parts. It’s pretty clear at this point that it’s only a matter of time until these are going to disappear from the RG line completely – I’m not even sure these two parts are necessary here anymore. Maybe the one for the core fighter because it has to hold up relatively big parts with very small joints, but the torso could’ve just as well been a few separate parts.
Anyway, the instructions have you start by assembling the core fighter.


It starts by folding up part B1 into this contraption, then building the four thruster arms.


Then you put together the main fusealge and the cockpit and you’re done. Note the small hinge that allows the nose to be folded down for insertion into the mobile suit’s back. As you can see, the hinge that holds it together is maybe 5 millimeters long. This stuff is all incredibly tiny, but it fits together perfectly, and I also found this to be far less difficult to put together than the Skygrasper, which is a plane of about the same size.
After the core fighter, assembly of the suit starts, shockingly and out of nowhere, with the feet. Nothing too out of the ordinary here, except of course there’s no MS joint inner frame.


Next are the legs which, as usual, are the most complex part of the suit. For some reason I didn’t take a whole lot of pictures during their assembly, but here are all the parts that go into one.
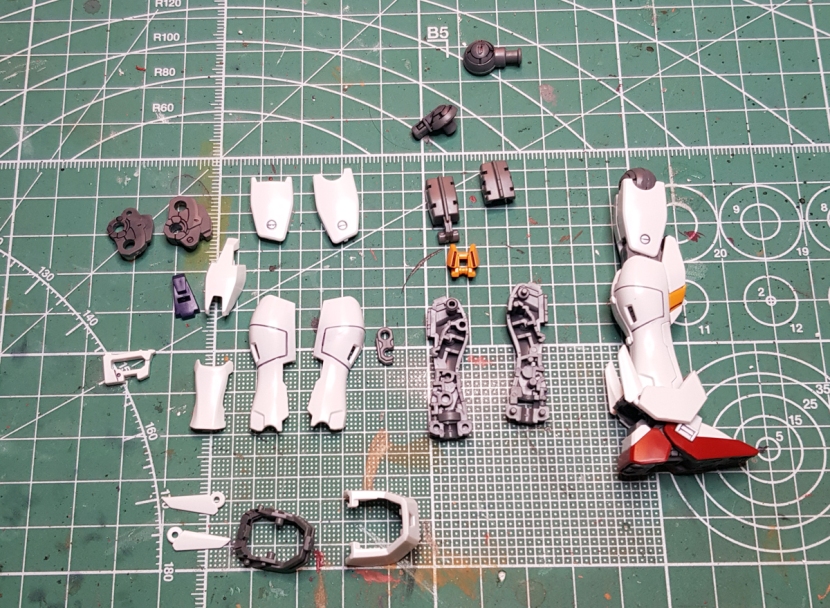 Here’s a look at how the knee works. The yellow piece slots into both the knee joint and the shin. This allows the knee armor to shift slightly as the knee bends. It’s a small touch, but it’s pretty neat, especially since the new inner frames so far have generally meant no more shifting armor plates.


Here’s how the ankle armor attaches to the leg. I just thought this was worth showing because I don’t remember any ankle armor on a RG I’ve built so far attaching this way, and it works very well.
 The “waist unit” is, uh, yeah. Lots of parts here.
 The hip joints are on a hinge so that they can be shifted for extra poseability. As usual, I think this is kind of pointless. On this particular kit, you move the legs so far away from the torso that it just looks ridiculous.


Here’s the assembly of the skirts. The front ones are particularly involved because of the, um, “scissor anchor”.


And now we have something to attach the legs to.
The torso is a fairly straightforward affair. The cockpit hatch opens, otherwise there’s nothing unusual going on here. The shoulder joints are just pegs on hinges to keep it simple and stable, no doubt because of the kit’s size.


And here’s how everything goes together so far.
The arms have a lot of parts, but it’s a bit deceptive because three of them come from the swinging mechanism that the beam shield will attach to, and everything you see at the top is actually the shoulder armor.
Here’s how it all goes together. Notice that the shoulder armor attaches directly to the arm and not to the peg the arm sits on. this does restrict poseability a bit better, but it’s also way, way more solid.


And you know what that means – headless hessian time.
Well, and then we assemble the head. I think this probably took up 30% of my assembly time and most of it was spent trying to get the eye sticker on.


Notice that the red “scar” markings are a groove on the head armor. I panel lined these here and later covered them up with stickers, but it’s worth noting because it probably wouldn’t be too hard to paint these red if you’re so inclined.
The head also comes with extra parts to give it an eyepatch, by the way, but handling the clear piece for both eyes was maddening enough, so you’ll excuse me if I’m leaving the two parts that are half its size on the sprue.
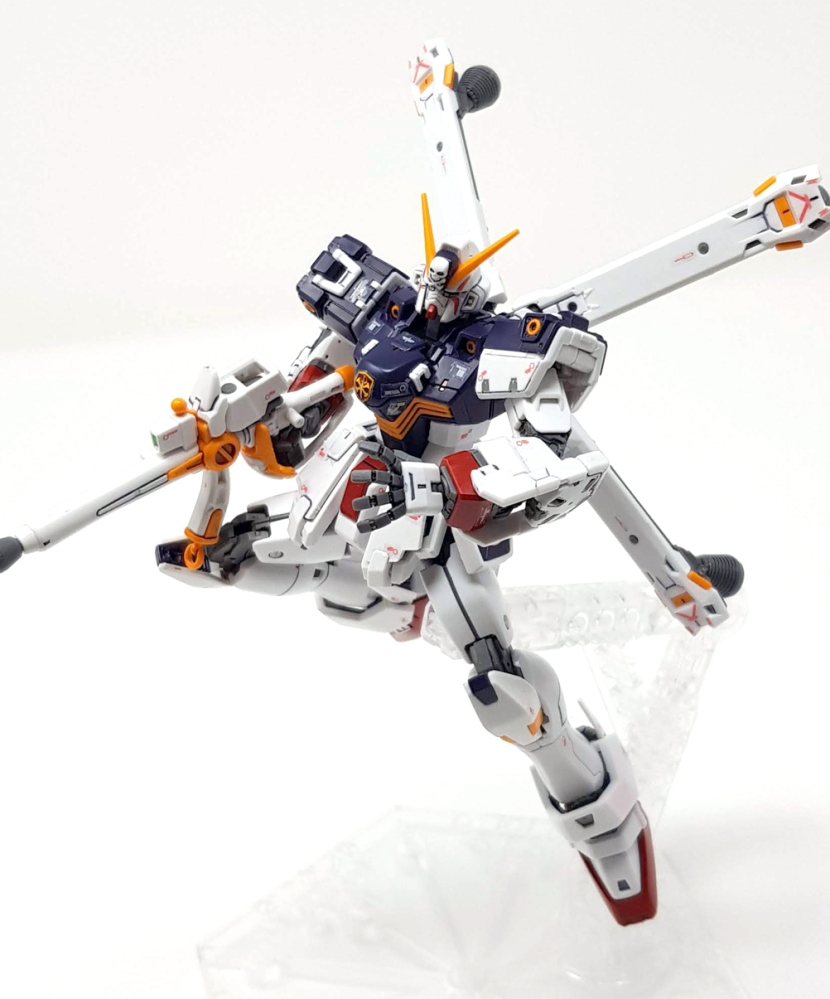
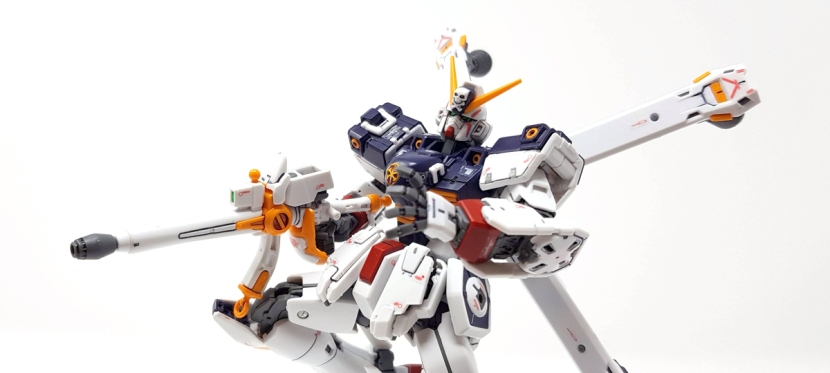
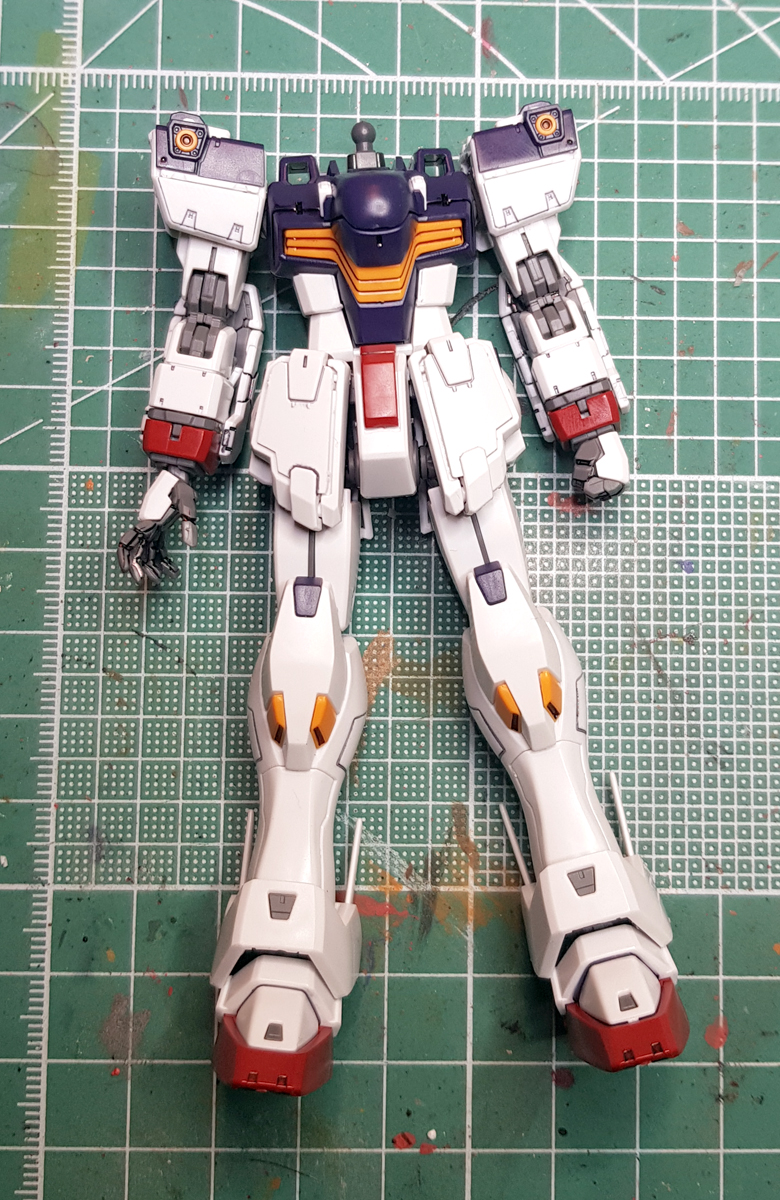
That completes the assembly, so here are the customary workbench pictures.


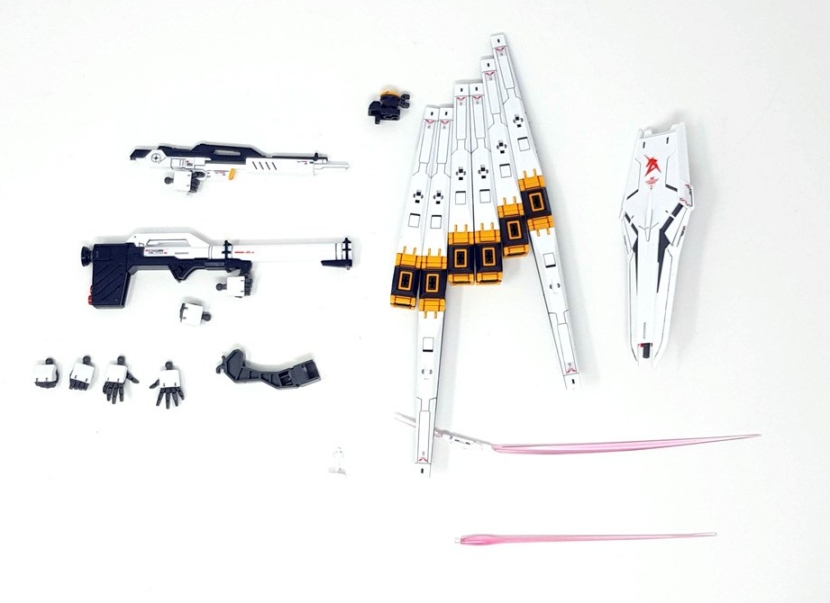
And now, you guessed it… accessories.
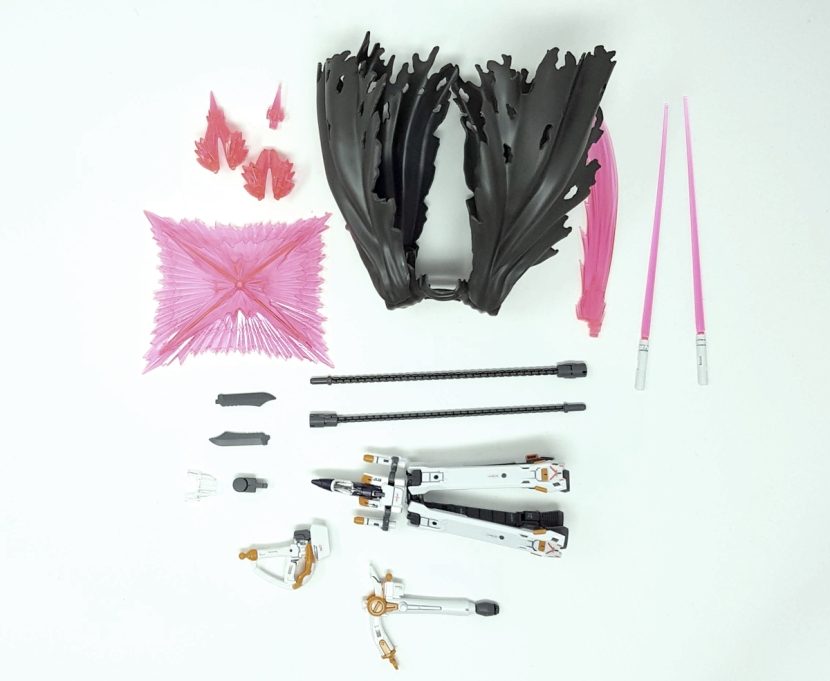
Needless to say, you get a ton of stuff with this kit. There are two beam sabers, the beam zanber, a pistol, two knife blades, two scissor anchor chains, two fist effect parts, a beam shield, two action base adapters and the cloak. Also pictured is the core fighter, if we want to consider that an accessory.
You also get a whopping eight hands.
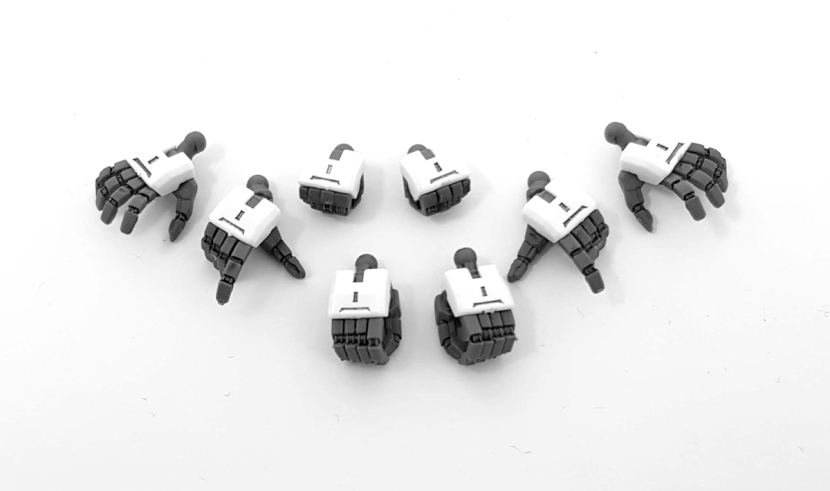
There are two closed fists, two regular holding hands, two trigger finger hands and two open hands. As usual with the recent RGs, no articulated hands anymore, and thank Lemmy for that. What’s new about the holding hands is that the pegs are molded into the armor parts, and they’re pretty thick. This results in some big peg holes in all of the weapons (there also aren’t any folding pegs on anything), but the tradeoff is that the suit can actually hold its damned weapons without you having to glue them in place, and frankly, I’ll take it.
The beam zanber and the pistol can be combined into this larger weapon.


Unfortunately, while it looks pretty cool, the guard rail from the zanber gets into the way of the arm, so the suit can’t hold it straight. You can still get some decent poses out of it, but it doesn’t seem too well thought out.

It looks ok like this, but if you look closely, you can see the gun is actually pointed way outward.


The knife blades can either be combined with handles stored in the legs into these Rambo knives, or they can be attached to the bottom of the feet for some James Bond type hidden-blade-in-my-shoe thing.
Here’s the scissor anchor. You transform the front skirt into this thing and then unplug it and attach it to the chain. Not my favorite gimmick and since I haven’t read the manga, it’s kind of lost on me.


My overall verdict is that the engineering on these RG kits is really getting nuts lately. This kit is tiny, and not only does it pose nearly as well as any other RG, it’s also at least as sturdy. The head was a nightmare to assemble and the knee pads have a tendency to pop off (they’re very easy to glue in place, though), and that’s about it. Everything else works perfectly.
Conversely, I also think that’s kind of the only thing I’m really all that impressed with – that this does what it does at about 70% of the size of a regular RG. If it was the size of the other kits, it would really just be another Real Grade – a nice looking and very solid one, but nothing particularly out of the ordinary.
So I guess the bottom line is, if you’re a fan of the Crossbone, you absolutely should get this kit because it’s definitely a damn fine piece of engineering, it looks good, and it comes with a ton of accessories. But if you’re looking for something a bit special and you don’t already have, say, the Sazabi or the Unicorn, I’d get those first.
Finally, here’s my Youtube review with a more in-depth look at the articulation. Everything else is more or less the same info (and pictures) as in this review.
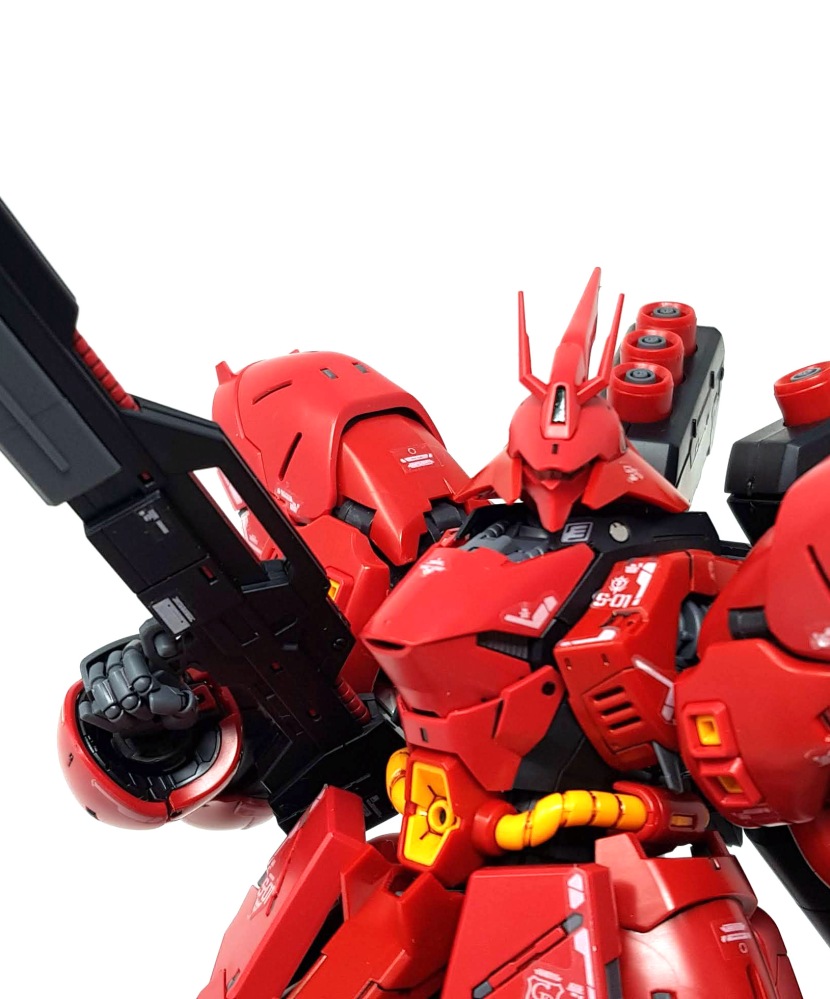
Real Grade Sazabi
After the massive undertaking that was the PG Aile Strike, I was kind of glad to get the RG Sazabi. To this day, I still just snapfit and panel line my Real Grades, and honestly, that’s kinda what I needed right now. Turns out, though, that I wasn’t going to do this one in one sitting like I usually do.
The RG Sazabi is far and away the biggest and most complex Real Grade ever made. I didn’t do the math, but I’m pretty sure the parts count is higher than even the Unicorn’s, and, well, it’s the Sazabi, so it’s gigantic. The box is quite literally the same size as most recent MGs like… incidentally, the MG Unicorn. Everything about this kit is big and crazy.
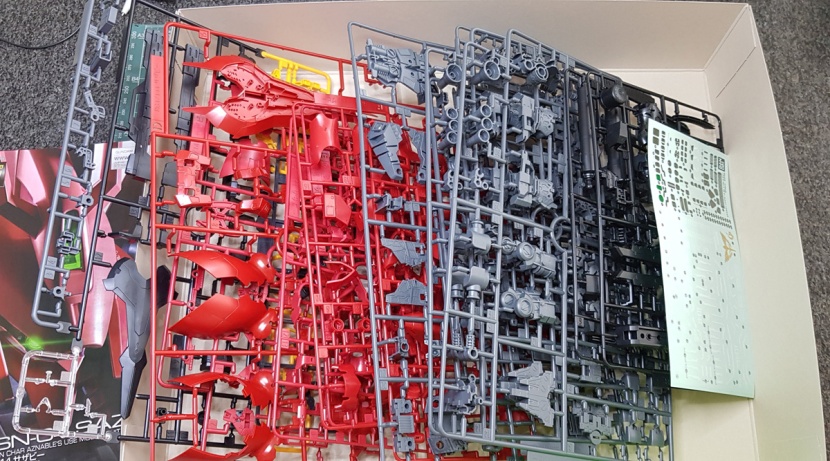
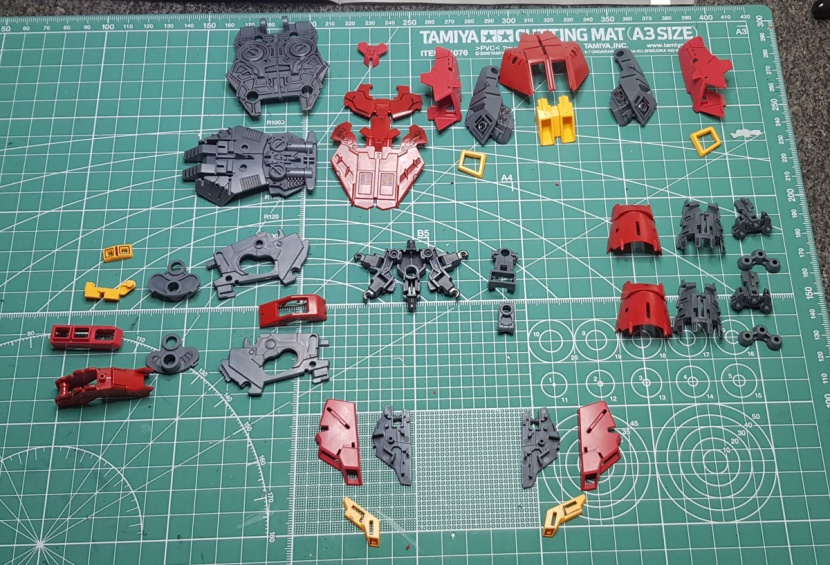
For example, this is usually the point in my review where I show you a picture of all the sprues laid out nice and neat on my table, but for this one, that was impossible. I had to pile them back into the box like this, sorted alphabetically like I would for a Master Grade. So this’ll have to do for my “here’s what’s in the box” pic this time.

Like on the Tallgeese, the B sprue is practically nonexistent. The part in the middle goes on top of the waist section to hold the skirts, the number 2 parts next to it are the elbows, and the ones on the outside are for the shoulder armor – that’s it. The rest of the joints is assembled like on any other Gunpla kit.
Honestly, I have zero issues with this. Some people might argue that with this being the second kit after the Tallgeese where most of the inner frame is assembled the old-fashioned way, the RGs are losing what distinguishes them from the other lines, but to me, their selling point was always being basically MG-level detail at 1/144th scale, and the pre-molded inner frame parts where just a means to an end.
Also, you might notice just from looking at this that there are sections separated by joints that don’t appear to have their own injection gates, but they actually do; it looks like the second layer of the sprue is removed before packaging as there are clearly visible gate marks on these parts.
Anyway, guess what? The build starts with the feet.


As you’d expect, you put together the inner frame for the foot and the ankle joint, then you plug the armor on top of it.
Next are the legs. Nothing too out of the ordinary here either.


Double jointed knee, a movable flap in the back that the thrusters at the ankle attach to, and that’s that. There’s no sliding armor here and no crazy exploding knee. I’m okay with the latter, but I guess it’s mildly disappointing that nothing at all moves as you bend the knee. Then again, the fact that the legs are as flexible and stable as they are, given the bulk and awkward weight distribution of the bellbottom armor, is amazing enough as it is – it doesn’t need any more gimmicks.
The waist section is next, and uh, yeah.
Of course, if you know anything about the Sazabi, you won’t be surprised to see that the waist and the skirts have the combined parts count of a small HG kit (also, as usual, there’s actually a few parts missing in this picture because I’m an idiot.) As you can see, though, that’s not just because of their bulk, but also because there’s a lot of nice inner detail and some opening hatch gimmicks here.


The main section consists of two halves with a swinging hip joint section in the middle, the aforementioned B sprue part that goes on top and is secured in the front and back with two parts that I didn’t photograph separately because cf “idiot” above, and then the armor goes on the outside.


The front skirts are next, consisting of three parts each and with a bunch of holes in the armor for the grey inner part to show and add some really nice color separation. Otherwise, nothing special here – no hatches open.


Next is the massive rear skirt section with opening hatches on the side and a ton of detail. At this point I was starting to think this kit would really be fun to paint and looking at these pictures as I’m writing this makes me ponder buying a second one to do just that.


The side skirts are simpler, but they do also have an opening hatch gimmick. And that completes the waist section.


Next is the upper torso, which is a nice example of economical design. As you can see, it looks fantastic and it’s jointed in two places for a decent ab crunch, but it doesn’t really consist of all that many parts. The tubing, especially, is just one chunk instead of a maddening pile of Zaku beads, but if I’m honest, I think with a little panel lining it looks just as good and it’s more solid.
Also, there’s been a lot of horror stories about the shoulder joints, but I really didn’t have any trouble with them. You do have to make sure you press them all the way down for the armor to fit around them, but other than that, they’re fine.


Next are the arms. Like the legs, they’re reasonably complex and really pretty looking, but they don’t have shifting armor plates. There is a nice little piston detail for the elbow, though. As you can also see in the second to last picture, there is no actual beam saber handle stored in there, just a dummy that makes it look like there is one. Given that the tradeoff is better stability, I can’t say I have a problem with this.


")

The shoulders are the final section with a B sprue part in them. Internal detail on every armor piece, everything’s articulated to make room for the arms to move, and there’s an open hatch gimmick as well.
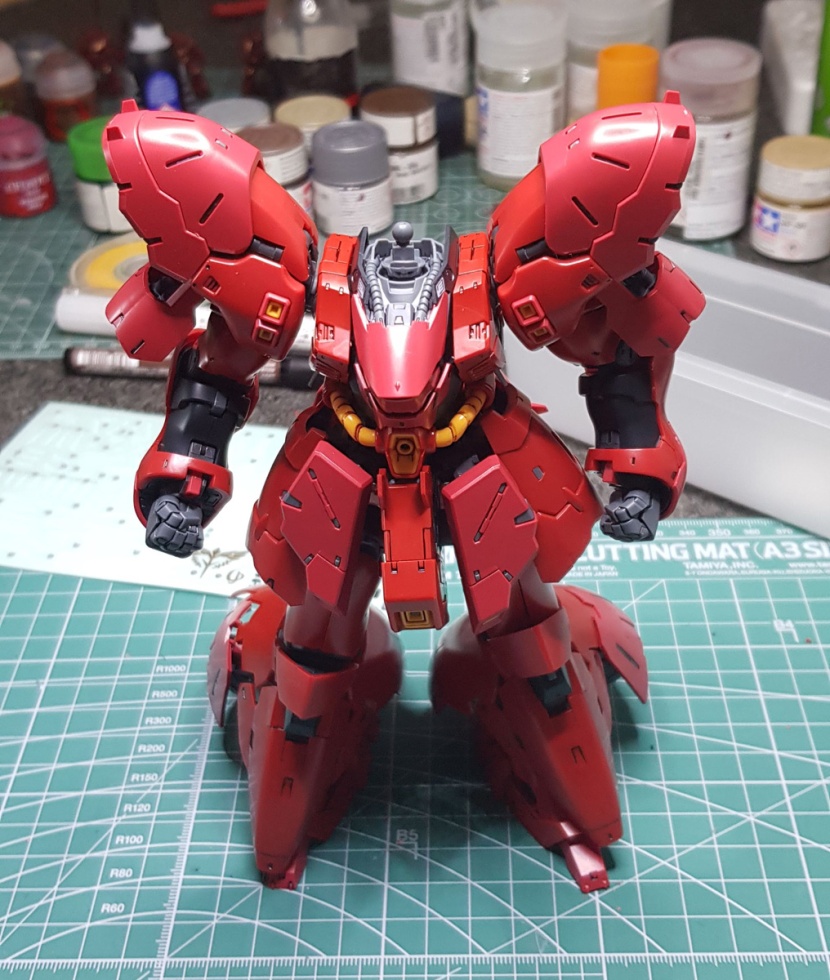 And we have a headless Hessian. I also finally figured out how to get the camera to focus on the top instead of the feet. Sadly, this means the end of a beloved RoboShop tradition, and I’m sure I’ll lose all of my legions of followers over this.
Uh, anyway, here’s the head.


Now unfortunately, I can’t quite show you this to you properly. It’s assembled in sections, as you can see, and has the sphere for the cockpit with opening parts around it, but I ran into a bit of trouble here.
First of all, the t-shaped part for the mono-eye was broken out of the box; the mono-eye itself was almost snapped off. That wasn’t a problem Tamiya Extra Thin couldn’t fix, though. What happened next was that, as you can see here, I decided to try painting the mono-eye instead of using the sticker. As I kind of expected, that came out basically invisible behind the visor, so I decided to take the head apart again and put the sticker on. And at that point, the clear part for the visor broke, and I had to glue the entire head assembly together. It looks totally fine as the broken part is hidden behind armor, but of course it doesn’t open anymore, and I’m always handling it pretty gingerly.
I really think the problem behind both these issues is that the clear parts are unusually brittle, at least for Bandai’s standards. This isn’t usually a problem with their kits, but you’re going to want to handle these carefully.
Then you get to the backpack, and I demand that you look at this.


LOOK AT IT.
The good news is, though, that despite consisting of seven parts each and having the full range of gimmicks with the opening side panels and protruding barrel, the funnels are actually less fiddly to assemble than on the MG. The side panels are partially held in place by the grey section on the inside, not just the armor part that goes on top of them, so you don’t have to somehow try and hold all four of them in place as you’re squeezing the top armor section on to secure them in place.


And then the backpack goes together like so. As you can see, it has a nice opening hatch gimmick in the center section, and of course the binders open and close; there’s actually a section that you pull out to open them, but honestly, it doesn’t work that well, and you have to be kind of careful not to open them too far or they’ll explode.
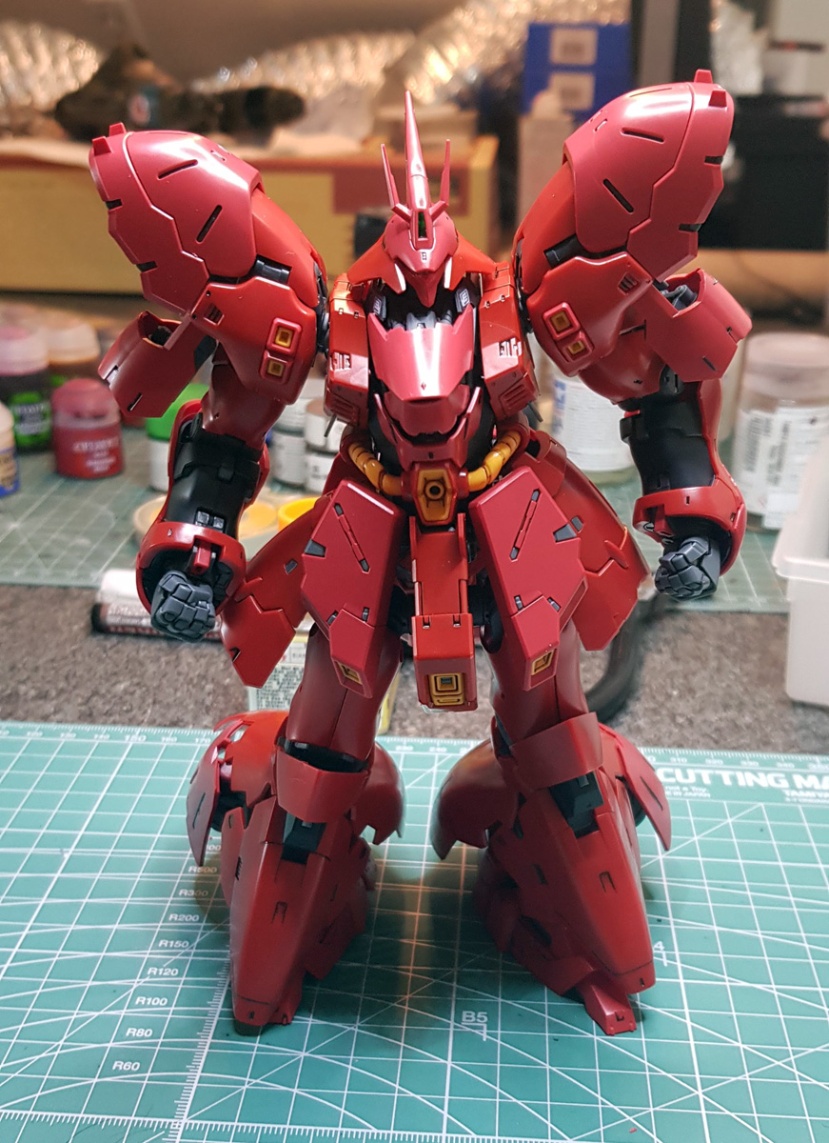
And we’re done. At this point I’d like to point out, purely because I think it’s what really stands out about this picture, that the RG Sazabi has by far the most accurately proportioned shoulder armor out of all the versions of this suit. For my tastes, this is an ongoing problem with every kit of the Sazabi – one of its most striking features in the anime is the bulk and curve of the shoulder armor, and they’ve never really gotten this right. This is definitely the closest any kit has come to accurately reproducing the proper proportions.
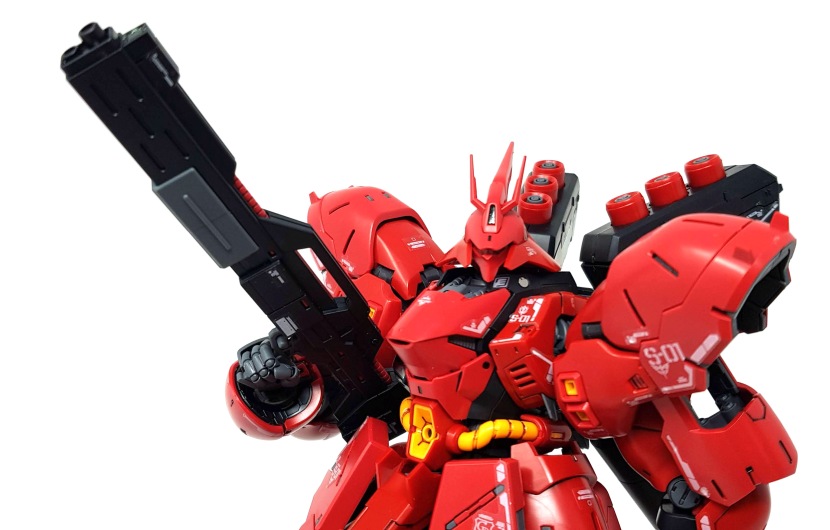
And that brings me to the accessories.
You get the shot rifle, the shield, two beam sabers with effect parts and the beam tomahawk with the long and short effect parts, as you’d expect. The beam tomahawk can also be mounted on the shield. Other than that, nothing attaches anywhere, but it all sure does look damned good. Also, you get a sufficient range of fixed-pose hands to hold everything, two fists and two open hands, and the holding hands have jointed wrists to help with posing. There’s also an action base adapter and a Char pilot figure that aren’t in this picture because I’m too cool to actually take useful pictures that contain all the necessary information.
If I have one complaint, it concerns the accessories, or more precisely the conspicuous absence of the long rifle. As you may know, this rifle is only available as a bonus item with a magazine, and if you’ll excuse my French for a second, that’s fucking bullshit. The long rifle is the gun that most fans of the Sazabi prefer, and to separate it from the main kit (which is expensive as hell for an RG) for a promotional stunt like this is just unforgivable.
Personally, I’ve always preferred the shot rifle, so I don’t need to play Bandai’s game here, but this is honestly the only thing they could’ve done that’s even worse than making the Sinanju‘s bazooka available exclusively as an overpriced P-Bandai add-on kit.
That’s about the only complaint I have, though. As mentioned above, this kit is missing the sliding armor gimmicks that have been a staple of RG design for as long as the line has existed, and I’m not entirely sure how I feel about the fact that that’s apparently a thing of the past, given that the Tallgeese also didn’t have it. I always liked it, but these two kits just seem to be considerably more sturdy because of the way their inner frames are put together, and if that’s the tradeoff, I think I can live with it. It’s not like they’ve otherwise scaled back the detail or complexity – this was the first time I had to split an RG build over several days, and at the same time, very little about it was fiddly or difficult, it’s just a lot of stuff.


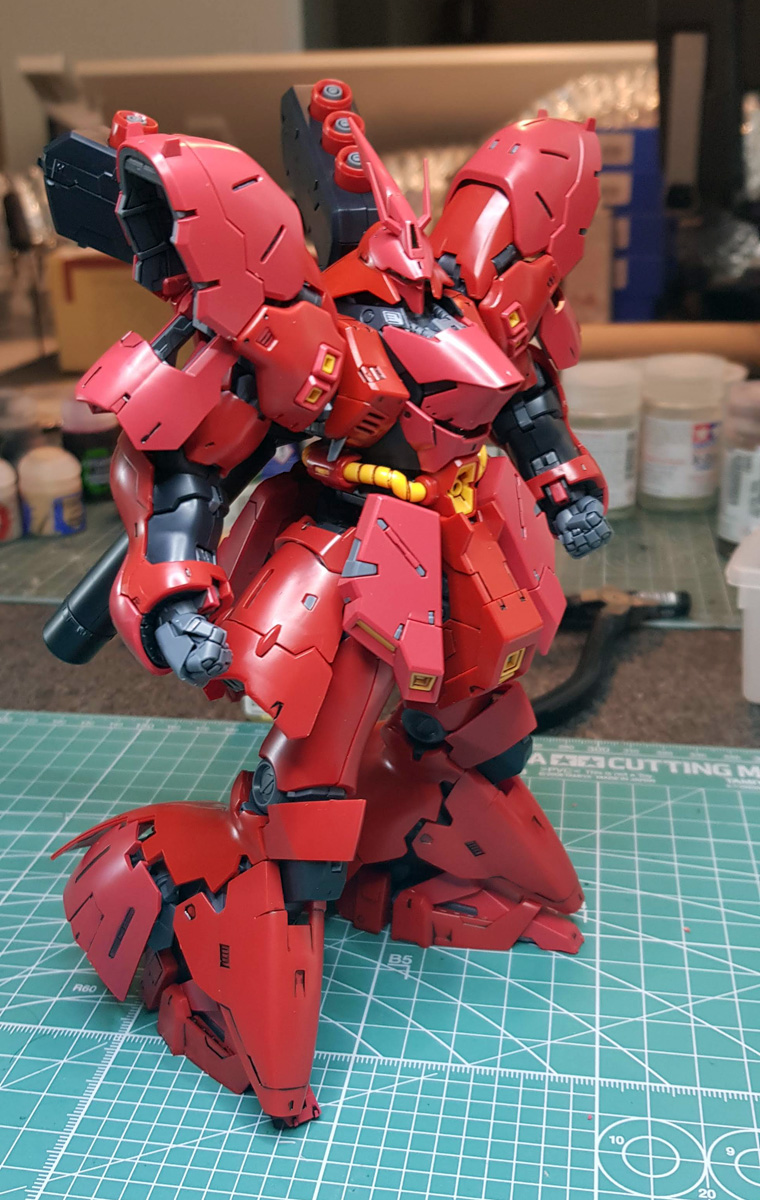
And as you can see, poseability is excellent, given that this is the Sazabi. I can’t honestly say that I like this more than the MG Ver. Ka because it just doesn’t quite have that kit’s level of detail, but it does have the improved proportions and both the poseability and stability to allow you to display it in the kinds of dynamic poses you actually want out of a Sazabi.
In conclusion, I think we have a new best Real Grade kit. This thing just doesn’t have any flaws. With the Unicorn, I really think there’s an issue with the proportions, but this one actually has better proportions than its predecessors, if anything, and sacrifices absolutely nothing in terms of posing, stability, sturdiness, and general fun factor both during the build and posing it for this photoshoot. Absolutely fantastic kit – get one if you can, they’re selling like hot-cakes for a reason.
And by the way, I know the damned ammo clip is missing in every picture with the gun, but “I’m an idiot” is the theme for this review, in case you hadn’t noticed.
Sigh.
Real Grade Tallgeese EW
You never forget your first.
I’m probably the only western Gunpla blogger alive or dead who didn’t grow up on a steady diet of Gundam Wing, and that, if you’ve been wondering, is the reason why you don’t really see any Wing kits on this blog. The Tallgeese, though, has kind of a special place in my heart.
See, way back around the turn of the century, I was really exclusively into Tomy Zoids and wanted to do a bit of kitbashing. Word around the Zoids community at the time was that “Gundams” made for good parts fodder, so I bought a few. The first of them was the 1/144 Tallgeese (this No Grade version, if memory serves), and while I did raid it for parts, I also built it first because I was curious about the kit. And honestly, taking it apart to slap the boosters on a Redler and use the shoulder joint to mount a cannon on kind of hurt. I really liked the design, and it was hard not to notice the quality of the kit, even back then.
Years later, I still sometimes thought of the Tallgeese and kind of meant to replace it. I’ve had the MG version sitting in my closet for a while now, but I’ve always been a bit apprehensive about whether I’d be able to do it justice. It’s white and it needs pre-shading, but all those curvy armor pieces look like they’re going to be a bitch and a half to shade.
Needless to say, when the RG was announced, I got my preorder in faster than a fat guy orders his supersize meal at Mickey Dee’s. Finally a quick fix for the glaring absence of a Tallgeese in my Gundam collection, and it’s the right version, to boot.
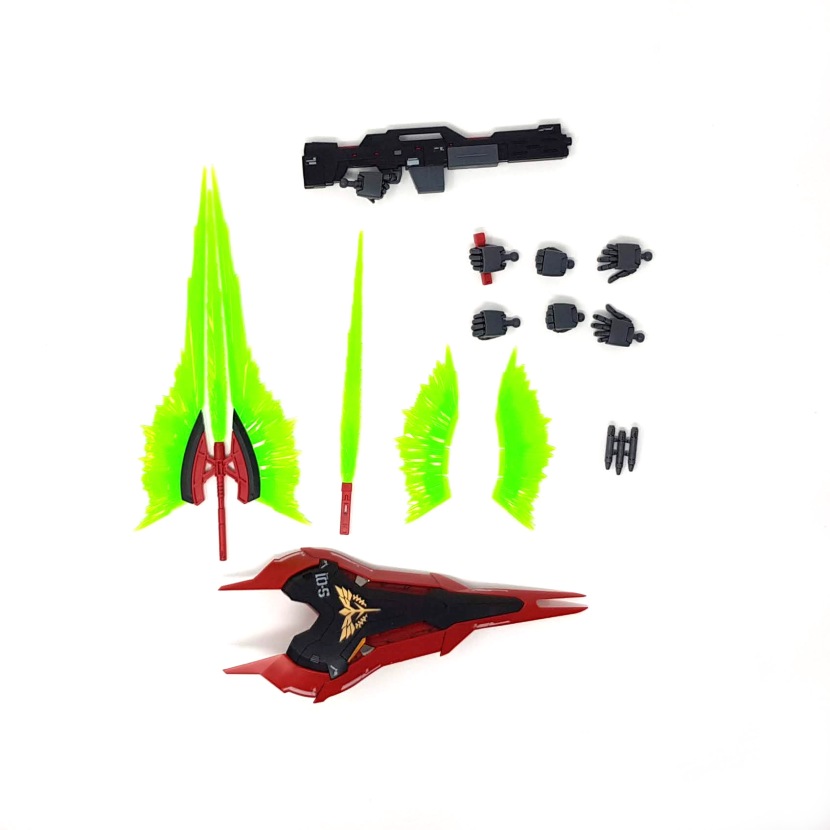
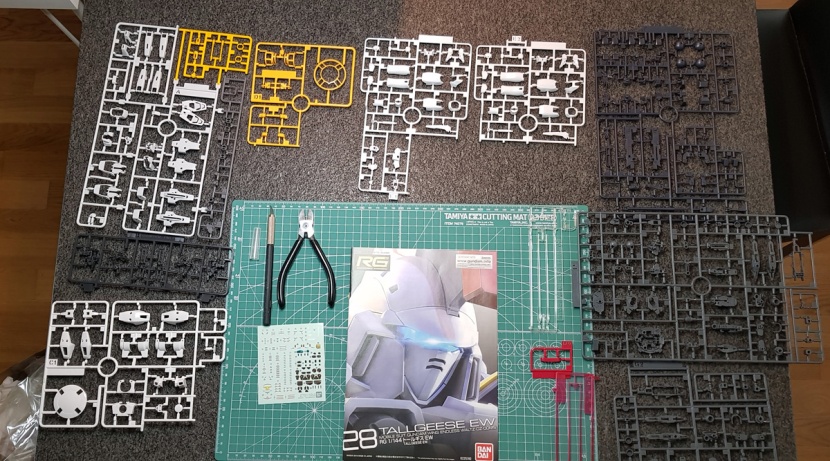
So here’s what’s in the box.
For some reason, the kit includes two clear beam saber effect parts along with the usual red ones. Sadly, the camera for the Dober Gun is also molded completely clear. There’s a blue sticker for this, but I decided to paint it clear red instead because clear blue always comes out too dark. Turns out the red did too. Oh well.
The sticker sheet is fairly small, which shouldn’t be too surprising – they opted to keep the general slick look of the Tallgeese and not clutter it up RG style with too much surface detail, and so there also aren’t that many stickers.
The white plarts are molded in a similar glossy plastic to the Sinanju and also pretty much all undergated; I don’t think there’s a single visible nub mark on any of the armor.
The big thing to notice here, though, is the small size of the B sprue. The internal frame on this kit is almost completely assembled the old-fashioned way with only a small handful of the usual pre-molded joints.
Nothing out of the ordinary about how the build starts, though – it’s with the feet. You take the internal frame part for them (which is really chunky in this case) from the B sprue and slap the armor on it.
What follows is unusual, though. Here’s the inner frame for the legs.


Only the part in the top left of the first picture comes from the B sprue, the rest is just regular grey plastic. You then assemble the knee joint with the mechanism for the armor separation much like you would on an MG.
Then you add the armor and you’re done. Nothing fancy here, although of course the ball-shaped joint for the hip also doesn’t come pre-molded.


An amusing idiosyncrasy is how the bottom of the armor goes on – at first I thought this was the ankle armor and just sat loosely on the foot, but you actually click it into place after assembling the rest of the leg like so:
The waist unit is a rather massive undertaking, of course, because all the skirts have to open. It also doesn’t have a B sprue part, you actually start by sandwiching its halves together with the moving parts in between.


The extending crotch thruster gimmick will never not be weird. How many more kits with alien genitals are we going to get, Bandai? Wasn’t the Nightingale enough?


The rear and side skirts are next; the rear skirt section is one piece, but it still consists of a number of parts because it has two separate hatches that open to reveal thrusters, and the side skirts are actually double jointed.


Speaking of the side skirts, they also have this little connecting rod that plugs into a hole on the side of the thigh to help them move along with the legs. This works very poorly, though, as the rod keeps unplugging from the leg. And frankly, if it didn’t, you’d probably snap it in half within five minutes. So it’s all really kind of pointless.
Yep, starting to look like the Tallgeese alright. Next is the torso. You’d think this section would be simple as it’s so tiny because Katoki proportions, but you’d be wrong.


As there’s no B sprue part for the torso either, it all has to be assembled; the advantage of this is that the white part for the cockpit hatch can simply be attached between the two torso halves.


")

The arms have the only B sprue part that really looks like your standard RG inner frame. In another amusing bit of Tallgeese assembly weirdness, though, the orange yellow trim part for the wrist doesn’t just click on, but you put it on and then rotate it 90 degrees to lock it into place. Same with the entire shoulder armor assembly. Be careful not to get the B parts for the arms mixed up – they look almost identical, but they’re not, and if you rotate the shoulder armor the wrong way to lock it, you end up causing damage. How do I know this? Oh, just something I heard.
Another oddity about this assembly is that you do not, in fact, attach the arms next, but build the head, in two parts.


")
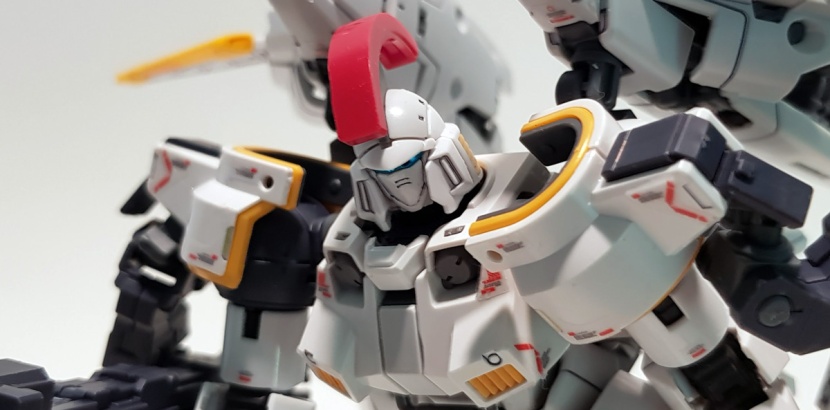
The instructions specifically tell you to first attach the bottom part of the head to the neck, then the dome/face combo. I have no idea why. Or why the instructions are done in a way that forces me to break with my Headless Hessian tradition. Anyway, it’s a nice looking head, but they really could have added some detail to the crest/fin/whatever. This thing looks beyond weird for a RG.
And here we are sans boosters. Needless to say, their assembly is pretty involved. Everything has to open and close, so the boosters are broken down into several interlocking sections.
")


In all honesty, I’m not terribly impressed with the engineering here. These things certainly look nice, but there’s a moving lever part in the middle (just under the armor piece with the yellow bit) that does basically nothing, and everything else has to be pried open and moved into place manually without any kind of mechanism making it slide into place on its own.


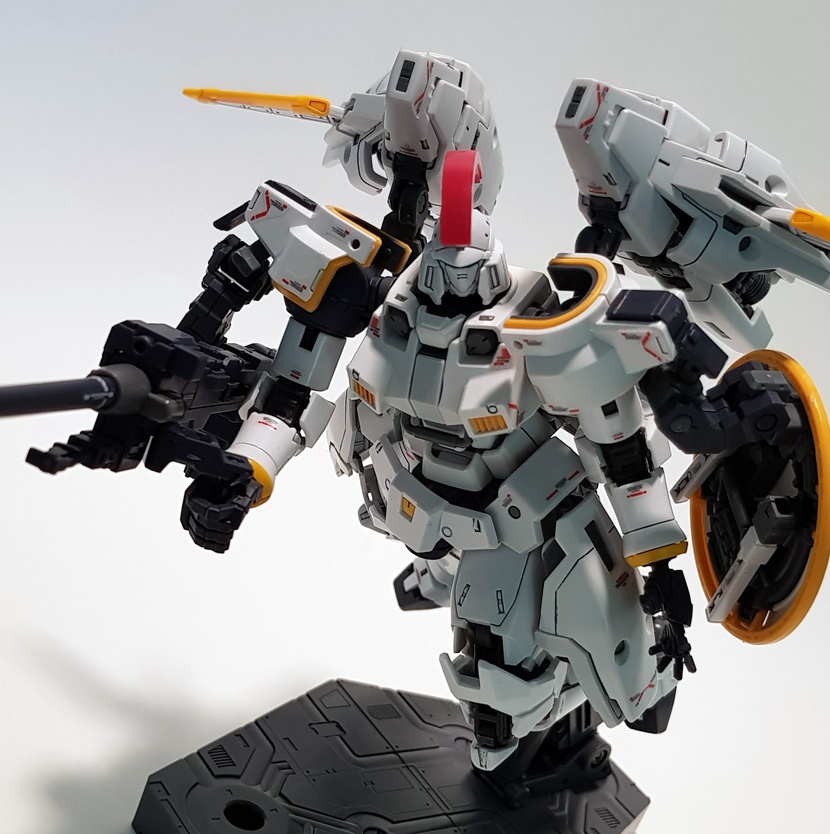
But anyway, here’s a shot of the suit with and without its accessories before I put the stickers on. As you can see, it stands up just fine, which comes as a pretty big surprise.


The accessories are about what you’d expect, except for the hand options. You get a pilot figure, the aforementioned four beam saber effect parts and two handles, the Dober Gun and the shield, plus no less than seven hands. Two fists, two open ones, two holding hands for the beam sabers and the handle on the shield, and one trigger finger hand for the gun. Also, the beam saber handles can be stored inside the shield.


The holding hands have angled wrist joints and also hold the sabers at a forward angle; this works really well for posing, as you can see here. The suit can hold the sabers at a much more natural angle than the awkward 90 degree TF G1 toy pose that you tended to get with the older RGs. No poseable hands, by the way, and thank god for that.


What doesn’t work as well, sadly, is the Dober Gun. The big contraption that attaches it to the shoulder armor works fine and can hold it up on its own, but it’s pretty ugly. Also, if you want to have the suit actually holding the handle as in the last picture here, you’re pretty much stuck with one pose for the arm – it’s a pain to wiggle it around until it all goes together, and there’s pretty much only one way to do it.
Poseability is pretty good considering all that’s going on with the kit. The torso has a considerable amount of ab flexibility and the head can also be tilted backwards so you can get some decent forward flying poses out of the kit. It’s also really, really solid – I don’t think a single piece fell off while I was working with the kit for these pictures.
And of course it looks great. I was a little apprehensive about the design choices here when I saw the preview pictures – obviously the designers struggled with the fact that the Tallgeese’s look doesn’t really lend itself to an RG kit. It’s meant to have a lot of large, clean surfaces and too much clutter wouldn’t have made it look meaner or more interesting, just weird. I think ultimately they struck a really good balance here where the kit looks detailed, but also retains the character of the original design.
I’d definitely recommend this kit if you’re a fan of the Tallgeese. If you’re not, though, I’m not sure there’s any urgent reason to get this. It does everything it needs to do, it works, it’s sturdy, and it’s also a really fun and smooth build without too much frustration or fiddliness, but on the other hand, there’s just nothing all that special about it, other than maybe the near total absence of the usual RG inner frame parts. It’s just a good, solid RG kit of a classic suit that won’t disappoint you if you like said suit, but if you don’t, it also won’t change your mind.
Real Grade Gundam Exia Build Review
Yeah, I thought I was going to get some photoshoots done this month, but guess what… I didn’t. So what I’ve got, and you know I have to get this one here so my archive isn’t missing a month, is a build review of the RG Exia that I snapped together a few weeks ago. No pose pictures, or at least not yet – you might remember I did the same thing with the RG Unicorn… and also haven’t gotten around to the photoshoot yet.
Anyway, the original plan was for this to be the first time I use waterslides on an RG, but once I started prepping the parts, it became pretty obvious that that wasn’t going to happen. The RG Exia isn’t super complex or anything, but it does have a ton of clear parts with foil stickers under them and these clear sheet strips for the GN power lines, which really makes it impossible to just assemble the limbs and then topcoat them. And frankly, I just still can’t deal with the idea of painting RG parts individually, even if it’s just for a topcoat over waterslides. So I just did my usual thing here, panel lined everything on the sprues, then cut the parts loose and got to building.
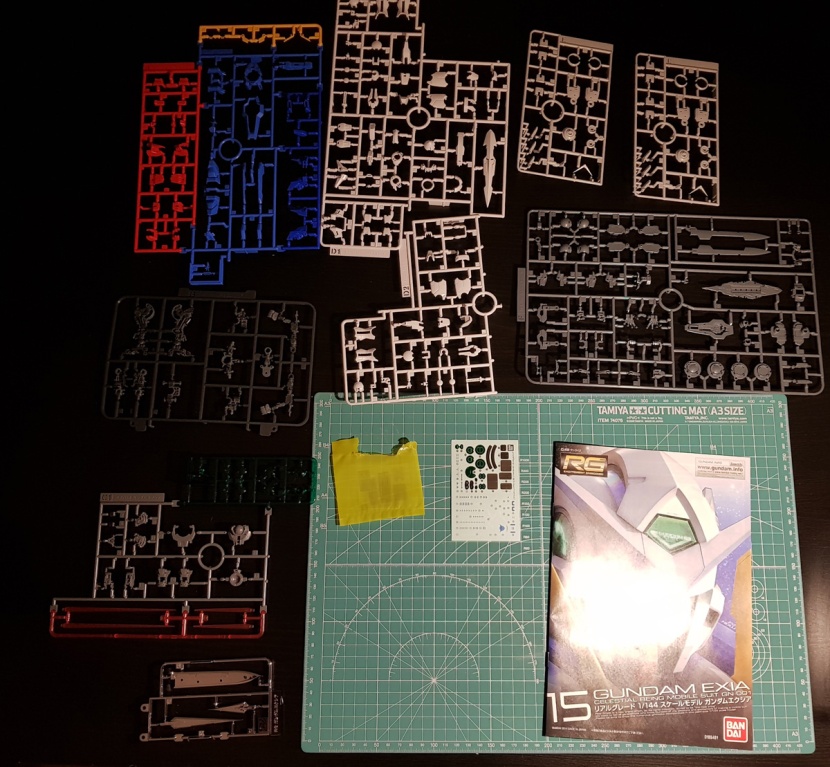
Behold the worst box contents shot in the history of RoboShop. Sorry about that, folks, but obviously by the time I noticed that this picture sucks, I kinda couldn’t put the toothpaste back in the tube anymore.
Anyway, nothing too unusual going on here, with two exceptions – there’s a chrome plated sprue for the blades, and inside that little yellow bag is the sheet with the GN power line parts. More on that later.


The build starts with the legs, which, funnily enough, are actually not one piece on the B sprue. As you can see here, the foot comes attached to the lower half, but you actually put together the double-jointed knee from two other parts. It all works just fine and dandy, it’s just odd for a Real Grade, I guess.


The GN power lines are this weird iridescent sheet plastic. To be honest, it doesn’t look that great. In some places, like on the upper thigh, they have a foil sticker under them, but it really just ends up looking like you glued a piece of tinfoil to the kit. I guess this is just an aspect of the Exia’s design that’s difficult to pull off. You know, unless you want to pay three figures for the PG with the LEDs. I hear it looks pretty neat on that one.


The rest of the leg assembly is pretty straightforward. As you’d expect on an RG, there’s a fair number of moving parts, the foot articulation actually works for once, and the green foil sticker with the graphic printed on it actually looks really nice under the clear piece.


The torso is where the Exia’s commitment to the circle as a design element is the most extreme, and I have to admit, I got quite enamored with it when I was putting this section together. The armor pieces layer on top of each other in a way that really creates depth and detail, and there’s a real sense of functionality here where you get the feeling that this part powers the suit. Even though, you know, none of it makes any sense. It just looks convincing if you can suspend your disbelief long enough to believe in teenage boys that can control giant robots with space magic.


The GN drive, of course, plugs into the back. It’s very nicely detailed and has these three clamps that close to… well, look like they hold it. It actually clicks into place securely without them and then won’t really come off anymore, but it looks pretty cool.


The waist section isn’t built separately but attached directly to the torso as you assemble it. No side skirts, just front and back, and I’m happy to report they’re all two pieces each. This shit matters, folks. The beam saber handles, uh… plug into the Exia’s ass cheeks, I guess. Moving along…


Nothing unusual going on with the arms. There’s another clear piece with a sticker underneath, otherwise they’re very simple and don’t do much. I made a really bad mistake here, though.


See, the long GN power line that goes from the shoulder armor to the upper arm is meant to hook on to this peg on the side, and then you secure it with a small armor piece. This works perfectly, but the problem here was that there’s a friggin’ nub mark right on top of that peg, and so I more or less cut it off completely on the other arm. I did leave just enough there so it held the GN power line in place well enough to glue everything together, so it looks fine now, but… well, don’t cut off this peg, folks.
I don’t know why I keep taking the Headless Hessian pic, but here it is. I think it was at this point that I realized the fixed-pose open hands are laughably out of proportion with the rest of the kit. Notice also that I forgot to clean up some of the panel lines on the right arm. Oops.


The head is… urrk. Sure, it looks nice, but this may well have been the most difficult Real Grade head I’ve ever assembled. Those little yellow vent pieces fell out at least half a dozen times before I got them in place, and while you’re trying to prevent that from happening, you’re pressing down on a GN power line piece with one finger, trying to tuck it into the armor part that goes on top of it. And also, these weird little ear pieces have an absolutely massive nub mark on them. Which is actually kind of a running theme for this kit. It’s really well engineered and super solid, especially for an RG, but man, does it have some big, fat nub marks in really conspicuous places.
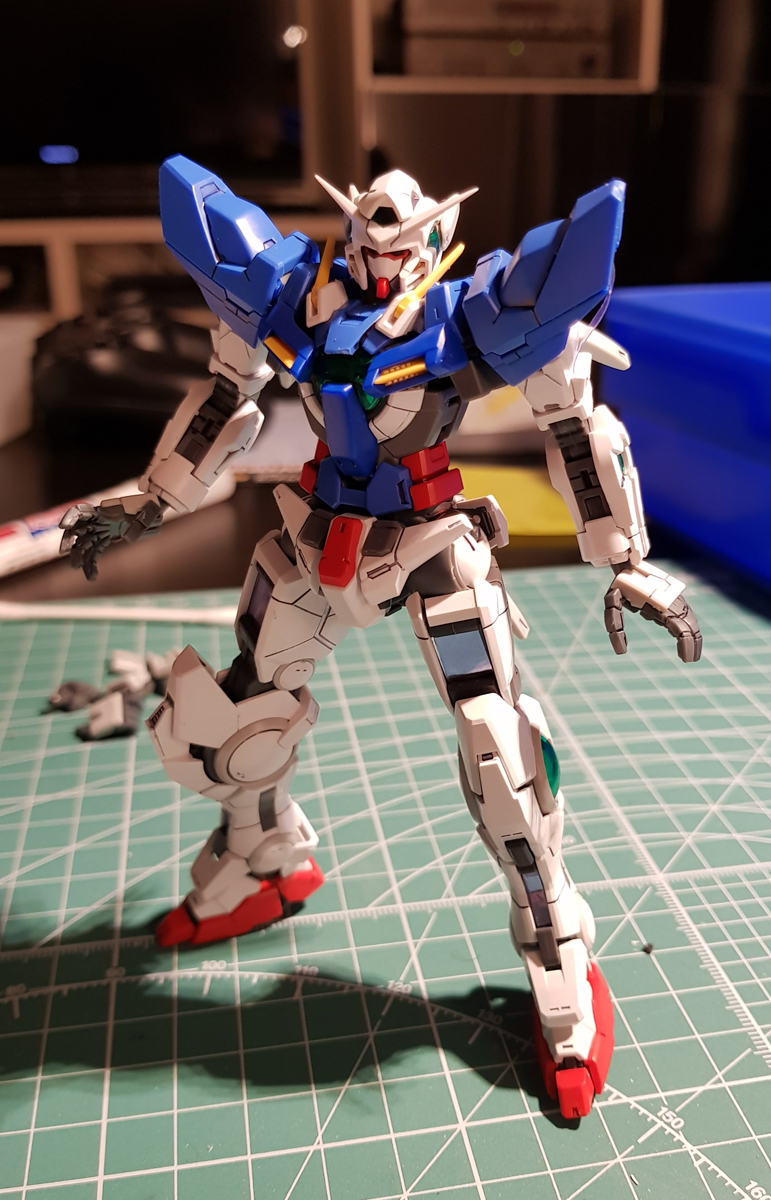
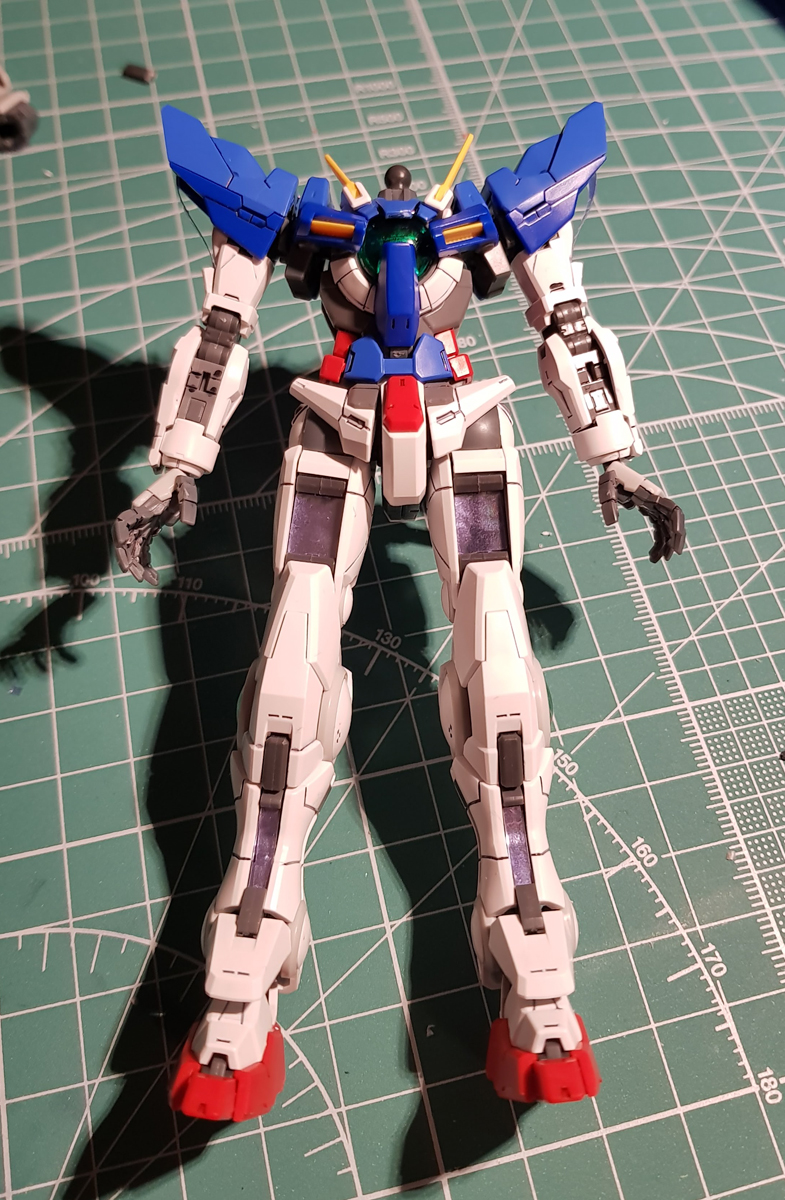
Anyway, head goes on, suit looks like zis, ja. I tried to do a pose with the open hands, but as you can see, it didn’t work out too well. I trust I’ve said enough times that I’ll always prefer fixed-pose hands like these, and I usually really like open “emote” hands for posing, but the way these bend at the wrist really make them useless, plus, like I said further up, they’re way too big for the kit.
And that’s it for this one, folks. I’ll have to post a second blog for at least the accessories and some pose shots, obviously, because the GN Sword’s kind of a big deal.
In the meantime, do I recommend this kit? If you like the Exia, yeah, absolutely. It’s designed with a lot of attention to detail, it poses well, and it’s one of the RGs that don’t explode when you touch them.
